Oct 31, 2017

Happy Halloween Treats


Hey, Donna Phelan  back again, this time with some sweet treats!  No tricks!
Let's get right to some spooky good fun!


I made these super cute Treat Tags.  To create the bases I used the Tutti Designs Nesting Stitched Tags.  I then decorated each one a bit differently for variety and added some fun ribbons!


Impression Obsession Birds I cut them in Black to mimic Ravens.


I disguised my pumpkins lol


I stamped a few sentiments and decorated with some fun Halloween Designer Papers.  Created a 'pocket' with a strip of Designer Paper to tuck my candy into.  So easy!  

Then I just added my sweet treats to put a smile on the recipient's face. 
These are for my Mom and her Peeps, they're going to love them!


Here's what I used:


Thanks so much for popping in for a treat!

Enjoy~~


Come join in all of the fun at the Dies R Us Challenge Blog.  There's a new challenge theme offered on the 1st and 15th of each month and one lucky randomly drawn winner will receive a gift voucher prize to the Dies R Us Store.  For your convenience, all the important Dies R Us links are provided below.
click below for:

Oct 30, 2017

Hey There Cupcake!

Hi Friends, it's Sandy Diller with you today sharing a pop up cupcake card.  This card features Karen Burniston's line of Pop-Up Dies that are fun, easy and gives you that extra surprise on the inside.


I kept the front rather clean and simple because, as I said, the fun is on the inside.


This festive card was such fun to put together - so let's get started.

This is an A2 card, 4.25" X 5.5".


Begin by cutting a panel for the cupcakes that measures 4" X  9".  Score in the center (at 4.5").  Place the die on the fold lining the nibs up on the fold.  Run through your machine.  Fold on all crease lines that are made by the die.
You can see a video from Karen on how to cut and assemble a card using this die set by


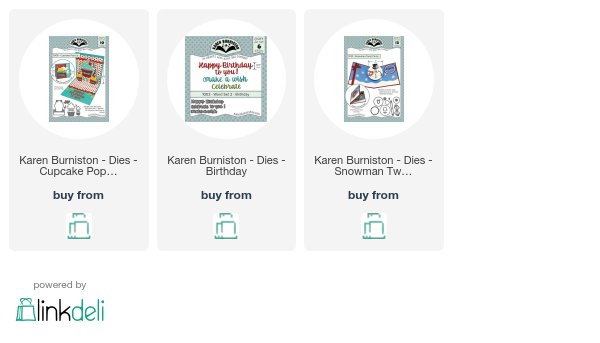
Cut the base of card that measures 5.5" X 11" and score in the center.  Cut 2 large cupcake cups, shown in dotted paper.  Two small cups, l large cupcake frosting, 2 small cupcake frostings, and 2 flourishes (not shown) from the Cupcake Pop-Up Die Set.  Cut the words "Celebrate" and "Happy Birthday" from the Word Set 2 Die Set.  Cut 1 circle (shown in white) and 1 larger circle (shown in blue) using the Snowman Twist Circle Die Set.  Cut 2 lengths of ribbon for the front of card.


Put the front of the card together first because the ribbon raps around the edges and then the ends are covered by the inside panel.  For this card I stamped the cupcakes from the "Just A Note" stamp set, designed by Karen Burniston for Elizabeth Craft Designs, all around the white panel, then colored them and  added the word Celebrate across the center.  The white panel was added to the blue and placed on the ribbon.


Place the cupcake panel on the inside of the card.  If you haven't done this before the best way is to fold the panel in half and add adhesive to half the panel avoiding the open spaces.  Place in card lining up the fold lines.  Put panel in place and then add adhesive to the second half and close the cover.  You will see exactly how it is done in the video HERE

For the large cupcake cup, pleat one panel and place on top of first one that has one panel removed, add frosting piece then add to card.  Put small cupcakes together and add to card.   Add all other decorations.

As a finishing touch - I added the cherries that come in the die set, cut from red and then colored the stems green.  If you have Nuvo Drops - they make a great addition to the cherries adding depth and shine. If not, use sequins or glitter dots.


I added more Nuvo Drops all around to make the card feel festive but you could use any embellishments such as sequins, enamel dots or glitter to do this.

Have a great day,
Sandy

Don't forget to come join in the fun at the Dies R Us Challenge Blog.  There's a new challenge theme offered on the 1st and 15th of each month and one lucky randomly drawn winner will receive a gift voucher prize to the Dies R Us Store.  For your convenience, all the important Dies R Us links are provided below.
click below for:

Oct 29, 2017

Autumn Wreath


Vickie Y sharing the colors of autumn with you today.

For my card, I first used Fire Brick Distress Ink to create a watercolor wash on Bristol Multi-Media cardstock.  After drying the wash I used a Brick embossing folder to create the texture for the background of my wreath card. 

(A list of dies used can be found below.)  I die cut the wreath from a woodgrain designer paper but omitted die cutting the sentiment, yet left the bird intact to give the leaves some stability as shown on the backside of the wreath below.

The wreath was attached to the brick using strips of dimensional tape and then embellished using leaves and a flower (see finished card for placement).  To complete the card front I created a double gingham bow embellished with a pearl.  I used Prima Sparkle Acrylic paint to give the leaves and flower some shine.  The completed brick panel was adhered to a deep purple card base.

Dies used from the DRU Online Store:


Penny Black Pop Out Rose (used only the leaves from this die set)

Don't forget to come join in the fun at the Dies R Us Challenge Blog.  There's a new challenge theme offered on the 1st and 15th of each month and one lucky randomly drawn winner will receive a gift voucher prize to the Dies R Us Store.  For your convenience, all the important Dies R Us links are provided below.
click below for:

Oct 28, 2017

Friends card with lots of die cuts


Dies R Us has an amazing mix of dies plus many other products. I am starting by sharing lots of die cuts from their collection. On this specific card I went for lots of paper and accent colours but love the white die cut pieces with the black die cut sentiment.

Supply List:
Paper & Chipboard: The Rubber Buggy BFS Wanderlust Collection
Twine: Whisker Graphics
Other: cardstock, brads, ink, bling


When starting a card I pull papers, cut dies and prep the accent pieces. 


I am going to share my twine tied bow. I hate single strand bows. I start with double piece of twine.


Then starting at the centre I tie a standard bow using double twine.


Do not make your loops too big. It's for a smaller accent on this card.  When you decide how big you want the bow and how wide you want the loops pull tight. When they are not perfect and still a bit too big.... with a finger on the centre part of the knot pressing down firmly.... grab one end and pull until the loop is the size you want. Repeat on other side.


Now that they are smaller and closer to the same size I pull loops evenly to tighten one more time so they don't move.


I now cut of the excess ends and it's ready to glue to my card.


Here are some close ups for better viewing and details. I used foam pop ups to add height and depth to the centre chipboard and added the bow on top.


Here is the the die cuts... they are perfect for this card.


Bottom corner I added 3 black brads to coordinate with the sentiment colour.


Any friend would love this card to say hello.


Don't forget to come join in the fun at the Dies R Us Challenge Blog.  There's a new challenge theme offered on the 1st and 15th of each month and one lucky randomly drawn winner will receive a gift voucher prize to the Dies R Us Store.  For your convenience, all the important Dies R Us links are provided below.
click below for:
FRIENDS OF DIES R US PINTEREST PAGE

Thanks for stopping my. So glad to see you.

Oct 27, 2017

Wishing You

Hello to you all Doreen here

I have some more shabby chic to share, I think this is my favorite style of card.
I have distressed the edges of the designer papers .

I first cut the  the Zoe die out of white card along with the Prim poppy and 
Butterflies, I then cut the centre out using some of the designer paper'


I used foam pads to adhere the Prim poppy to give some dimension

Gems were added to the butterflies


Don't forget to come join in the fun at the Dies R Us Challenge Blog.  There's a new challenge theme offered on the 1st and 15th of each month and one lucky randomly drawn winner will receive a gift voucher prize to the Dies R Us Store.  For your convenience, all the important Dies R Us links are provided below.
Click below for:

Dies used