Feb 28, 2019

St. Patricks Day Fun Folds with Lawn Fawn


Hi Everyone, Kristina here with a fun fold / flip card for St. Patricks Day next month. I used an older discontinued flip card die, but you can get a similar effect with something like this from frantic stamper. 

I decorated my card base with some Doodlebug paper and Lawn Fawn stamps and dies. Here's the inside. 


Here's how it all came together

I die cut my main card panel from the die using glitter cardstock, and used the coordinating side panel dies to cut out the accent pieces from patterned paper. For the flip center, I used the Lawn Fawn Scallop Circle die to make a front and back piece for the flip circle. 

To decorate my circle, I stamped, colored, and cut out several images from the Lawn Fawn Lucky Charm and Party Animal stamp sets. 


I used foam squares to make a staggered wreath of four leaf clovers, and added my party animal to the middle.


To finish the card I used some stamps from the set to stamp and heat emboss my inside sentiment. 


Supplies


Lawn Fawn Outside In Stitched Scallop Circles
Shop at:
Dies R Us
Lawn Fawn My Lucky Charm
Shop at:
Dies R Us
Lawn Fawn Party Animals
Shop at:
Dies R Us


Don't forget to come join in the fun at the Dies R Us Challenge Blog. There's a new challenge theme offered on the 1st and 15th of each month and one lucky randomly drawn winner will receive a gift voucher prize to the Dies R Us Store. For your convenience, all the important Dies R Us links are provided below.


click below for:


Feb 27, 2019

Floral Hello

Happy Wednesday everyone!  Kristina H. here with today's project share.  I've got an any occasion card for you.  Check out this beauty!


I find that when you have a gorgeous die to work with it is really easy to make a gorgeous card.  Not to mention it takes minimal effort.  Now that's my kind of die!

I started by grabbing a piece of dark gray cardstock.  I then taped the Pinkfresh Studios Hello With a Bouquet die down and ran it through my die cut machine.  Next I carefully poked out all of the pieces I didn't need.   This is another die where I recommend you use your metal/detail shim in your die cut machine.

Once I had all of the pieces poked out, I taped the die cut piece onto an A2 sized piece of watercolor cardstock.  I taped it in several places so that it wouldn't wiggle around.  I got out two different colors of Zig Clean Color Real Brush markers and my waterbrush.  I went through flower by flower and leaf by leaf.  I added a little of the dark gray marker to the bottom of the flower sections and spread out the color with the waterbrush.  I keep a paper towel close by to scribble off my waterbrush if I feel like it still has too much color.  I repeated this for all of the flowers.  Then I used the light gray marker on all of the leaves using the same technique with the markers.


Here is what it looked like after I got all of the sections colored and removed the die cut piece.


Doesn't that look cool?

Next I cut about a 1/16th of an inch off a top and bottom of the watercolor panel.  I added some Stick-it adhesive to another piece of dark gray cardstock and ran it through my die cut machine.  If I had done that with my first piece I could have used it but I didn't think of it at the time.  This die cut is pretty fine and would be difficult to add liquid glue to the back of.  Not impossible but not exactly fun, at least for me.  I peeled off the backing paper and carefully lined it up with the watercolored cardstock.


I thought it looked pretty striking just like this but I wasn't done yet.  I decided I wanted to use silver glitter paper for all of the letters.  I cut a piece of glitter paper just large enough to cover the letter section of the die and ran it through the die cut machine.  When I laid the glitter paper close to the colored piece I realized the silver was just too bright in comparison.  Thankfully this is a pretty easy fix.  I got out a T3 and T5 Copic marker.  I went over all of the letters with the chisel end of the T3 marker.  This toned down the brightness of the silver.  I think I went over it two times.  Then I added a bit of T5 to the very bottom and blended it up just a bit with the T3 until I was happy with the blend.


I popped the letters out and glued them into place on the watercolor panel.  Now we are pretty close to finishing up this card!

I used a corner rounder punch on all four corners of the watercolor panel.  Then I glued it down to an A2 sized card base of the same dark gray cardstock I used for the die cut.  It leaves a tiny little space on the top and bottom of the card.  This helps to tie the base together with the die cut piece.  For the final touches I glued a few confetti sequins down around the card.  That's it!


I know I say this all the time but I'm so pleased with how it turned out!  

Supplies used are listed below.  Please note, the image is not for the Pinkfresh Studios die that it I used, Hello with a Bouquet.  It is currently out of stock and the link has been temporarily removed from the site.  When you click on the link it will take you to all of the Pinkfresh Studios dies.  Dies R Us has tons of other gorgeous dies you could use in its place to be sure!

Stick It Adhesive sheets
Shop at:
Dies R Us
Pinkfresh Studios
Pinkfresh Studios
Shop at:
Dies R Us

Check out all of our fabulous links below!


See you soon!
~Kristina

Feb 26, 2019

Mosiac Style Cards


Hi .. How are you today. This DT project for Dies R Us showcases Birthday cards made using some die cuts along with Scraperfect Best Glue Ever with the non clog writing tip. For these projects I am using the die looks like mosaics and you can use them plain or add the coloured inset pieces.. your option.
Supply List:
Ink: Tim Holtz Vintage Photo
Machine/ tools: stamping platform
Other: Cardstock, stamp


After cutting the mosaic frame cut again putting some coloured paper into the section you want tosave the pieces from.


Theses 2 are done like stain glass with some amazing coloured pieces inset into the frame.


These 2 are more muted using just print paper to cut the image and mount on the background.


All the stamping is done using a stamping platform.


Don't forget to come join in the fun at the Dies R Us Challenge Blog.  There's a new challenge theme offered on the 1st and 15th of each month and one lucky randomly drawn winner will receive a gift voucher prize to the Dies R Us Store.  For your convenience, all the important Dies R Us links are provided below.
click below for:

Thanks for visiting... hope to see you again soon, Have a great day.


Feb 25, 2019

Same die, Different Occasions :-)

Hello crafting friends and welcome back.  Lena here today to share a few cards using the same die but for different occasions.  I love background dies, they're so versatile and so easy to use.  Let's take a look ... (scroll down for the other cards)


I made this card thinking of Mother's Day, but it can be used for a Birthday, a Thank You, or even a Sympathy card.  The background die I'm using is the Floral Oval by Jeanine's Art's Vintage Flowers collection.  I added a layered tulip image to the centre, a few gems and it was done. Didn't take me more than 15 minutes to put together this side folding 5.25" x 5.25" card.


I have a special person in mind for this card. She's a very tropical and fun loving person, so this bright and cheerful card is going to make it's way to her to wish her a very Happy Birthday :-) The flamingo image is from a Tropical Birds cutting sheet by Marianne Designs.  Again I added some gems and another card done in under 15 minutes :-) This is a top folding, 5.25" x 5.25" card.


Like I mentioned above, background dies are great for any occasion at any time of the year.  This time I used this Floral Oval die to make a Christmas card. I also cut out a few poinsettias from the Holy Frame die set by Spellbinders. A few gems and voila, another top folding, 5.25" x 5.25" card done :-)


For my last card, I added a rose from Build a Rose die set by Marianne Designs, a few gems and a little stitching.  I love this rose die because you can shade it in any colour you want and it always looks pretty.  For this card I used the Memento London Fog ink for the rose and the Memento Cottage Ivy for the leaves. 


It is better to do any sponging and shading while the die cut is still in the die. It gives your shading a sharper look. For smaller details such as the veins on the leaves, I normally a small makeup applicator to get the ink into the little spaces.

I know that I've mentioned this before, but for anyone who is visiting us for the first time, every now and then Dies R Us runs a big sale on international dies. During these times, you will find dies from companies such as Marianne Designs, Lea'bilities, and Joy Crafts among others. The best way to know about these fabulous sales is to subscribe to the Dies R Us Newsletter.  When you go to the store's home page,  scroll down to the bottom.  There you will find a box where you can enter your email address and be put on their mailing list.

In case you want to try your hand at stitching the triangles, I've included a little diagram with instructions that should help you :-)

                              ~~~~~~~~~~~~~~~~~~~~~~~~~~~~~~~~~~~~~
                               ~~~~~~~~~~~~~~~~~~~~~~~~~~~~~~~~~~~~~


Well, crafting friends, that is it from me for today. I hope you enjoyed your visit and that I was able to inspire you to use your dies, create a project, and come play along with us at the Dies R Us Challenge Blog for your chance to win a gift voucher to the Dies R Us Store.  A new challenge begins on the 1st and 15th of every month.  Be sure to follow us on Facebook too.


Till next time,
Crafty hugs,


Feb 24, 2019

You Are Enough Card

Hello Crafty Friends - Annie here with a masculine encouragement card.

I don't know about you but, I see a lot of encouragement card in 
social media designed for the women in our lives. 
However, not as many for the men in our lives.

Today, that's exactly what I would like to share with you.


Let's get started.

First, Turn on your laminator - so that it can get nice and hot. Next, on a card front panel (cut 4-1/4"X5-1/2") of Bristol Smooth cardstock, I sponged some Distress Oxide inks making sure to blend well were the colors met.  

Next, using a star stencil I applied some Therm O Web iCraft Deco Foil Transfer Gel 
to the card front panel with a craft knife.

It will be milky white when applied but, will dry clear - in about 30 minutes to an hour 
depending on how thick it's applied. That's when it's ready to be foiled.


While the Deco Foil Gel is drying -
I die cut the word YOU from a
 Foilable Pre-designed Sheet from Creative Visions Stamp 
- foiled with Blade Heat Transfer Foil. 
Then, stamp your secondary sentiment onto white cardstock and trim into a thin strip.

Now, that the transfer gel is dry - 
place some heat transfer foil onto the stars and
 send it through the laminator. 
 I did a tone on tone look but, you can use foil colors you prefer.

I also went a bit messy with my gel on purpose - because the person I am making this card for likes the sketch/distress look on things. You can make sure you apply your stencil nice and clean.

Next, I trimmed about 1/4" off top and side of the card front and matted onto a white card base. 

Then, I adhered the die cut YOU and sub-sentiment to the card using low profile foam adhesive. Next, I added a few dimensional silver stars and my card is complete. 

I hope you create a Masculine encouragement card for that special male in your life. 


Supplies Used:

Dies:
Elizabeth Craft Designs - Dies - Blackboard Alphabet

Inks:
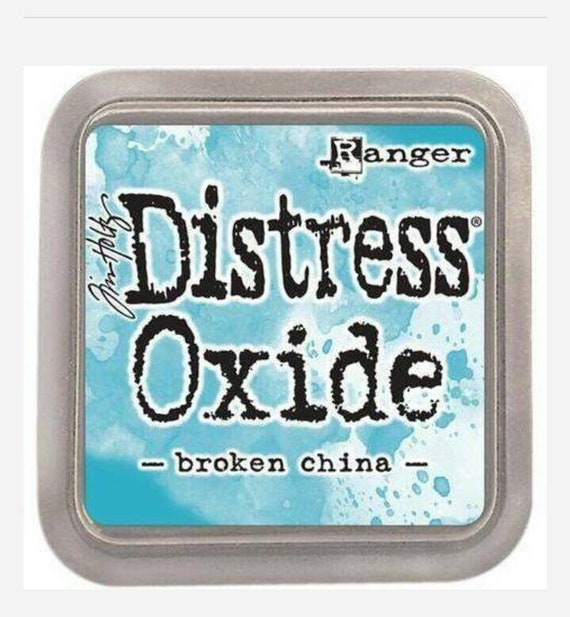
Distress Oxides Inks
Distress Oxide Ink Pad - Hickory Smoke
Distress Oxide Ink Pad - Faded Jeans
Memento Dye Ink Pad - Paris Dusk

Other Materials:
Thermo O Web iCraft Deco Foil Transfer Gel
Creative Vision Stamps - Heat Transfer Foil (Hello Sailor, Blade & Seaside Cabana)
Creative Vision Stamps - Foilable - FPPGE023 (Dots)
Strathmore Bristol Smooth Cardstock
Recollections Brand Heavy Weight Cardstock - White
My Favorite Things Stamps - All About You (sub-sentiment)
Ms. Sparkle & Co. Tiny Silver Stars Embellishments

Tools:
Swingline Brand Laminator
Star Stencil
Plastic Craft Knife
Acrylic Block

Thank you for stopping by the blog today!

Don't forget to come join in the fun at the Dies R Us Challenge Blog
There's a new challenge theme offered on the 1st and 15th of each month 
and one lucky randomly drawn winner will receive a gift voucher prize 
to the Dies R Us Store
For your convenience, all the important Dies R Us links are provided below.


click below for:
FACEBOOK