Oct 31, 2018

Not too spooky

Happy Halloween!  Kristina H. here today to share a not so spooky halloween card.


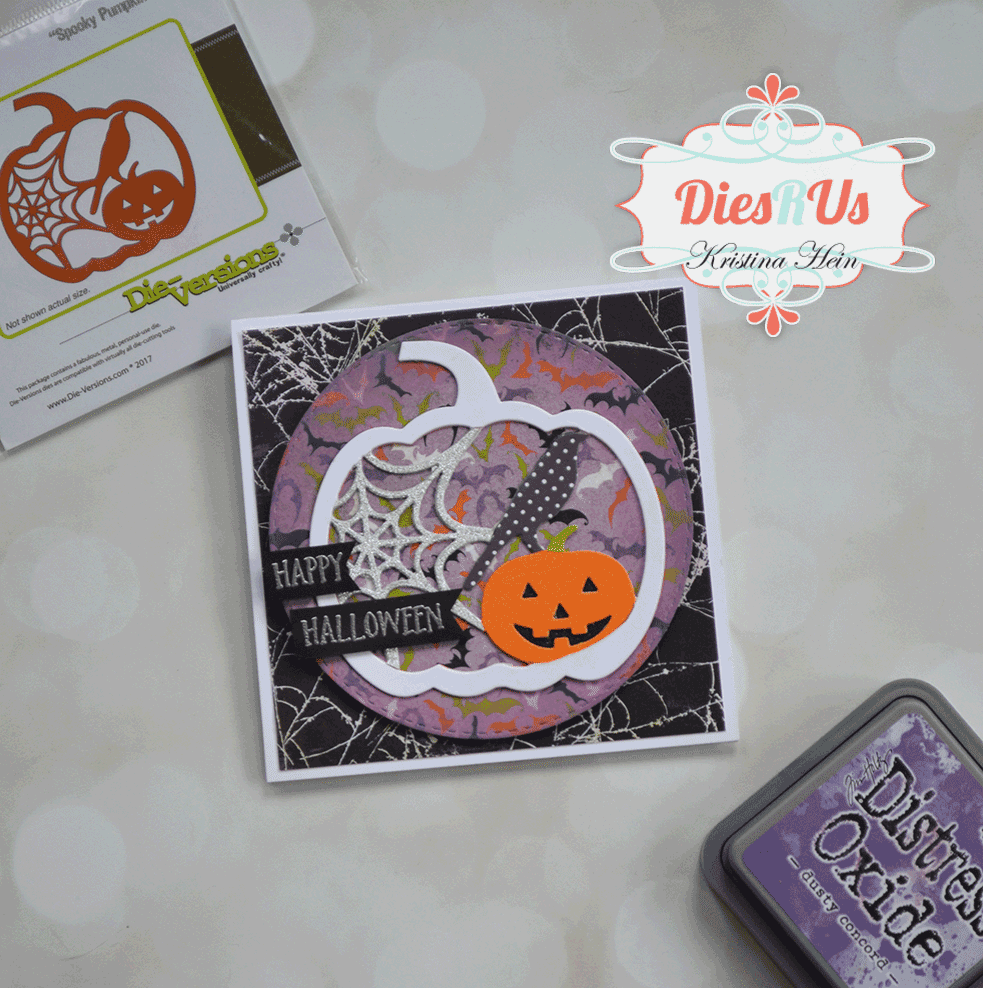
This card looks like a lot of work but it really is pretty easy to recreate.  The main die I used for this card is Spooky Pumpkin by Die-Versions.  

I first cut the die with an orange piece of cardstock.  I then strategically placed the different pieces of cardstock on the die and ran it through my die cut machine.  I did it with the polka dot paper (Lawn Fawn), the silver glitter paper, orange patterned paper (Doodlebug) and the green paper (Doodlebug).  I then used a fine tip pair of scissors and a craft knife to cut out the pieces that I needed.  

I used the Zig 2-way Glue Pen and adhered all of the layers onto my base piece cut from the orange cardstock.  I had a scrap piece of black cardstock that I added a little shimmer to it and put it behind the pumpkin.  I needed this to look like one cohesive unit so I went back and cut another whole piece out of white cardstock.  I carefully trimmed out everything on the inside so I just had the pumpkin outline and glued it in place.

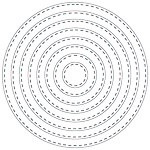
While the pumpkin die was drying, I turned my attention to the cardbase.  I started with a 4 3/4" x 4 3/4" white cardbase.  I found a couple different halloween papers in my stash.  The black cobweb piece is cut to 4 1/2" x 4 1/2".  The purple bat piece was first cut out using the largest die from Tutti Designs Stitched Nesting Circles set.  I highly recommend this set because you will use it a lot!  I'm currently trying to collect several of the other stitched die sets by Tutti Designs.  There are TONS in the store.  Check them out HERE.

Next I sponged Dusty Concord Distress Oxide ink all around the edges of the circle.  I backed it with foam tape and adhered it to the black paper.  Then I added the pumpkin die cut.  Again I used the Zig 2-Way glue (love this stuff!)  

As my final touch I used a sentiment from Lawn Fawn Pick of the Patch.  I prepped the black paper with anti-static powder, stamped it with Versamark ink and applied silver embossing powder.  I heated it up until the powder melted.  I trimmed the pieces down and hand cut the banner edge on the right side.  These were then adhered on top of the pumpkin with foam tape.  Ta da!!


Supplies used:


I sure hope you enjoyed today's project!  Be sure to check out all of our links below.  See you soon!

~Kristina H


Come join in all of the fun at the Dies R Us Challenge Blog.  There's a new challenge theme offered on the 1st and 15th of each month and one lucky randomly drawn winner will receive a gift voucher prize to theDies R Us Store.  For your convenience, all the important Dies R Us links are provided below.


click below for:


Oct 30, 2018

Musical Best Wishes Card


Hi .. How are you today. This DT project for Dies R Us showcases a Best Wishes card made using some die cuts along with Scraperfect Best Glue Ever with the non clog writing tip. I went for lots of layers to add some colour and depth along with some white square corner brads.
The stitching in the circle adds texture and the silver glitter best wishes adds the bling to this card.

Supply List:
Ink: Tim Holtz Vintage Photo
Machine/ tools: Big Shot Express,
Other: Cardstock, print paper, brads

 The close ups give a better view of the details.

This card if perfect for so many of those cards that are slightly masculine ... which can be changed up with different colours... your choice. 


Don't forget to come join in the fun at the Dies R Us Challenge Blog.  There's a new challenge theme offered on the 1st and 15th of each month and one lucky randomly drawn winner will receive a gift voucher prize to the Dies R Us Store.  For your convenience, all the important Dies R Us links are provided below.
click below for:

Thanks for visiting... hope to see you again soon, Have a great day.

Oct 29, 2018

O' Christmas Tree, O' Christmas Tree ...

Hello DRU friends. Lena here today to share a few different Christmas cards using the same
  Elegant Christmas Tree die by Elizabeth Craft Designs.


The set comes with 4 dies. The outline/solid die, the inlay die, a medium star and a small star.


So for my first card, I used the outline die first. I marked the middle of the front of my card and placed the  die in such a way that only half cut. Remember, when using an embossing machine, only what is between your plates will cut or emboss and nothing will happen to what is left outside of the plates.


 Next I placed the inlay die only, on the card and again sent it through the machine.  Now you have the Christmas tree as the edge of the front of your card.For the green background, I cut out another solid piece out of glitter green card stock and adhered it to the back.


  Lastly, I added the stars (I like the effect of the little star in the center of the medium star, it adds a little dimension) and the gems and voila, card was done.


So this was the first card. It measures 5.5" x 5.5". I wish I could get a really good photo but between the green glitter and the gold mirror card stocks, I had way to much reflection coming towards the camera.  I guess I need one of those fancy lenses or maybe what I really need is photography lessons :-)


For this next card, I did the same as above, but instead of cutting a green solid backing die, I used a piece of green card stock and adhered to back of the front of the card.  Oh boy, does that make sense? I think you all know what I mean though, right? To finish it off, I adhered the stars and the gems.


On my 3rd card, I went with a simpler method. I cut the solid frame in green card stock. I cut the Christmas tree out of white, using both the outline and the inlay dies together. After cutting the front of the card in half,  I adhered the green and white pieces together and adhered them to the front of the card. Again, I added the stars and the gems to finish off the card.


And on this 4th card, I went even easier. All I did was cut the inlay part of the die set in the center of the card and used a piece of green card stock for the background. I also ran out of gems so I used sequins instead.


 Because these cards were so easy to make, I decided to make 25 of these in various colour schemes. These will be added to the other cards that I'm making to contribute to the Caring Hearts card drive.

I hope I have inspired you to use your dies in various different ways to get the most out of them. Sometimes, it all depends on how much time you have.

Thank you for stopping by today and sharing a little piece of your day with me.  I hope you will create a project, and come play along at the Dies R Us Challenge Blog for your chance to win a gift voucher to the Dies R Us Store.  A new challenge begins on the first and fifteenth of every month.  Be sure to Follow Us on Facebook too. 


Till next time,
Crafty hugs,

Oct 28, 2018

Thankful Wreath Card

Hello Friends - Annie here sharing a Fall card - perfect to let that special someone know that you are Thankful to have them in your life.


Let's get started with the tutorial.

First, gather your supplies. Next, on Bristol Smooth or White card stock apply some Distress Oxide ink. I just did a few circle making sure to blend into each other. Then, Do a few spritz of water to oxide the ink.


Next, I added a few droplets of Heidi Swapp Colorshine in Gold, Bronze and Tea. Then, I set it aside to dry.


Next, I die cut my circle shape this will help me with my wreath. I also die cut the word Thankful 4 times - 3 times from medium orange and 1 time from gold foil paper.
 

Now, the cardstock with the oxide ink is dry. I die cut the leaves from it I cut several of each leaf. I rather have extras that not enough. 


Now, that I have all the components ready - it's time to assemble the card. I start by trimming a bit off my circle. Then, I stack my word by gluing between the layers


Now, I start adhering the leaves to the circle to create the wreath.

  
Once the wreath is finished I flip it over and add foam adhesive to it. I like to use the thin strips from the foam squares

I do the same thing to the Thankful word.

Now, to place onto the front panel and card base. I used a scalloped tan card stock I had left over from another project for my front panel. I will link a scallop die set below.  I adhere the scallop front panel onto the brown card stock card base. Next, I place the wreath onto the card. Then, centering the word in the center of the wreath I place it onto the card.
  

Now, for some finishing touches. I used some sequins in three places on the wreath.

  
The card is complete. You may have noticed I lowered my wreath a bit on the card. I felt it looked better that way.

Supplies Used: Dies
Impression Obsession - Dies - Leaves

Lawn Fawn - So Thankful Border Dies

Lawn Fawn - Large Cross Stitched Circle Stackables Dies

Lawn Fawn - Stitched Scalloped Rectangle Frames Dies

Inks: Distressed Oxide 

Distress Oxide Ink Pad - Aged Mahogany
Distress Oxide Ink Pad - Forest Moss
Distress Oxide Ink Pad - Gathered Twigs

Distress Ink Pad - Spiced Marmalade
For more inspiration, please stop by the Dies R Us Challenge Blog.  There's a new challenge theme offered on the 1st and 15th of each month and one lucky randomly drawn winner will receive a gift voucher prize to the Dies R Us StoreFor your convenience, all the important Dies R Us links are provided below.
Come check these out! Click below for:


Thank you so much so stopping by today!