Jul 31, 2019

Fungi Birthday


Hello Dies R Us Friends!!  Lori here today with a fun fungi birthday card!!


For this A2 card I started with Neenah Desert Storm paper for the base of this card.  I took the Green textured paper and inked the edges with Green ink and added that to the base of the card.  I took some solid Green paper and the Lawn Fawn Grassy Hillside die and cut out the grass and added that to the card.  I took some White paper and the Tutti Designs Small Mushrooms dies and the ScrapMan Mushrooms Dies and cut out the mushrooms.  I colored them with Copic markers and then tucked them in behind the grass.  I took some dark Green paper and the Penny Black Bamboo Foliage die and cut out the branch and tucked that behind the grass and mushrooms.  Lastly I took some black ink and stamped the Lawn Fawn Fungi sentiment onto the card.

Lawn Fawn Grassy Hillside die:


ScrapMan Mushrooms Dies:


Don't forget to come join in the fun at the Dies R Us Challenge Blog.  There's a new challenge theme offered on the 1st and 15th of each month and one lucky randomly drawn winner will receive a gift voucher prize to the Dies R Us Store.  For your convenience, all the important Dies R Us links are provided below.
click below for:
FRIENDS OF DIES R US PINTEREST PAGE

Thanks for stopping by.


Jul 30, 2019

Hummingbird Note Card

Tracy here today with a cute little note card.  I love to watch the hummingbirds in my backyard and when I saw this die by Memory Box, I knew I had to have it!
 

I started working on the hummingbird first with a piece of white cardstock and several different colors of  Distress Oxides. I just sponged the inks across the cardstock and then die cut the hummingbird out.


Once I cut the hummingbird out I colored over it with a clear Wink of Stella pen to give it some sparkle and shine. It gave it the iridescence that I've seen on some real hummingbirds.
 These photos don't do it justice.

Then I die cut all my other pieces.


I used a white card base and layered some pink cardstock on it and added the white floral background die cut on top. I popped up the pink stitched oval die cut to give the card some depth and added the hummingbird on top. I also added some flower shaped sequins around the stitched oval.


Supplies

Memory Box - Dies - Marvelous Hummingbird

Impression Obsession - Dies - Floral Background

Tutti Designs - Dies - Nesting Stitched Ovals

Zig - Wink Of Stella - Clear


Don't forget to come join in the fun at the Dies R Us Challenge Blog. There's a new challenge theme offered on the 1st and 15th of each month and one lucky randomly drawn winner will receive a gift voucher prize to the Dies R Us Store


For your convenience, all the important Dies R Us links are provided below.
                       FRIENDS OF DIES R US PINTEREST PAGE 

Thanks for stopping by!


Jul 29, 2019

Friends

Hi! Doni here today with a sweet card for your BFF.

I got the idea for this card from the Meow You Doin' stamp set from Lawn Fawn.
The sentiment on the bottom says Let's Be Friends Furever, however the letters are all the same size
and I wanted to use the friends die cut which is way larger. 
so this is what I did:
I used the "s" from the sympathy die. Cut both dies out of the same color , 
cut off the letter and add it to the word and the problem is solved!
Here's what I used to make this card:

Poppystamps - Dies - Friend Folksy Script 
Lawn Fawn - Meow You Doin' Stamps 

Lawn Fawn - Meow You Doin' Dies

Lawn Fawn - Stitched Scalloped Rectangle Frames Dies 

Don't forget to come join in the fun at the Dies R Us Challenge Blog. There's a new challenge theme offered on the 1st and 15th of each month and one lucky randomly drawn winner will receive a gift voucher prize to the Dies R Us Store. For your convenience, all the important Dies R Us links are provided below.

click below for:
                                      FRIENDS OF DIES R US PINTEREST PAGE
 

                                                                    'till next time,
                                                                            Doni


Jul 28, 2019

Summer, Watermelon, and Ants!

Hello, fellow crafters!  This is Julie with you today.  I hope you are enjoying the summer!

Lawn Fawn is one of my favorite stamp companies.  They have such cute stamps and matching dies.  The one I used on today's card proves how fun they can be!


The Dies R Us Store has a great selection of Lawn Fawn products.  This uses the Happy Summer stamp set and matching Happy Summer die cuts.

Here's a photo of all the supplies I used, including 6x6 papers.

I stamped the watermelon, and colored it with Copic markers.  I stamped the ants with black ink and then used the matching die cuts to cut all the pieces out.

I wanted the sentiment to run across the red gingham paper.  I could have done this by masking the "Happy Summer" stamp, but I decided to cut it apart instead.  It was easier to line it up that way, and easily cut into two words.

Here are the products I used with links to the Dies R Us Store:


That's it!  The picnic is over.  I'll leave you with one last look at the card...

I hope you visit this blog often to see the great inspiration from the Dies R Us Inspiration team.  They are a talented group of ladies!  Then, create a project of your own and enter it in the Dies R Us Challenges.  I'd love to see your creations. 

click below for:

Jul 27, 2019

A Golden Birthday!

Hello everyone, Shanta here! 
I'm back on the blog today to share a 5 x 7 size card with you using dies carried at Dies R Us.
For details on how I created my card please check out my You Tube video which will be listed below the photo.
Hope you all have an amazing day!

Here is my project below:


Here Is My Video:


Supplies Used:


Until Next Time...

Don't forget to come join in the fun at the Dies R Us Challenge Blog. There's a new challenge theme offered on the 1st and 15th of each month and one lucky randomly drawn winner will receive a gift voucher prize to the Dies R Us Store. For your convenience, all the important Dies R Us links are provided below.

Jul 26, 2019

Pinwheel Hello

Hi everyone!! Dawn here with you today and I have a Pinwheel Hello card to share with you.


 Here’s how I created my card:
Creating the card base – 

1. Cut a piece of white cardstock that is 6 inches by 12 inches. Score along the 12 inch side at 6 inches and fold.
Cut a piece of teal cardstock that is 5 3/4 inches square. Adhere to the folded white card.
Cut a piece of designer paper that is 5 1/2 inches square, adhere to the teal card as per photo above

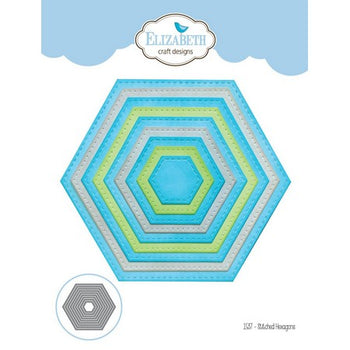
2. Using the largest die from the Stitched Hexagons die set and die cut from teal cardstock.
Using the next size down from the Stitched Hexagons die set and die cut from white cardstock.
Cut out sentiment using the Hello die set from Birch Press designs.
Layer the white hexagon onto the teal hexagon using foam tape.  Adhere the sentiment to the white hexagon. 
Attach to the card front using foam tape


3. Using the PInwheel die from the PInwheel die set, cut the following:
(3) Pinwheels from the checked designer paper.
(3) PInwheels from the Pink/Green designer paper
Assemble the pinwheels using a pink brad through the holes on each top point of the pinwheel and the center hole.
Attach the PInk/Green pinwheels to the bottom of the checked pinwheels using some foam tape.
Attach the pinwheels to the left side of the hexagon using some foam tape on the front of the card.


Below are the supplies that I used to make the card:

                    Elizabeth Craft Designs - Dies - Pinwheel

Elizabeth Craft Designs - Dies - Pinwheel


             Elizabeth Craft Designs - Dies - Stitched Hexagons

Elizabeth Craft Designs - Dies - Stitched Hexagons


Don't forget to come join in the fun at the Dies R Us Challenge Blog. There's a new challenge theme offered on the 1st and 15th of each month and one lucky randomly drawn winner will receive a gift voucher prize to the Dies R Us Store. For your convenience, all the important Dies R Us links are provided below.
https://blogger.googleusercontent.com/img/b/R29vZ2xl/AVvXsEjygNLxcuoMF0QGkWjeKFQy4lZE9xPm4QkjkK4ZIy3_i6CUH4dbIlD2GtvtJDSNeEyKsnkATkFOo0ED3Uqr_dYSKeke1onYgxnGYC_PyWMxI9FSEcJGEYbPSTfYFWjlWZZWcd5jnDd6RmiC/s1600/-logo+collage.jpg


Thanks for stopping by and have a great day!


Jul 25, 2019

Sending you Get Well Wishes

Welcome Back Dies R Us Friends!

Darlene here today sharing a card created for an Amish girl who loves horses.

Have you been over to the Dies R Us Store lately?  OMG there are so many
wonderful companies represented in one location that you
will certainly find a few things you can't live without!  I know I do every time I visit!  LOL


The DRU product I've used are:

 Impression Obsession - Dies - Country Fences


(I cut off the horn to create my 'horse')
 
 Frantic Stamper - Dies - Large Unicorn

Also from one of the DRU International 'Special Order' Sales

Joy! Craft 'Grass' #6002/0137
See the source image


Uni-Ball Pen Signo Gel - White UM-153

 To create my scene, I first die cut the two panels I would need for the background ... once in light blue and again in green.  Next I cut out my country fence and laid it across my green 'grassy' panel and marked a pencil line 'under' the railing and fussy cut to create my grassy paddock area for the horse.


Next I laid these pieces together and began gluing my background.


 My horse (unicorn) was die cut three times and glued together for dimension.
I've used my white Signo pen to create the accents on the hooves, tail & mane.


A grassy panel was die cut from the Joy! Craft grass die and added to the front ... again this added extra dimension. 
I've used various stamps in my stash to create the birds and sentiment.  To catch a peek at the inside of my card please pop over to my personal blog.

Don't forget to come join in the fun at the Dies R Us Challenge Blog. There's a new challenge theme offered on the 1st and 15th of each month and one lucky randomly drawn winner will receive a gift voucher prize to the Dies R Us Store

For your convenience, all the important Dies R Us links are provided below.

click below for:

Thanks for stopping by!
Until next time ...

Jul 24, 2019

Hollyhocks

Hello Dies R Us Fans!!  Lori here today with a summery card to share with you today!


For this A2 I started Neenah Solar White paper for the base of the card.  I took a piece of Blue Marble paper, inked the edges with Salty Ocean distress ink and added that to the base of the card.  I took some White paper and the Impression Obsession Arch & Trellis die and cut out the Arch and Trellis and added them to the card.  I took some more White paper and the Impression Obsession Hollyhocks die and cut that out and then colored it with Copic markers and added that to the card.  I took some Green paper and the Poppystamps Weeping Willow branch and cut out the branch and added that to the card.  I took the Impression Obsession Cat Set of dies and some White paper and cut out the cats and then colored them with Copic markers and added 2 to the card.  I took some Yellow paper and the Lawn Fawn Spring Shower dies and cut out the sun, trimmed it down so only part of the sun is on the card and then added it to the card.  I took some Gold stickles and filled in the center of the hollyhocks.


Don't forget to come join in the fun at the Dies R Us Challenge Blog.  There's a new challenge theme offered on the 1st and 15th of each month and one lucky randomly drawn winner will receive a gift voucher prize to the Dies R Us Store.  For your convenience, all the important Dies R Us links are provided below.
click below for:
FRIENDS OF DIES R US PINTEREST PAGE

Thanks for stopping by.