Jul 31, 2016

Butterflies And Change

Happy Sunday!
Donna Phelan  back again to share a quick little card with you today!

My card uses the beautiful Butterfly Exhibit die set from Memory BoxThis particular die set was out of stock at the time of writing.....however you could easily use a number of butterfly die sets to create this look, here are 2 of my favorites;

Memory Box
Colette Butterfly Branch


Memory Box
Hovering Butterfly Frame


I am certain either of those would make stunning cards!


I die cut my butterflies from Toner Paper and then ran it through my Mini Minc Machine to add this gorgeous Hot Pink Foil.  It really picks up all of the delicate and intricate designs.  Adhered them on to a panel of white card stock with Swiss Dots Embossing texture.  Little circle dots stamped in Frost White ink. 


Sentiment stamped on to a strip of Vellum using Marcasite Embossing Powder, a perfect match to my die cuts.  And those handy dandy little foiled butterflies are great for hiding the adhesive. 


Don't forget to join in all of the fun at the Dies R Us Challenge Blog. There's a new challenge theme offered on the 1st & 15th of each month, with a gift voucher prize to one lucky winner.

And in case you were wondering, why YES we do have a  FB Page and PINTEREST Page.  Come check us out!


Jul 30, 2016

Thank you.

Hello everyone. Olivia here to showcase a way to use a number of dies for a lovely Thank you card.


For this card, I used the Die-Versions Butterfly Kisses die as the focal point. For the circles, I used the Die-Versions Whispers Stitched Circle Cards. The sentiment is from Elizabeth Craft Designs.


Don't forget to play along at the Dies R Us Challenge Blog for your chance to win a gift voucher to the Dies R Us Store.  A new challenge begins on the first and fifteenth of every month.  Be sure to Follow Us on Facebook too.


click below for:
STORE
CHALLENGE BLOG
FACEBOOK
INSPIRATION BLOG


Jul 29, 2016

Thinking of You

Morning Peeps, 
Berni here with another creation for the Dies R Us Inspiration blog!  The Dies R Us on-line store carries a huge assortment of amazing dies by several manufacturers.
Project Instructions:
I use one layer cut out the Tutti Tree of Life die, gave it some color on the trunk, birds, and leaves. Created a park scene with the couple sitting on the bench, both dies from Impression Obsessions. Added some cut grass at the bottom and bling on the flowers. Added some clouds on a beautiful day. Finish off with Elizabeth Craft sentiment. So sweet, just sitting and enjoying each other company.

Kindly take a jog and check out all of the fabulous dies available at the Dies R Us Store; and do not forget to come join in the fun at the Dies R Us Challenge Blog! A new challenge is offered on the 1st and 15th of each month with a Gift Certificate to one winner each challenge. That winner could by You!

Thank you for stopping by. See ya real soon, Berni

Also, if you are new to Pinterest, kindly know you do not need to sign up or have a Pinterest account in order to enjoy all the lovely Pin-inspiration you will find.
Follow Dies R Us

click below for:
STORE
CHALLENGE BLOG
FACEBOOK
INSPIRATION BLOG

>

Jul 27, 2016

Happy Birthday

Hello, Janice here with you again to share my latest card 


I started with a 7" x 5" card base. 
I then embossed a piece of white card measuring 7" x 4.25" with a Creative 
Expressions Textures Embossing folder called Lace.
I matt and layered the embossed card onto a piece of purple card and glued it to the base card.

Next I cut the Memory Box Happy Birthday Extravaganza in purple card and glued it 
to a piece of plain white card measuring 6.5" x 2.25"
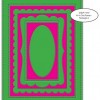
I then cut two strips of purple card with the Lawn Fawn - Stitched Scalloped Borders, 
and glued them to each edge of the white card. 

 I glued a smaller piece of scrap chipboard onto the back of the white card, and then glued this directly onto the embossed panel to give it some support and dimension.
Finally I added some small punched flowers and diamanté gems to decorate.

Here are the dies I have used:-


Thanks so much for stopping by. Do make sure to check back daily for more 
great inspiration from the girls on the design team.

Why not check out all the fabulous dies available at the Dies R Us store AND, 
don't forget we have a Dies R Us Challenge Blog too!

A new challenge is offered on the 1st and 15th of each month with a PRIZE VOUCHER 
offered to the lucky winner of each challenge.

click below for:
STORE
CHALLENGE BLOG

INSPIRATION BLOG
FACEBOOK
PINTEREST
See you again soon!
Janice

Jul 26, 2016

More Under The Sea Fun!

Good morning friends, Birgit here with you today and I've got more cards for you from Under The Sea.


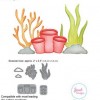
I started by cutting some Elizabeth Craft Designs Seaweed  out of colored card stock and sprayed each piece of seaweed with similar colored shimmery mists by Heidi Swapp.  That gave the seaweed a nice shimmery shine!


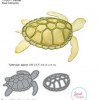
For this card, I cut the Elizabeth Craft Designs Turtle out of two shades of green and added some color around the body of the turtle using distress ink.


For the background of this card, I rubbed in some distress inks in greens and blues on the top portion and masked off the bottom section which I distressed using tattered straw and a darker brown.  I  spritzed the background with water to remove some color and then spritzed on more Heidi Swapp shimmer spray.  Once it was dry I adhered the turtle, layered the seaweed and added some iridescent sequins to look like water bubbles.  I left this card without a sentiment and sent it to a very dear friend of mine.  


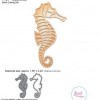
On these next two cards I used some old printed scrapbook paper for the backgrounds and used the Elizabeth Craft Designs Seahorse and seaweed for a quick and easy card.


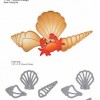
I added some saffron colored Silk Microfine Glitter from Elizabeth Craft Designs to the outline part of this seahorse die.   It's really pretty in real life, the way it shimmers and shines.  The large seashell is from Elizabeth Craft Designs Large Shells.

Here's a list of supplies I used from Dies R Us:


Follow Dies R Us!
    click below for:
    STORE
    CHALLENGE BLOG
    FACEBOOK
    INSPIRATION BLOG

    Thanks so much for stopping by!  Blessings~ Birgit

    Jul 25, 2016

    Dogwood Blossoms

    Good Monday Morning!
     
     
    Donna Phelan here again with another card to share with you!


    To create this card I first die cut my beautiful Dogwood Blossom Corner by Poppy Stamps.  Twice. 
     
     
    I cut 2 complete sets in white card stock and then a bunch of blossoms in light pink.

     
    I then colored the vines and flowers using Copic Markers.

     
    Then I simply layered the light pink blossoms over the colored ones.  I off set them a bit to add a bit of dimension to the flowers. 
     
     
    Here I die cut my Birds by Impression Obsession also in white card stock.

     
    This way I could color them how I wanted with Copic Markers.
     
     
    Using Spellbinders Fanciful Lattice and Perfectly Pierced Frames I created my background layer and sentiment label.  Sentiment stamped in Black Licorice ink.  Nuvo Crystal Drops in Dandelion Yellow for accents.  Swiss Dots Embossing Folder for texture.


    Don't forget to join in all of the fun at the Dies R Us Challenge Blog. There's a new challenge theme offered on the 1st & 15th of each month, with a gift voucher prize to one lucky winner.

    And in case you were wondering, why YES we do have a  FB Page and PINTEREST Page.  Come check us out!