Aug 31, 2016

'All in Pink' Birthday

Hello, Janice here with you to share my latest card 
made for the Dies R Us Inspirational Blog.


I started with a square scalloped card base measuring 6"x 6"
I then cut a piece of pink Crafter's Companion pearlised card slightly smaller.

Next I positioned the Memory Box - Grand Happy Birthday die and the
Memory Box - Piestra Tile die on the card using low tack tape and ran it through
my die cutting machine. Carefully removing both dies from the card,
 I used a pokey tool to pop out the waste.

Using my Scor-Buddy, I embossed a line below the Happy Birthday and one
above the Piestra tile. Measuring the middle of the embossed area,

I positioned a piece of white ribbon, and scored two lines on each side.
I glued a panel of silver mirri card to both the Piestra tile and the bottom
half of the sentiment.

Next I glued the pink card straight onto the card base.
To finish, I added the bow, and two pink diamantés.


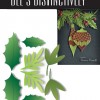
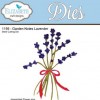
Here are the two Memory Box dies I used on my card:-
Thanks so much for stopping by. Check back daily for more great inspiration 
from the girls on the design team.

Why not check out all the fabulous dies available at the Dies R Us store AND, 
don't forget we have a Dies R Us Challenge Blog too!

A new challenge is offered on the 1st and 15th of each month with a PRIZE VOUCHER 
offered to the lucky winner of each challenge.

click below for:
STORE
CHALLENGE BLOG

INSPIRATION BLOG
FACEBOOK
PINTEREST
See you again soon!
Janice

Aug 30, 2016

Down In The Meadow

Good morning friends~  Birgit here with you today and I've got a sweet baby gift to share with you.

I made this little framed deer scene to give to a new mom as part of her baby gift.

I started by cutting lots of different types of greens and flowers using some fabulous dies from Dies R Us.  I'll list everything I used at the end of this post just to make it easier, since I cut way more than I needed or used for this project.

I then added color using Tim Holtz Distress Inks and assembled the flower pieces.  The Marianne Designs Deer were a special order from Dies R Us.  I highly recommend adding your name to their e-mail list so you'll get the first in on special orders and lots and lots of magnificent sales!

I built the base of the scene to fit into a 5"x7" frame, using stitched landscape dies.  You can see where I had to add length to the scene to fit it into the frame but that line isn't going to show once I add all the other pieces.   The fern dies are from Spellbinder and are no longer available but there are a lot of other fern dies available at Dies R Us.

I played around with different layouts until I found the one that made me happiest and then started adhering the layers on.  

I built up the layers and added depth by using foam squares and glue dots that I rolled between my fingers for smaller pieces, like the cattails.

I added some sparkly Stickles to some of the flowers and butterflies for added detail.

I stamped the sentiment from Sweet N' Sassy Stamps "Vintage Baby" onto the space left in the sky.  Some cut grass fills the rest of the front.

 Here's a list of products I used that can be found at Dies R Us:


Be sure to stop by the Dies R Us Inspiration Blog daily for fresh new ideas and inspiration!

Join in on the challenges at the Dies R Us Challenge Blog and you could be their next winner! 
click below for:
STORE
CHALLENGE BLOG
FACEBOOK
INSPIRATION BLOG
Thanks so much for stopping by!  Blessings~ Birgit

Aug 29, 2016

You're So Tweet!

Good Monday Morning!
 
Donna Phelan here again with another card to share with you!
 
 
You know I love a pretty tag.....and I just adore a pretty tag ON a card!
 
I used the Die-Namics, Stitched Traditional Tags, layered in Brown and Pale Blue card stock as my base.  Then I created my little garden scene complete with birdhouses, fence and feathered friends.  I die cut my Picket Fence by Amy Design in White card stock.....because every house, bird or otherwise, needs a little white picket fence!


Using the sweetest little Bird House set from Paper Smooches I die cut card stock in several different colors.  I  also added some texture to one using a Swiss Dots Embossing Folder.  Laying out each piece, I adhered them and topped with my fence.  Of course, it needed something more.  Enter the handy dandy Foliage 2 dies also by Paper Smooches.  I must say that these particular dies are VERY versatile!  I have used them in flower bouquets, as grasses, like here, I have even made a wreath using only them.....lots of them!  They really are one of my 'go to' dies....a MUST have in any craft room! 


Another little Die-Namics Stitched Traditional Tag, sentiment stamped in Real Red ink, topped with 2 Adhesive Pearls.
 
Accents include, Eyelet, Button, Twine and a Natural Fiber Ribbon in Green.  The large tag is popped up using 3 Dimensionals.
 
This could be used for a New Home, Thank You or All Occasion card.  I think the recipient would enjoy this piece of Happy Mail!

Here's what I used:


Enjoy~~
 
 
Don't forget to join in all of the fun at the Dies R Us Challenge Blog. There's a new challenge theme offered on the 1st & 15th of each month, with a gift voucher prize to one lucky winner.
And in case you were wondering, why YES we do have a  FB Page and PINTEREST Page.  Come check us out!


Aug 28, 2016

Happy Birthday Card

Deanna here back with another inspiration post for you.  Today is my step-dad's birthday so this is the card I made for him.


For my card, I started with a piece of Kraft card stock cut and folded to make a 4 1/4" X 5 1/2" portrait style card.

Next I took some Tim Holtz Distress Water Color card stock and using Tumbled Glass and Mermaid Lagoon created my sky.  I used Twisted Citron and Mowed Lawn for my grassy area.  After inking it I lightly spritzed the water color card stock with a distress sprayer and using a paper towel blotted the paper.  This helps create a distress look to the sky and grass. (See the little white areas on the card stock? That is a result of the spritzing and blotting it off).

I used two different dies for my project.  The first one is from Impression Obsession Cattail die for the cattails and dragon flies.  Next I used the grass from the Yvonne Creations toad stool set.I die cut my images from regular colored card stock.  Everything but the grass is adhered down directly to the card using some liquid adhesive.  The grass is adhered with some foam tape and the Happy Birthday was stamped using some Memento Tuxedo Black ink.

I hope you will join in on the fun over at the Dies R Us Challenge blog.  Be sure to pop over to the Dies R Us store to do some shopping while you are here. And don't forget to like us on our Facebook page.  You don't want to miss out on anything that is happening at Dies R Us.


Yvonne Creations - Toadstool
Follow Dies R Us!
click below for:
STORE
CHALLENGE BLOG
FACEBOOK
INSPIRATION BLOG

Aug 27, 2016

CAS Style Card


Welcome back everyone. It is Olivia here and just wanted to share a more CAS style card I made for an adult friend of mine for her birthday. It is still very girly but easy enough to mail out.

I started out with a plain cardstock paper on beige and use my distress inkers and sponge it on. I used the Die-Namites Butterfly Frame Die. I took the sentiment that came in the Die-Versions Hot Air Birthday Balloon and then used the Happy Birthday die as the sentiment in the middle.  I finished it off with using some flowers I had in my stash.


Be sure to stop by and check out the many fabulous dies available at the Dies R Us store AND, 
don't forget we have a Dies R Us Challenge Blog too!


A new challenge is offered on the 1st and 15th of each month with a PRIZE VOUCHER 
offered to the lucky winner of each challenge.


Aug 26, 2016

Happy Halloween

Morning Peeps, 
Berni here with another creation for the Dies R Us Inspiration blog!  The Dies R Us on-line store carries a huge assortment of amazing dies by several manufacturers. The camera diid not do justice on this card. So much better in person. 
Project Instructions:
I creates a black mat with a little orange peeping from the top. I created the background using watercolors, my goal was to make it little haunted on the hill. Graveyard silhouette is from Impression Obsessions, added some bats and sentiment from Frantic Stamper Inc. To finish it off, a moonlit night using a spellbinder circle die.

Kindly take a jog and check out all of the fabulous dies available at the Dies R Us Store; and do not forget to come join in the fun at the Dies R Us Challenge Blog! A new challenge is offered on the 1st and 15th of each month with a Gift Certificate to one winner each challenge. That winner could by You!

Thank you for stopping by. See ya real soon, Berni

Also, if you are new to Pinterest, kindly know you do not need to sign up or have a Pinterest account in order to enjoy all the lovely Pin-inspiration you will find.
Follow Dies R Us

click below for:
STORE
CHALLENGE BLOG
FACEBOOK
INSPIRATION BLOG


Aug 25, 2016

Candy bar labels

Hello, friends! Natalya here with a Candy bar labels for Dies R Us Inspirational BlogSuch cute items from favorite cartoons perfectly complement the children's birthday! 

Here are the dies I have used:
Spellbinders Grand Nestabilities - Grand Scalloped Circles:
Spellbinders - Nestabilities - Card Creator - A2 Curved Borders One:

And this is how my projects looks at the feast:
 
And these labels for a "Finding Nemo"  birthday.


Hugs, Natalya!
Follow Dies R Us!
click below for:


Aug 24, 2016

A Birthday Stepper Card

Hello, Janice here again with you to share my latest
card made for the Dies R Us Inspirational Blog


I started by cutting my card base from an A4 piece of white linen card, 
using the Spellbinders Card Creator Step Card die - Gift of Happiness.
This is a great die to use and comes with various little dies to use for decoration.

I then carefully folded the card on all the score lines to create the steps.
Next using the rectangular die which is included in the set, I cut and embossed a piece of 
lilac card and glued it to the front of the card. 

Using the Impression Obsession - Umbrella die, I cut two from purple card 
and glued them one on top of each other to give some extra depth.
 I added some punched flowers, punched butterflies, and pearls to the centre of the flowers.


Next, I cut three small rectangular pieces of lilac card and glued them to the 
front of each step.
I decorated the back step with the heart and the wrapped gift dies 
which come as part of the die set, glueing them halfway across the back, 
so they are raised up on the step.

I then stamped the sentiment on the middle step. Lastly to decorate the lower step, 
I cut two Memory Box - Peppini Laurel in white card, and coloured them with
 my Promarkers. I then glued them together and attached to the card.
Lastly, I added sequins, diamantés and a purple gem to finish the decoration.

These are the dies I have used:-

Thanks so much for stopping by. Check back daily for more great inspiration 
from the girls on the design team.

Why not check out all the fabulous dies available at the Dies R Us store AND, 
don't forget we have a Dies R Us Challenge Blog too!

A new challenge is offered on the 1st and 15th of each month with a PRIZE VOUCHER 
offered to the lucky winner of each challenge.

click below for:
STORE
CHALLENGE BLOG

INSPIRATION BLOG
FACEBOOK
PINTEREST
See you again soon!
Janice