Nov 30, 2018

Wildflower Birthday Card

Hey Paper Crafters!
Lisa back again today to share a pretty wildflower birthday card with you. I used the Fancy Pants Life Is Beautiful 6x6 paper pad for this card:


I added a few layers of patterned paper and machine stitched them together. I used more patterned papers from the 6x6 paper pad to cut the wildflowers (Frantic Stamper Wildflower Die) and the sentiment (Happy Birthday).


These are the items from the store I used for my card:
I used The Best Glue Ever and No Clog Writing Cap to put my card together:

Don't forget to come join in the fun at the Dies R Us Challenge Blog. There's a new challenge theme offered on the 1st and 15th of each month and one lucky randomly drawn winner will receive a gift voucher prize to the Dies R Us Store. For your convenience, all the important Dies R Us links are provided below.
click below for:

Thanks for stopping by and sharing your day with us!

Nov 29, 2018

Tim Holtz Holiday Dies Christmas Card


Hi Everyone, Kristina here pounding out my holiday cards in hopes to actually get them out on time. 
The main dies you see here are from the Tim Holtz Mini Christmas Things dies


They come all together in a pack of piece-able thin-lits. I used a few different methods for cutting and putting these together. The first is to cut them out of the different assorted colors of cardstock.
I cut them all out of white and red cardstock. 


Next, I starting piecing them together, and where I didn't have the color of card stock I wanted for a piece, or just didn't want to die cut again, I used markers to color the white card stock pieces instead of cutting them out of colored card stock. 


The red hat comes from color cardstock, where-as instead of cutting out another skin toned piece, I just colored santa's face instead. 

Off camera I did a few of the dies in a green cardstock as well, the rest of the colors you see are either marker or gel pen accents. 

To put it all together, I wanted to put together a quilt of sorts, so I started by embossing my front card panel with an older quilted embossing folder. 
Next I cut out some scallop squares out of different Christmas colors and mounted my die cuts onto them with some strong liquid adhesive. 
Lastly I stamped my sentiment in white embossing powder onto black cardstock, and of course, added shimmer pen to all of the white parts of the card. 

Thanks for stopping by today!

Supplies


Sizzix Tim Holtz Mini Christmas
Shop at:
Dies R Us
Lawn Fawn Winter Scripty Sentiments
Shop at:
Dies R Us
Tutti Designs Scallop Squares
Shop at:
Dies R Us

Don't forget to come join in the fun at the Dies R Us Challenge Blog. There's a new challenge theme offered on the 1st and 15th of each month and one lucky randomly drawn winner will receive a gift voucher prize to the Dies R Us Store. For your convenience, all the important Dies R Us links are provided below.


click below for:

Nov 28, 2018

No Prob-llama

Howdy my crafty peeps!  Kristina H. here today with something totally *not* holiday related!  Don't get me wrong, I love all the great holiday cards but I needed a break.  Without further ado, I bring you Lorenzo the Llama!


Isn't he just absolutely the cutest???  I cut him out of X-Press It white paper and colored him up using Copic markers.  Who says die cuts have to be plain?  I used E41, 42, 43 and 44 to color the main portions of the body.  I added a little R00 on his cheeks and the inside of his ears.  For the muzzle area I used W1, 3 and 5.  For his hooves I used W7 and for his eyes I used a blue Prismacolor pencil.

To build the card I started by cutting out the purple patterned with a rectangle die from Lawn Fawn.  I glued it to a purple card base.  The llama paper I cut down to 4 1/4" wide and then ran it through my Big Kick with the Lawn Fawn Simple Stitched Hillside Borders.  I believe I used the middle sized hillside.  I glued this down to the purple patterned layer.  I decided where Lorenzo ought to be on the card and used a Copic marker to add a bit of shading underneath before gluing him in place.  The shading helps to ground him to the hillside.

I used a die from the Frantic Stamper Long Special Bubbles set to cut out the mustard patterned paper.  The sentiment is from the Frantic Stamper Llama sentiments set which was one of the special order items available on the website.  They frequently have special order dies and other items available.  Make sure to sign up for the newsletter to always be in the know!  I stamped it with black Versafine ink and sprinkled it with clear embossing powder.  I used my heat tool to melt the clear powder.  I added some foam tape to the back of the bubble and adhered it to the purple paper.

It might be hard to see in the photo but the purple paper has some gorgeous purple foil details.  I wanted to spruce the card up a little more and kind of fill some of the area that I felt was too open.  I dug through my stash of sequins and found a purple that matched and some smaller sparkling clear sequins.  I used a dot of liquid glue to adhere them randomly on the card.  And we have a finished card!


Here are the supplies I used today.


Frantic Stamper Lorenzo the Llama
Shop at:
Dies R Us
Frantic Stamper Long Speech Bubbles
Shop at:
Dies R Us
Lawn Fawn Simple Stitched Hillside Borders
Shop at:
Dies R Us
Lawn Fawn Rectangles
Shop at:
Dies R Us


Don't forget to come join in the fun at the Dies R Us Challenge Blog. There's a new challenge theme offered on the 1st and 15th of each month and one lucky randomly drawn winner will receive a gift voucher prize to the Dies R Us Store. For your convenience, all the important Dies R Us links are provided below.
click below for: STORE CHALLENGE BLOG FACEBOOK INSPIRATION BLOG FRIENDS OF DIES R US PINTEREST PAGE

Until next time!
~Kristina H

Nov 27, 2018

Celebrating a Wedding at Dies R Us


Hi .. How are you today. This DT project for Dies R Us showcases a Wedding page using lots of dies to accent the page along with Scraperfect Best Glue Ever with the non clog writing tip. Any inking is done with Tim Holtz vintage photo distress ink. This Wedding page is of our dear friend and I hope she loves the pages I am making to start her wedding album.

Supply List:
Machine/ tools: Vagabond
Other: Cardstock, butterflies,


On these 2 photos you will be able to see that I cut apart the buttfly die into sections to place in 2 different locations on the page.


Amazing title words... you can use more than one if they suit the theme.


Main photo section .. showcasing amazing wedding photos of family.


Don't forget to come join in the fun at the Dies R Us Challenge Blog.  There's a new challenge theme offered on the 1st and 15th of each month and one lucky randomly drawn winner will receive a gift voucher prize to the Dies R Us Store.  For your convenience, all the important Dies R Us links are provided below.
click below for:

Thanks for visiting... hope to see you again soon, Have a great day.

Nov 26, 2018

Christmas Birds

Hello crafting friends. Did you catch the wonderful special order sales Dies R Us had last week?
It's Lena here today, sharing two pretty Christmas cards with you, that use international dies.

In case you don't know, every so often, Dies R Us runs a big sale on international dies. During these times, you will find dies from companies such as Marianne Designs, Lea'bilities, and Joy Crafts among others. The best way to know about these fabulous sales is to subscribe to the Dies R Us Newsletter.  When you go to the store's home page,  scroll down to the bottom.  There you will find a box where you can enter your email address and be put on their mailing list.


When these sales come along, I tend to splurge a little and grab more than just a few dies :-) This first card that I'm sharing with you today is made with a die by Marianne Designs called Petra's Botanical Star.  Isn't it gorgeous? And the best thing ... it can be used all year round, not just for Christmas. It all depends on the image and embellishments you use :-) The Christmas bird images I'm using today are from a Christmas Bird Cutting/Decoupage sheet that my SIL sent me. They're so beautiful, I knew I had to use pretty dies to showcase them :-)


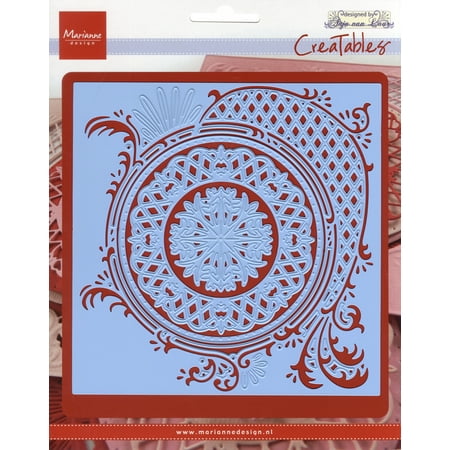
For the second card, I used a die also from Marianne Designs, this one is called Anja's Circle, and again, just like the first card, this die can be used for any occasion by changing the image and the embellishments.
Another great plus - they're so quick and easy to put together, yet it makes your cards look like you spent hours working on them.

I don't have a pictorial to share with you today, because it really is that simple. Just cut the dies out of which ever card stock you want and add an image, flower or sentiment of your choice to the centre. Then add a few embellishments and you're done :-)

Here is a quick recap of the dies I used for card # 1:


And these are the dies I used for card #2:

Image result for marianne designs anja's circle


Related image

I hope I was able to show you how versatile these dies are and to inspire you to make a project and come play along at the Dies R Us Challenge Blog for your chance to win a gift voucher to the Dies R Us Store.  A new challenge begins on the first and fifteenth of every month.  Be sure to Follow Us on Facebook too.
For your convenience, I have listed all the important information below, with links to the different sites.

That is it from me for today.  I'll be back next week to share another card, or two, with you.
Till then,
Crafty hugs,