Apr 30, 2016

You're so Pretty Card

Welcome back everyone to another inspiration post for DiesUs.  Olivia here and today I did to alter some of dies to create this adorable card.

I used the Die-Versions Sweet Frames-Pretty Die to surround this adorable image I colored up with my Copics.  I then cut out my Cheery Lynn Butterfly Out die but with this die, I actually cut off the end swirls and reglue them separately onto one end of the image. I then added the butterfly on the other edge of the image.


Please be sure to take a minute and check out all the fabulous dies available at the Dies R Us Store!  AND, don't forget we have a Dies R Us Challenge Blog too!  A fun new challenge is offered on the 1st and 15th of each month with a PRIZE VOUCHER offered to one lucky winner each challenge.  It could be YOU!

Olivia


Follow Dies R Us!

click below for:
STORE
CHALLENGE BLOG
FACEBOOK
INSPIRATION BLOG


Apr 29, 2016

All The Best

Morning Peeps, Berni here with another creation for the Dies R Us Inspiration blogThe Dies R Us on-line store carries a huge assortment of amazing dies by several manufacturers.Today I used a couple of dies, Sue Wilson Gemini Dies, Lyra and Elizabeth Craft designs Small Butterfly.


Project Instructions:
  • To create card base, cut  5" x 7" piece of cardstock in natural white
  • Cut design cardstock 6 3/4" x 4 3/4"  attached to card
  • Die cut Gemini Die - Lyra with design paper  
  • Die cut the small butterfly on design cardstock and paper, embellish with yellow rhinestones
  • Embossed background with green cardstock for texture
  • Sentiment is a sticker
  • Embellished flowers with glitter
  • Added flower over the Gemini Lyra die
Kindly take a jog and check out all of the fabulous dies available at the Dies R Us Store; and do not forget to come join in the fun at the Dies R Us Challenge Blog! A new challenge is offered on the 1st and 15th of each month with a Gift Certificate to one winner each challenge. That winner could by You!


Thank you for stopping by. See ya real soon, Berni

Also, if you are new to Pinterest, kindly know you do not need to sign up or have a Pinterest account in order to enjoy all the lovely Pin-inspiration you will find.


Follow Dies R Us

click below for:
STORE
CHALLENGE BLOG
FACEBOOK
INSPIRATION BLOG

Apr 27, 2016

Engagement Congratulations

Hello, Janice here again to share with you my next card for the Dies R Us Inspirational blog.
Friends of ours recently got engaged, and this is the card I made them.
I first of all embossed the base card with a heart embossing folder. 
Using jade green card, I cut the Spellbinders Lacy Square and 
the Memory Box  Sofia Heart. Using matching white base card,
I cut and embossed a square using one of the Spellbinders Nestabilities dies, to mat and layer nicely with the Lacy Square. I then attached the Sofia heart to the white square, and added a heart shaped diamanté to the centre. I attached this topper to the base card using 3D foam pads.
Next I used one of the X Cut Tags and Bookplates dies on white card, and adhered it to a piece of the jade card, cutting around the shape with scissors to give a narrow border for a mat. I attached it under the topper using DST, and then added a couple of diamantés to decorate.

The items I have used are:-
Spellbinders - Lacy Squares

Spellbinders - Nestabilites


Memory Box - Sofia Heart
X Cut - Tags and Bookplates

Click below for:-
Happy Crafting, and see you again soon!
Janice

Apr 26, 2016

Elegant Mother's Day Card

Good morning friends ~  Birgit here with a Mother's Day card, featuring some
 fabulous dies from Dies R Us.  This is a picture heavy post so lets get started.


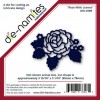
I started by cutting Die-Namites Rose With Leaves three times out of white card stock.  On one layer, I adhered some Scrapbook Adhesive to the back of the card stock before running it through my die cutting machine.  That way the adhesive was already on the back of the die for easy mounting. 


I mounted the die with the adhesive onto my white Spellbinders square panel.  This is one of their first die sets released so I'm not even sure it's available anymore but you can cut the square to the size that meets your needs for your project.  I also mounted in all the negative spaces of the flower from this die, so the whole image was on the card stock.   I then colored each negative space using Copics.  Don't worry if your coloring runs onto the white border, as that's going to be covered by the other layers that were previously cut.
The Copic colors I used were:  R12, R14, R17, G20, G21, G94, Y11 & Y13.

On the second layer of the die, I colored just the leaves using Copics and adhered it to the bottom layer, making sure it all lined up.


On the third and top layer of the die I simply fussy cut the leaves off the die cut leaving just the flower, which was then glued on the top, again being careful to line it up correctly.  This completed the flower portion of the card.


Next, I die cut a Spellbinders Scalloped Square (again, very old) out of light blue card stock and pierced inside the rim of the die through the card stock to give it some interest and detail.  The white flower panel is adhered to the scalloped panel and layered again with a Cheery Lynn Designs Nautical Wheeler Doily on the back.  Let me just take a moment to say that this die is very intricate and it cut perfectly without shimming in just one turn of my die cutting machine.  Incredible and perfect detail!

Next, I positioned the panel onto the card front, a regular A-2 sized card, and stamped the sentiment from My Creative Time's "Pretty Spring Wreath's" in red ink.
The gold metallic "MOM" die is from Cheery Lynn Designs Mom and this comes in a set of two, so it's a really good deal!  A few white sequins finish this card off!


Supplies Used that you can find at Dies R Us:


QUICK DESIGN TIP:  Before running intricate dies through your die cutting machine, add sheet adhesive to the back so when you cut it, it will be all ready to mount onto your project with adhesive on the back.  


Thanks so much for stopping by!  Blessings~ Birgit