So why did I call it faux floating frame? Well, you see, I had every intention of making this a floating frame card...but I didn't think it all the way through. I am using the Jumbo Beautiful Rose die from Frantic Stamper. You see, this die is a very delicate and fine line die. Pretty much impossible to put foam tape behind the pieces to give it the floating look. I improvised!
First step-since the die was so delicate, I wanted to actually color the paper first. I traced the outline of the die onto some Bristol cardstock several times.
Second step-I added distress inks with a blending brush. I used Dusty Concord and Bundled Sage.
Third step-I fitted the die back into the pencil outlines and cut them all out.
Fourth step-I laid all of the die pieces out onto a piece of A2 sized white cardstock. I used Press n Seal to hold everything in place. Then I cut off everything that was left hanging over the edge of the cardstock. This picture was taken with the Press n Seal still holding everything together.
This was about the time I realized I wasn't going to be able to do the regular floating frame technique. I peeled the Press n Seal and the die pieces away from the cardstock. I then went around the backs of all the dies with a liquid glue. I lined it back up and pressed back onto the cardstock. After I made sure it was dry, I took a stitched oval die from the Elizabeth Craft Designs Stitched Ovals set and cut it out of the center. This left me with two pieces.
Sixth(ish) step-I cut a piece of purple cardstock using the Elizabeth Craft Designs Stitched rectangles. I then splattered on some shimmer spray.
Seventh step-I added foam to the back of the oval piece and played around with some of the extra bits I had left from trimming the original piece down. Once I liked the layout, I glued the extra flower bits in place. I cut the Best Wishes die from Tutti Designs out of white cardstock. I then glued it in place.
Final steps-I glued the purple layer onto a white cardstock base. I then added the oval piece and some Silver Lining Nuvo drops and called it done!
The steps are pretty similar for the green card except that I used the frame piece instead of the oval piece. I also made it a side fold, landscape style card. I added gold splatters and Honey Gold Nuvo drops. The celebrate die is from Karen Burniston. I cut a white layer and a purple layer. I offset the white layer just a bit to give it a shadow.
I love how they turned out and I hope you like them as well!
Have you heard? We are looking for new design team members! Check out the details HERE.
And take a peek at all of our awesome links.
And last but not least, supplies used:
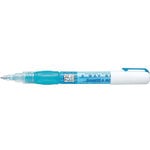
 Zig 2-Way Glue Pen - Squeeze and Roll Shop at: Dies R Us |
 Honey Gold - Nuvo drops Shop at: Dies R Us |
 Jumbo Beautiful Rose die - Frantic Stamper Shop at: Dies R Us |
 Celebrate - Karen Burniston Shop at: Dies R Us |
 Best Wishes - Tutti Designs Shop at: Dies R Us |
 Silver Lining - Nuvo drops Shop at: Dies R Us |
 Stitched Rectangles Elizabeth Craft Design Shop at: Dies R Us |
 Stitched Ovals - Elizabeth Craft Designs Shop at: Dies R Us |


Great cards and tutorial, Kristina. Thanks for sharing!
ReplyDelete