Isn't she a beauty? It only took two dies to create it! I used the Elizabeth Craft Designs Butterfly Aperture and Frantic Stamper Inc Elegant Happy Spring Easter dies.
The first step is to cut a piece of watercolor paper down to 4 1/2" X 5 3/4". You can certainly cut it larger but I wouldn't go any smaller. I wanted to make sure I had enough paper to cut out the butterfly. Next a I got out my supplies to create the watercolor panel. I used Kuretake Gansai Tambai watercolors in a yellow, medium blue, teal blue and deep purple. I started by going over the entire panel with my brush and a generous amount of clean water. Then I started applying color with the yellow paint. I rinsed it before moving to the medium blue, rinse, teal blue, rinse and then deep purple. I went ahead and dried it with my heat tool.
Here is what it looked like after the first layer of color.
Watercolors have a tendency to lighten up as they dry so I knew I would need at least a second coat of the paints. I repeated the same process and made sure to overlap the colors so they would blend together. Heat set it. Then I did it one more time until it was nice and vibrant! I also splattered on some white pearl paint from the same set to give it more interest and I dried it one more time.
Next I got out the butterfly dies. There is an outline die which cuts the entire butterfly shape and there is the aperture die which cuts out all of the butterfly inside pieces. I used the outline die to cut the watercolor panel.
Then I cut a piece of champagne colored mirror card stock to just a bit bigger than the butterfly aperture die. I used a bit of washi tape to hold it in place on the paper. I suggest you use your metal shim with this die. It has lots of pieces! After it was thoroughly cut, I poked out all of the inner pieces of the die. Now at this point I just had a rectangle piece of mirror cardstock with all of the butterfly bits poked out. I ran it back through my die cut machine with the outline die in order to get the complete butterfly shape. Voila!
For the next step, I simply used a liquid glue all over the back of the mirror cardstock butterfly and glued it to the butterfly shaped, watercolor panel. I did cut the butterfly body with a piece of black mirror cardstock and glued it in place as well.
Now I needed a card base. I wanted the entire card base to be shaped like a butterfly. I took a white, top fold, A2 sized card base and taped the butterfly outline die onto it. The trick is to let a little bit of the die hang over the top of the fold. This way you don't cut through the entire card base.
Run it through your die cut machine and now you have a butterfly shaped card!
The only thing left is to add a sentiment. This is where the lovely Elegant Happy Spring Easter dies come in to play. I took the word "spring" and die cut it three times out of plain white cardstock. Then I glued all of the layers together. Once they were dry I glued them onto the center of the butterfly. The very last step is to glue the entire panel onto the butterfly card base. That's it! It would be fun to create all kinds of background panels to put behind your butterfly die. Think of all the options!
Supplies listed below:
Zig 2-Way Glue Pen - Squeeze & Roll Shop at: Dies R Us |
 Neenah Solar White Shop at: SBC |
 Tombow Mono Multi Liquid glue Shop at: SBC |
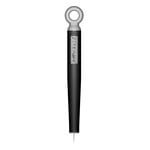 Tonic Studios-Retractable Craft Pick Shop at: SBC |
 Elizabeth Craft Designs Butterfly Aperture die Shop at: Dies R Us |
 Frantic Stamper Inc Elegant Happy Spring Easter Shop at: Dies R Us |
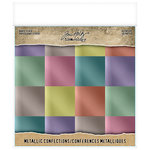 Tim Holtz Idea-ology 8x8 Metallic - Confections Shop at: SBC |
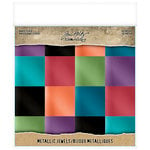 Tim Holtz Idea-ology 8x8 Metallic - Jewels Shop at: SBC |
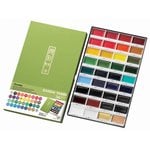 Kuretake Gansai Tambi Watercolors Shop at: SBC |
Come on over and check out all of our great links!
See you soon!
~Kristina H.


This is absolutely gorgeous! Love it!
ReplyDeleteWOW what a great idea and SO beautiful! Thanks for awesome inspiration!
ReplyDeleteSimply beautiful. Love the background colours and the gorgeous butterfly!
ReplyDeleteI purchased this die as soon as I saw this post and tutorial. I just love this!
ReplyDelete