I was SO excited when Dies R Us got these in stock and I knew I needed them in my life.
The colors in this card are inspired by one of my yard gnomes. I purchased a resin gnome a few years ago but the paint didn't fare very well. I cleaned it up and painted it in the colors I wanted. My gnome now proudly sports a bright yellow hat and a vibrant purple shirt. I know those aren't the traditional colors but they are what make me happy!
I started by die cutting the roof out of a purple gingham paper from Doodlebug. The house I cut out of Neenah Solar White cardstock. I colored the roof portion of the white cardstock with a BV000 Copic marker. Then I laid the the purple roof over top. I held it in place while I added more shading to the holes with BV01, BV00 and BV000. I went over the colors until I was happy with the blend.
I used liquid glue on the back of the purple paper and added it to the white cardstock. I then used the same Copic markers to add a bit of dimension to the roof.
I pulled out a few more dies from the Mushroom House die set to cut out a few more elements. I cut the roof pipe out of gray cardstock. I cut the door out of yellow linen paper as well as the same gray cardstock. I cut the lamp pole and lantern out of black metallic cardstock and the "light" portion of the lantern out of yellow cardstock. For the door I cut off the gray door and laid the whole piece over the yellow door. This way it has a nice frame. I also used Copic markers in Y18, Y15 and Y11 to add depth to the door. I held the door die cut in place so I would know where to add Y11 Copic marker to the white cardstock. I also used N3, N1 and N0 to add some shadows under the purple roof on the white cardstock. I glued all of these into place.
I moved on to create the grass for my scene. I cut a bright green cardstock with the grass hill die from the Mushroom Borders die set. Then I started adding shading and blades of grass with Copic markers. I used YG25, YG23 and YG21.
Next I needed a sky for my scene. I started by cutting out a piece of Neenah cardstock with a rectangle die from Lawn Fawn. I dug out one of my cloud stencils, an ink blending tool and Broken China distress ink. I added lots of different layers to achieve fluffy looking clouds.
Now that I had all my main pieces I just needed to color up some of the adorable gnomes from the Oh Gnome! stamp set. I stamped them with a Copic safe black ink to begin with and then started adding color. The blue is B16 and B14. The purples are the same ones I used on the house, BG01, BG00, BG000. The yellows are the same ones I used on the door, Y18, Y15 and Y11. Their skin was colored with E02 and E00 and the beard was N3 and N1. There is a coordinating die set but I don't own it yet so I fussy cut them out with scissors. I went around all of the edges with a black marker to create a finished look.
Now for the fun part, putting the whole scene together! I played around until I got everything where I thought it looked good, added glue to each piece and adhered them to the card base. There were a few more finishing touches. I added white highlights with a white Gelly Roll pen. I also cut out two of the itty bitty butterflies out of paper I colored with the blue Copic markers. One I glued flat to the card and the other I bent the wings up and just glued the center to the card base. I added a little bit of "flight" lines with a fine black marker. That way it looks like the butterfly just flew out of the gnome's hand! The very last item was to add a bit of Icicle Stickles to the doorknob and Wink of Stella to both gnome's hats. That's it!
Supplies used:
 Lawn Fawn Rectangles Shop at: Dies R Us |
 Neenah Solar White Shop at: SBC |
 Tombow Mono Multi Liquid glue Shop at: SBC |
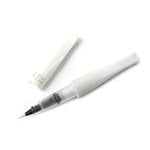 Wink of Stella - Glitter Clear Shop at: SBC |
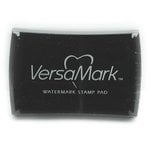 VersaMark Watermark ink pad Shop at: SBC |
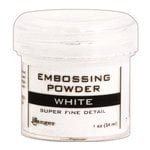 Ranger Super Fine White embossing powder Shop at: SBC |
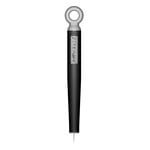 Tonic Studios-Retractable Craft Pick Shop at: SBC |
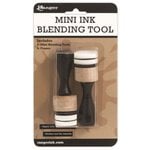 Mini Ink Blending Tool Shop at: SBC |
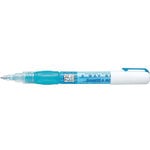 Zig 2-way glue pen Shop at: SBC |
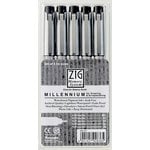 Kuretake ZIG Millennium pen set Shop at: SBC |
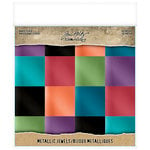 Tim Holtz Idea-ology 8x8 Metallic - Jewels Shop at: SBC |
 Lawn Fawn Mushroom House die Shop at: Dies R Us |
 Lawn Fawn Mushroom Border die Shop at: Dies R Us |
 Lawn Fawn Oh Gnome stamp set Shop at: Dies R Us |
 Doodlebug Gingham and Linen paper Shop at: SBC |
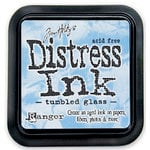 Distress Ink - Tumbled Glass Shop at: SBC |
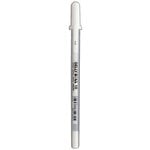 White Gelly Roll pen Shop at: SBC |
Come on over and check out all of our great links!
See you soon!
~Kristina H.


This is adorable! Great little scene you've created!
ReplyDeleteOMG what a cute scene! Love it!!
ReplyDeleteAdorable! I gotta get some of these little gnomies. Sigh ... another item to add to my wish list. It's about a mile long as it is!
ReplyDeleteI didn't know I needed these until I saw this project. Adorable!!
ReplyDelete