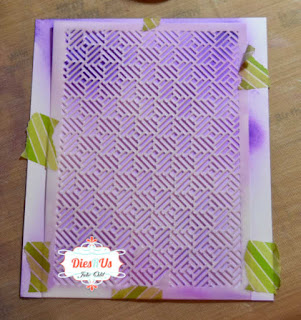
I began this card by making the basketweave background with a stencil. I picked up the stencil from the Dies R Us Store on one of the special purchases weekends. Look for these special products in the newsletters and emails, and in the Special Order section of the store.
I used Washi tape to adhere the stencil to the card stock, then used 3 shades of similar inks on the stencil so they would blend nicely.
Below, the stencil has been removed from the paper. Inking is complete.
In the picture below, I trimmed away the portions of the card stock I didn't want, getting it ready for the card base. I also included a photo of the brush I used for inking:
The next step was die cutting the tulip. I cut it multiple times to get all the colors I needed. Here's a photo of all the supplies and the tulip with the die cuts.
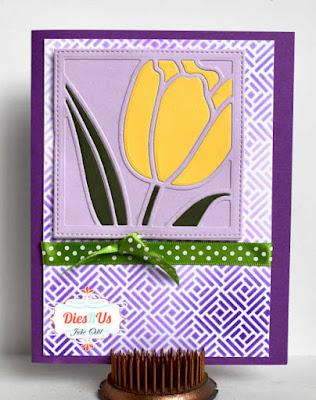
Once that was done, then all I needed to do was use the Best Glue Ever to glue all the pieces together to construct the card. I left it without a sentiment, not being sure whether I'd use it for a spring card, an Easter card, a get well card -- who knows? It's appropriate for many occasions, don't you think?
Dies R Us supplies used on this card:
by Sue Wilson
Don't forget to come join in the fun at the Dies R Us Challenge Blog. There's a new challenge theme offered on the 1st and 15th of each month and one lucky randomly drawn winner will receive a gift voucher prize to the Dies R Us Store. For your convenience, all the important Dies R Us links are provided below.
click below for:


Very pretty Julie and creative! Thanks for the details and inspiration!
ReplyDeleteSo pretty!
ReplyDelete