Jun 23, 2019

You're Stinkin' Cute

A happy hello, fellow crafters!  It's Julie with you today from Muddy Paws & Inky Fingers.  I love Lawn Fawn, and Distress Oxide inks, so I combined 2 of my loves on today's card:

Stinkin' cute, isn't it?

Let me show you how I made it.

First, the supplies I used (they'll be linked at the bottom of this post):

I started out with 2 colors if Distress Oxide ink -- Spun Sugar, and Squeezed Lemonade.  I worked roughly on the diagonal.  I used a piece of paper larger than I would need so I'd have some room to play with:

Then, while the ink dried, I stamped my skunk and heart, and used Copic markers to color them up. You'll see my "oops" on the heart stamp, so I stamped it again.

After I got them colored the way I liked them, it was time to use the matching die cuts, and a scallop edge die cut, also from Lawn Fawn:

Below, is everything die cut, and the background paper that I used.

All that's left is to stamp the sentiment, add some twine, and assemble the card.


Dies R Us Store supplies used:


I hope you have a stinkin' great day!

Don't forget to come join in the fun at the Dies R Us Challenge Blog.  There's a new challenge theme offered on the 1st and 15th of each month and one lucky randomly drawn winner will receive a gift voucher prize to the Dies R Us Store.  For your convenience, all the important Dies R Us links are provided below.
click below for:

Jun 22, 2019

You're the best

Hi everyone, Steph back with another project for Dies R Us.
I've got a sweet card that can be used for any occasion.


Stamp the image and color with Copic Markers.  Fussy cut the image and mat with white cardstock.  Fussy cut it again.  Lightly ink the edges for definition.


Die cut pattern paper using Lawn Fawn dies.  Add a layer of white between the die cut papers before adhering to the card.


Add the image to the card on an angle with foam adhesives.  Stamp phrase and add to card.


Dies R Us supplies used:

Memento Tuxedo Black Ink

Memento Dew Drop Ink Pad - Tuxedo Black

Lawn Fawn Stitched Rectangle Dies


Lawn Fawn - Stitched Rectangle Frames Dies


Scraperfect Best Glue Ever

Best Glue EverColorBox Brown Ink
 
ColorBox - Cat's Eye - Pigment Ink Pad - Brown

Thermoweb 3D Foam Squares

Thermoweb - 3D Foam Squares - White .5" 88/Pkg


Don't forget to come join in the fun at the Dies R Us Challenge Blog.  There's a new challenge theme offered on the 1st and 15th of each month and one lucky randomly drawn winner will receive a gift voucher prize to the Dies R Us Store.  For your convenience, all the important Dies R Us links are provided below.

click below for:
Thanks for visiting... hope to see you again soon, Have a great day.


Jun 21, 2019

WELCOME


Hello  , Wendy here with a Welcome card that would be perfect to give to that new neighbor that just moved I used several dies and even one that is unlikely used in this way...I started out by die cutting my door pieces from Frantic Stamper  out of red card stock, then I used the Hydrangea die from Impression Obsession   to create bushes on the front step...I love finding unconventional ways to reuse my dies ...I chose to add a piece of acetate as the window to create a peek a boo element to my card front


I added some distress ink around the cut outs for added depth and dimension

I wanted to layer up my word die cut for dimension so I found that using the Xyron sticker maker turned the words into stickers and made stacking them a breeze , I also added glossy accents to the word Welcome from Serendipity for some added shine

 Here is the card front showing the open window 


                                                  Hydrangea Impression Obsession
                                                           Door from Frantic Stamper


Don't forget to come join in the fun at the Dies R Us Challenge Blog. There's a new challenge theme offered on the 1st and 15th of each month and one lucky randomly drawn winner will receive a gift voucher prize to the Dies R Us Store
For your convenience, all the important Dies R Us links are provided below.
                       FRIENDS OF DIES R US PINTEREST PAGE 


Thanks for stoppin in today


Jun 20, 2019

A Sparkly Hug w/ Pinkfresh & Concord and 9th


Hi Everyone, Kristina here - Thanks for stopping by, I hope you're having a great day.
Grab your sunglasses for this one! So-Much-Glitter! My original plan for this card was glitter peeking through the fun geometric background from Pinkfresh Studios - The rest fell into place from there. 

The Process

  • Start by glittering a 4.25 x 5.5 piece of white card stock. I did this by running the cardstock through my Xyron sticker maker to cover one side with adhesive and added two tones of glitter for an ombre effect. You could also use glitter card stock. 
  • Die cut your background die 2 times and adhere them down to your glitter background, one of top of the other. 
  • Die cut and add your sentiment. The background is so busy you'll need a chunky word like this. I love that this die comes with the word, the shadow, AND a frame. The shadow piece was cut once from white card stock, followed by the word in glitter card stock, and lastly the frame was cut 3x from black card card stock and glue on one one top of the other. 
  • Use the negative space pieces from the black card stock to fill in the font's holes. I only used a single layer here. 
  • Cut out the hearts from the 'Hugs' die set. Adhere down to the card panel and coat with a dimensional adhesive such as Nuvo Crystal Glaze. 
  • Lastly, add a sentiment strip and adhere the whole thing down to an a2 sized card base.

Notes

The glitter I used was Elizabeth Craft Silk Microfine glitter. I had tried another glitter on my first go and didn't like the way it looked. You definitely want a full coverage opaque glitter, or just use a glitter card stock. 

If all you have is translucent glitter, you could also ink blend an ombre background then cover it with your glitterable (yes its a word) adhesive and cover the panel with your translucent glitter. 

Supplies


Concord and 9th Hugs Dies
Shop at:
Dies R Us
Pinkfresh Studio Geo Floral
Shop at:
Dies R Us

Don't forget to come join in the fun at the Dies R Us Challenge Blog. There's a new challenge theme offered on the 1st and 15th of each month and one lucky randomly drawn winner will receive a gift voucher prize to the Dies R Us Store. For your convenience, all the important Dies R Us links are provided below.


click below for:


Jun 19, 2019

Let's Flamingo

Hello my friends!  Kristina Hein here today to share a tropical themed card.  Summer is fast approaching and I'm dreaming of tropical vacations so I channeled those vibes into a card.


So let's chat about how I made this card.  First thing I did was to cut all of the flamingo pieces out of watercolor paper using the Flamingos dies from Elizabeth Craft Designs.  Then I got out my Zig Clean Color markers and added color.  I fashioned my flamingo after some that I found with a Google search.  They are called James's Flamingos.  They are so cool looking!

Here is my inspiration photo.


These guys are just the coolest!  They have some really striking coloring and I did my best to capture it in my coloring.


I set my flamingo aside and went to work on the card panels.  I cut another piece of watercolor cardstock using one of the Dotted Scallop Ovals dies from Elizabeth Craft Designs.  This set is one of the staples in my collection.  I wanted to use a stencil to create a tropical background but I didn't have an appropriate stencil.  So I created my own using some other dies in my collection with a piece of transparency film.  I sponged three differnt colors until I was happy with the look.  I did mask off the bottom quarter.  This way I could go in with a dark blue ink to create the look of water.  I spritzed the whole piece with water and blotted it off.


I cut out the other pieces I needed using another oval from the dotted scallop ovals as well as the stitched ovals dies.  I also cut a piece of patterned paper to cover the front of an A2 sized card.


I attached the printed piece to a white, top fold A2 sized card.  Then I used a liquid glue to adhere the wavy yellow-green oval.  I applied foam tape to the back of the navy piece before placing it on the card panel.  Next came the stenciled watercolor piece.

Before adhering the flamingo to the card I wanted to add in my sentiment.  I cut a piece of yellow-green cardstock with the Long Speech Bubbles dies from Frantic Stamper.  Then I used stamps from two different Lawn Fawn sets to create a custom sentiment.  I used the "Let's" from the Party Animals set and "Flamin-go" from Flamingo Together.  I stamped them with navy ink.  I adhered it to the card panel and then glued the flamingo on top.  


Supplies used:


Frantic Stamper Long Speech Bubbles
Shop at:
Dies R Us
Neenah Solar White
Neenah Solar White
Shop at:
SBC | EH
Tombow Mono Multi Liquid glue
Shop at:
SBC | EH
Flamingos - Elizabeth Craft Designs
Shop at:
Dies R Us
Stitched Ovals - Elizabeth Craft Designs
Shop at:
Dies R Us
Dotted Scallop Ovals - Elizabeth Craft Designs
Shop at:
Dies R Us
Party Animal - Lawn Fawn
Shop at:
Dies R Us
Flamingo Together - Lawn Fawn
Shop at:
Dies R Us
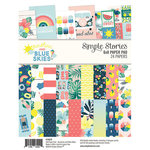
Sunshine & Blue Skies - Simple Stories
Shop at:
SBC

Come on over and check out all of our great links!


See you soon!
~Kristina H.