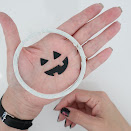
Halloween is the time that Jack-O-Lanterns come to life.
Welcome everyone! I'm so happy that you could join me for today's post. I'm Monica of HeartcraftPaper and today I was inspired to make some Halloween shakers. I figured that this shaker would make the perfect card. I absolutely love using Lawn Fawn because they are fun, cute and simple. The images and dies makes it simple to build up cute little stories. Here is my pumpkin inspired card.
Outside-Inside Stitched Pumpkin Dies - LF
Stitched Pumpkin Frame Die - LF
Stitched Scalloped Square Frames- LF
Happy-Happy-Happy Add On Stamps - LF
Twisted Citron Distress Oxide
India Ink Black - Hero Arts
Transparency Film
Tangerine Gingham & Linen - Doodlebug
Lime Crush - Bazzill Basics
Stitched Pumpkin Frame Die - LF
Stitched Scalloped Square Frames- LF
Happy-Happy-Happy Add On Stamps - LF
Twisted Citron Distress Oxide
India Ink Black - Hero Arts
Transparency Film
Tangerine Gingham & Linen - Doodlebug
Lime Crush - Bazzill Basics
Dark Kraft - American Craft
Black Glitter Cardstock - Best Creation
A2 Card Base
White Cardstock
Ghostly Damask - Carta Bella
So Creepy - Simple Stories
Fun Facts - Bella Blvd
Gina Marie Design Enamel Dots
Liquid Glue
1/8" double sided tape
Halloween Sequin Mix
Black Glitter Cardstock - Best Creation
A2 Card Base
White Cardstock
Ghostly Damask - Carta Bella
So Creepy - Simple Stories
Fun Facts - Bella Blvd
Gina Marie Design Enamel Dots
Liquid Glue
1/8" double sided tape
Halloween Sequin Mix
___________________________________________
Five Little Pumpkins Sitting On A Fence...
Start by die cutting the solid pumpkin piece from the Gingham & Linen Tangerine cardstock and transparency film. Use the Linen side for this. Next die cut the pumpkin frame out of the same paper on the gingham side. Finally cut out 10 pumpkin frames out of white cardstock.
Begin by gluing together sets of three or four white pumpkin frames together to make three sets. Take each set and cut out the center frames.
Once you have all three sets with the frames in the center cut out, begin gluing and stacking them all together. I used the dies to press down firmly on the stack to make sure they adhered fully. This leaves a 1/4" thick frame.
It's time to build the well by gluing the solid pumpkin piece to the back of the stack. make sure that the linen side is facing up and line the frame with 1/8" double sided tape. Also line the frame with 1/8" double sided tape.
Peel the tape backing off and adhere the transparency film cutout to the frame. Die cut the pumpkin stem from the Dark Kraft paper. Now peel back the tape backing off of the well and attach the pumpkin stem to the top of the well. Apply double sided tape to the stem as well.
Time to fill up the well with a Halloween Sequin mix. I had a lovely black, orange and green in my stash and I used a small amount. Seal the well with the frame. Be careful to alight it well.
Decorate the pumpkin with the face cutouts of black glitter card stock. Also use the lime crush paper to cut out the leaves and vines for decoration as well.
Using the damask paper pattern cut to 4.25" x 5.5" adhere it to the A2 card base. Die cut out the frames from the So Creepy and Fun Facts paper. you will turn them askew and glue them down onto the card base. Cut the over-hanging pieces from the card. This will set your background to glue down your pumpkin in the center.
Cut a 1/2" strip of white cardstock and stamp the sentiment Halloween with the exclamation point in black ink on the far left and then make a perpendicular cut on the right side. Stamp the happy sentiment in Twisted Citron and die cut out. Using liquid glue, adhere the sentiment to the bottom left of the pumpkin.
This is how the final product will look. This is the perfect Halloween card. It's fun, cute, and interactive.
______________________________________________________
Thank you for visiting the blog. I Hope that you have enjoyed this how-to and find some inspiration for your next craft. If you do C.A.S.E. this card, then share it with me!
Until Next Time!
XOXO - HeartcraftPaper
Until Next Time!
XOXO - HeartcraftPaper
Don't forget to come join in the fun at the Dies R Us Challenge Blog. There's a new challenge theme offered on the 1st and 15th of each month and one lucky randomly drawn winner will receive a gift voucher prize to the Dies R Us Store.
For your convenience, all the important Dies R Us links are provided below.
click below for:


This is so cute! Great step by step.
ReplyDelete