

Hummingbirds enjoy the lightness of being, the sweetness of life, and uplift negativity wherever it may be.
Hi Everyone! Monica from HeartcraftPaper here today I have an amazing card for you. I have a fascination with hummingbirds. They are so tiny and frail, yet so light and fast. What they lack in size they make up in speed and grace. This is why this particular card is so special to me. Who wouldn't love to receive a beautifully stunning interactive hummingbird card? I surely would. I usually make cards that I myself would love to get.

I have been looking for a hummingbird die for some time when I came across this Angela Pool die. What makes it so special is that it has so much detail to it. It really is a one die set so you don't need to incorporate any additional dies into it. The colors that are on the sample card made by Angela Pool are lovely, but I really wanted to pull in more of a hummingbird coloring through out the whole card, yet keeping it to a simple white card. I always find white cards with pops of color to be more elegant.
The items come with instructions as well as a full magnet sheet on which they are mounted. This is perfect to just store into a binder. These dies are ready for crafting from the get go.


Supplies:
A7 Card Base
5 1/8" x 7" White Cardstock (2)
5 1/8" x 7" White Cardstock (2)
8 1/2" x 11" White Cardstock (1)
Pearl Embellishments
To begin start with blending of all 6 of the distress oxide on the 8 1/2" x 11" cardstock in landscape. It's really important to make sure the color is saturated well and that any harsh lines are softened.

Repeat the blending process on one of the 5 1/8" x 7 Cardstock so that is it covers about three inches from the right side of the card towards the center. A full coverage is not required as the blended portion is all that will be seen.

Die cut out the hummingbird on the 8 1/2" x 11" blended cardstock. In order to get detailed wings cut, trim the paper down length ways for it to fit exactly to the wing span so it would pass through die cutting machine. As you can see the wings and body of the interactive bird are cut out from the bluer sections or lower part of my blended paper. The body of the humming bird will be cut from the remaining blended piece with the beak in the cracked pistachio section and the tail in the Mermaid lagoon section. The miniature hummingbirds are cut from the green sections so that the solid is darker than the other. for the solid winds cut one with the paper face up and the other with the paper face down to create mirror images.


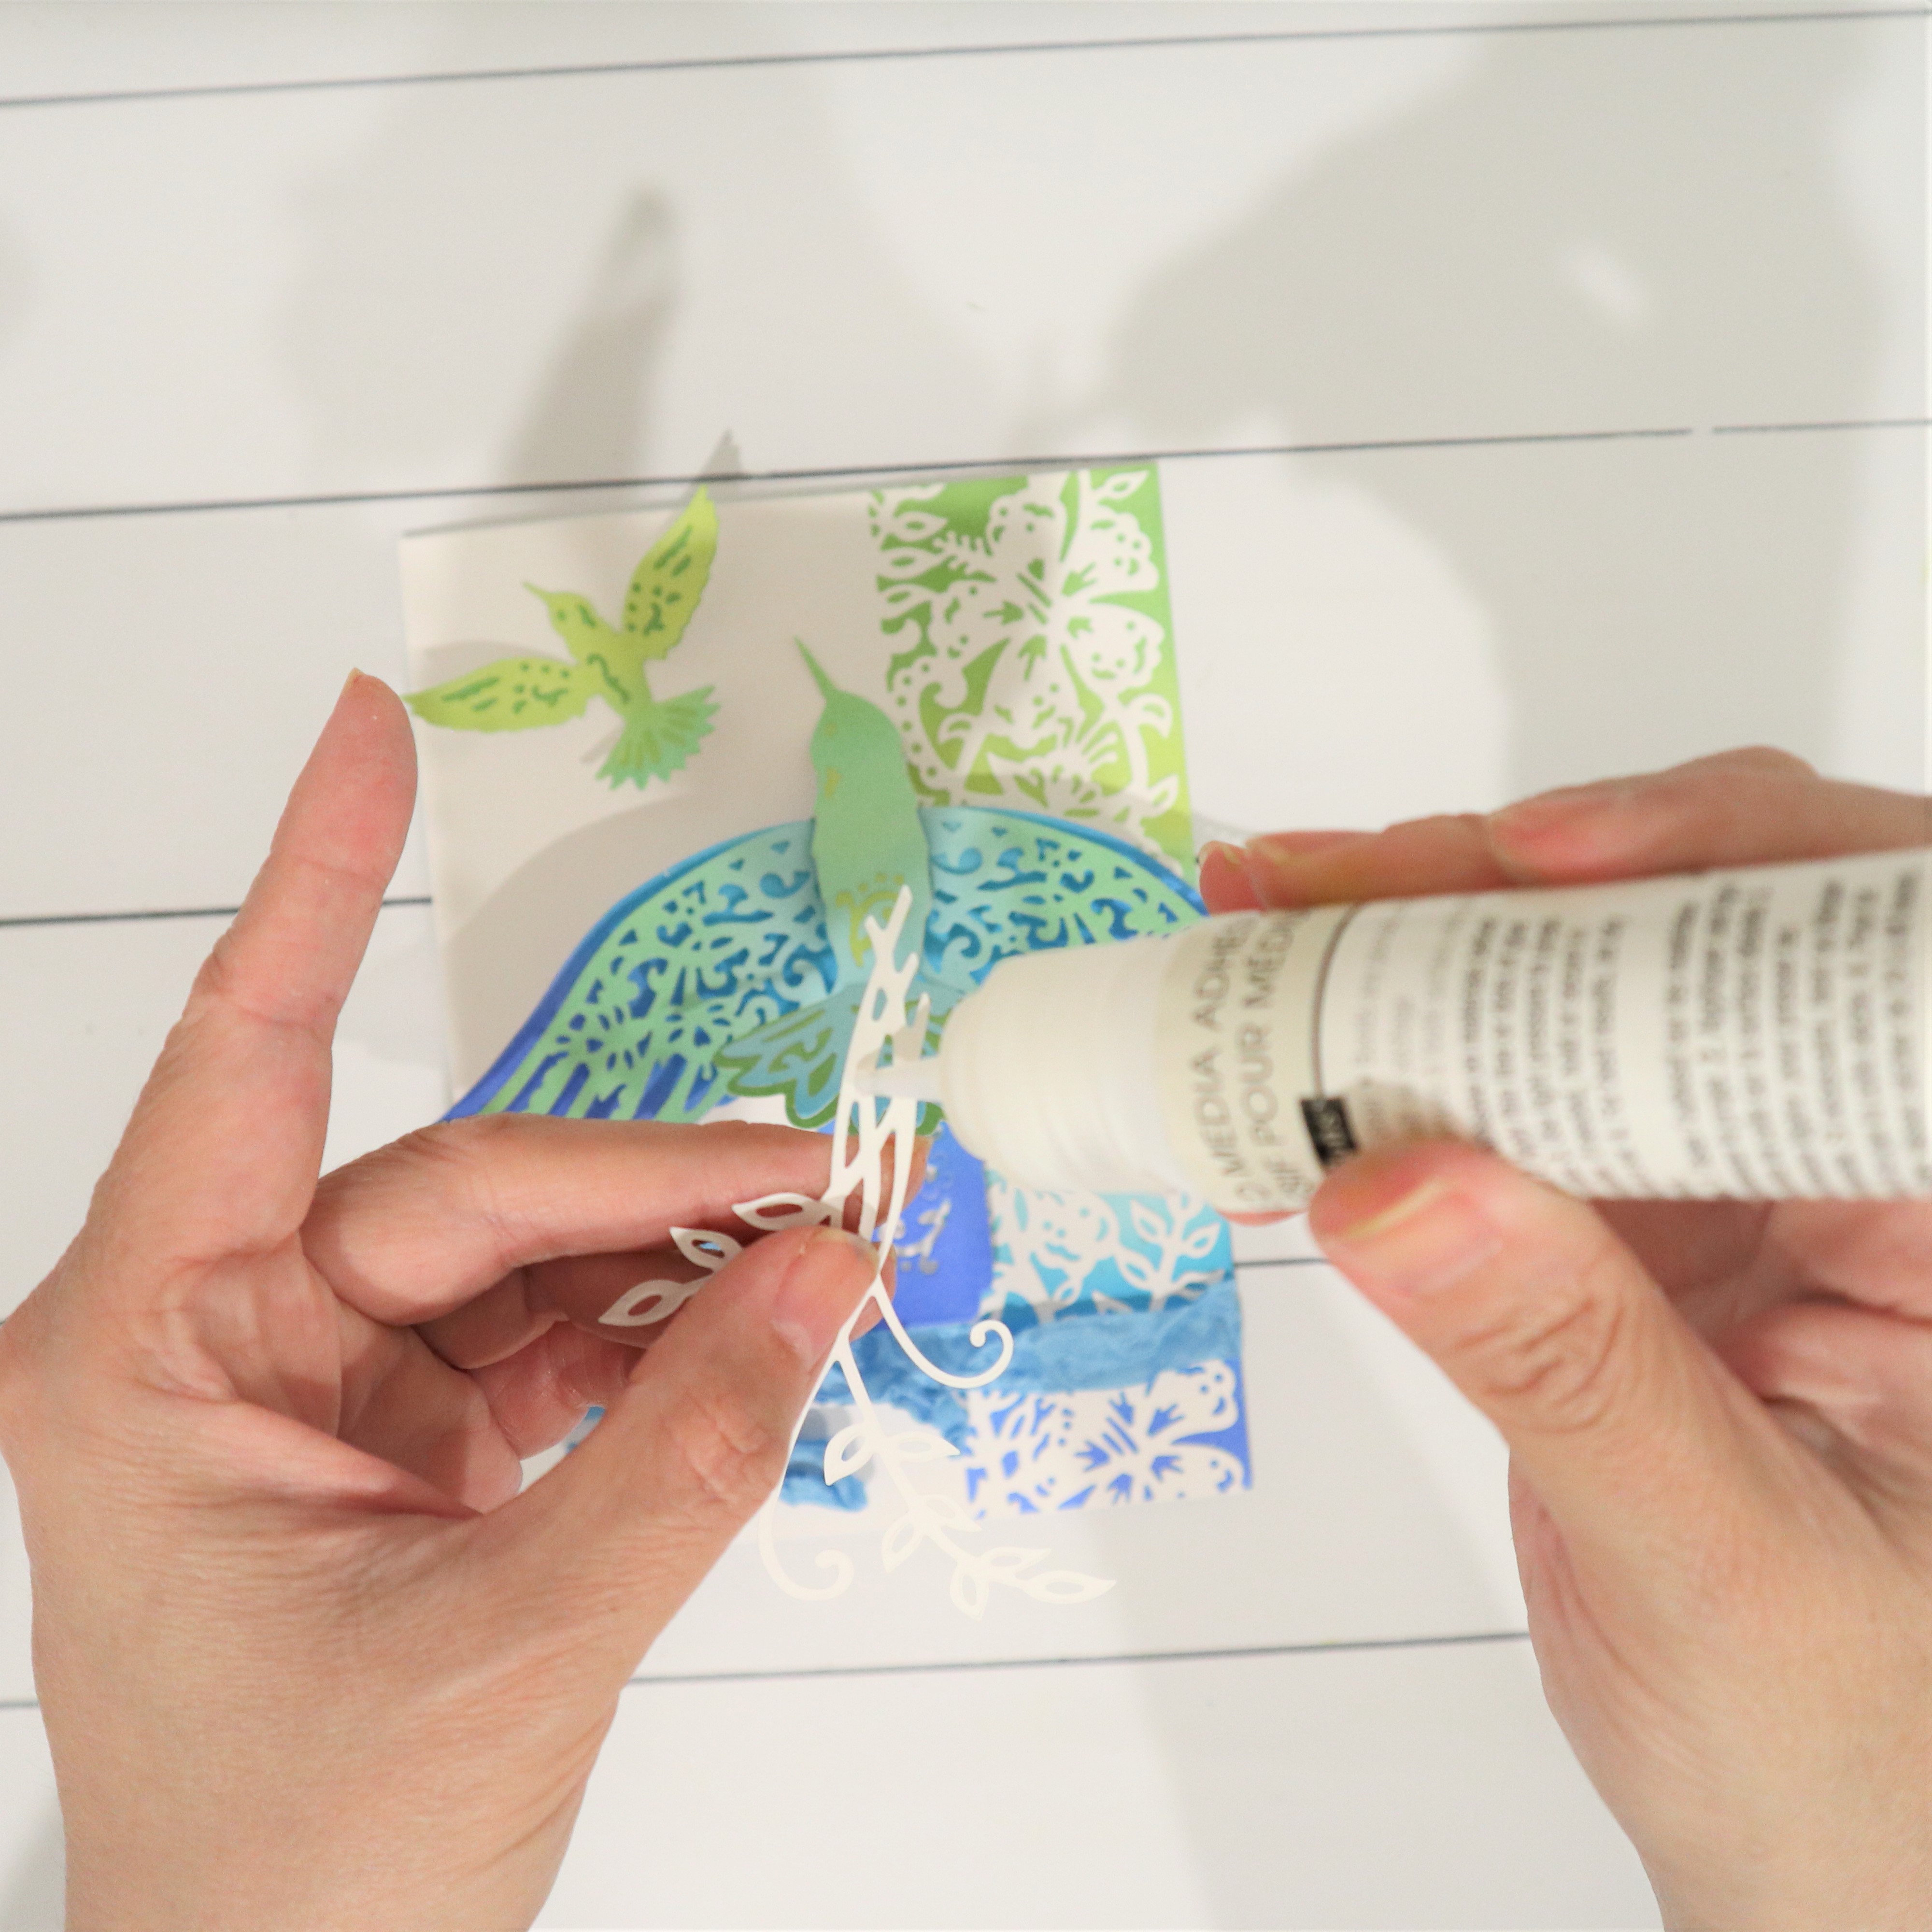
Using the remaining 5 1/8" x 7: cardstock, center the floral border die along the very right edge of the cardstock.

With the die cut ready, adhere the floral edging to the blended piece using liquid glue. Use both non die cut dies to light up.


Use crinkle binding to make a bow tie. Begin by laying down a strip of 1/8" double sided tape along about 1 1/2" from bottom. Adhere the crinkle binding as flat as possible across the back. Tie a bow on the front on the left side.


Adhere the card front to the A7 card base using liquid glue.


Moving on to the bird, fold along the crease lines on the winged tab so that the tab folds upwards in both directions and the fold the center crease away from you. the upper tab will be folded along the two creases away from you. You should have a wing section with two valleys and one peak.


Fold the wings along the score lines. Adhere them using liquid glue to the mechanism underneath so that the solid shows through the filigree. Ensure that it follows the folds of the mechanism to allow for movement.


Die cut the solid piece of the birds body from the green section of the green blending. Adhere it to the filigree section of the body. Fold the tail upwards at the score line.


Adhere the winged mechanism to the card by adding glue to the top tab from the second fold to the edge. Leave the fold to the main piece alone for now. Attach it so that it is facing the opposite direction and then fold the whole thing over so that the color is showing up. Fold the in the peak and valleys under the wings.


Add liquid glue from fold to fold on the wing mechanism at the top as well as one small dab on the card itself. Adhere the head to the card and the rest to the tab. Hold down until it sets. Once dry test the mechanism several times to make sure it moves as required.


Add liquid glue from fold to fold on the wing mechanism at the top as well as one small dab on the card itself. Adhere the head to the card and the rest to the tab. Hold down until it sets. Once dry test the mechanism several times to make sure it moves as required.


The set comes with a foliage die. Die cut a piece of green section adhere it under the mechanism to the left. This will help to draw color and the eye down the card.


Finally, add some pearl embellishments to the card. Three around the small hummingbird and three on the flower centers of the filigree.


This is what the card will look like once finished .

Thank you for visiting. I hope that you enjoy this tutorial and give it a go yourself. It's a fun interactive card!
Until next time!
XOXO - HeartcraftPaper
Until next time!
XOXO - HeartcraftPaper

Don't forget to come join in the fun at the Dies R Us Challenge Blog. There's a new challenge theme offered on the 1st and 15th of each month and one lucky randomly drawn winner will receive a gift voucher prize to the Dies R Us Store.

For your convenience, all the important Dies R Us links are provided below.
click below for:
Beautiful! Love the ombre colors on this11
ReplyDelete