Hello Crafty Friends - Annie here with a lovely Lattice card.
This card has an open front panel - However, you can place a colored cardstock
behind the lattice for a different look.
To create this card you will need an A2 card base and a piece of cardstock measure 4-1/4" X 5-1/2".
On the extra panel die cut the lattice.
Next, on the card base measure a 1/8" from the score of the card.
I did a light pencil line for you to see.
Now, trim off the card base front panel.
Next, adhere the lattice to card base.
Your card should look like this - with a see through front panel.
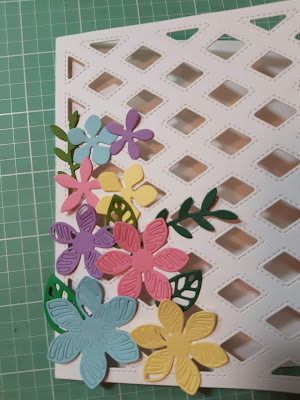
Next, die cut several flowers and leaves.
I like to do what I call a dry run for placement of the flowers and leave so I get a general idea if I like the look of where everything will be.
Once, I like the placement. I adhere the flowers and leaves in place.
Next, I add a bit of Nuvo Drops to the centers of the flowers. **Note - you can add Liquid Pearls, Stickles or any other embellishment you would like to the centers.
Now, the card is complete. You can add a sentiment if you would like.
I like having blank cards like this in my stash.
This way I can use them for Birthdays, Mother's Day,
Easter or Just thinking of you cards.
I hope you give this card a try.
Supplies Used:
Dies:


Embellishment:

Adhesive:

Cardstock:
Recollections Brand:
White, Pink, Purple, Blue, Yellow & Green
Don't forget to come join in the fun at the Dies R Us Challenge Blog. There's a new challenge theme offered on the 1st and 15th of each month and one lucky randomly drawn winner will receive a gift voucher prize to the Dies R Us Store.
For your convenience, all the important Dies R Us links are provided below.


Beautiful card!
ReplyDeletePretty colorful design!
ReplyDeleteAbsolutely beautiful and very creative! Thanks for wonderful inspiration!
ReplyDeleteVery Pretty
ReplyDeleteI love that lattice background!
ReplyDeleteWhat a beautiful card. Love the lattice background with the pretty flowers.
ReplyDelete