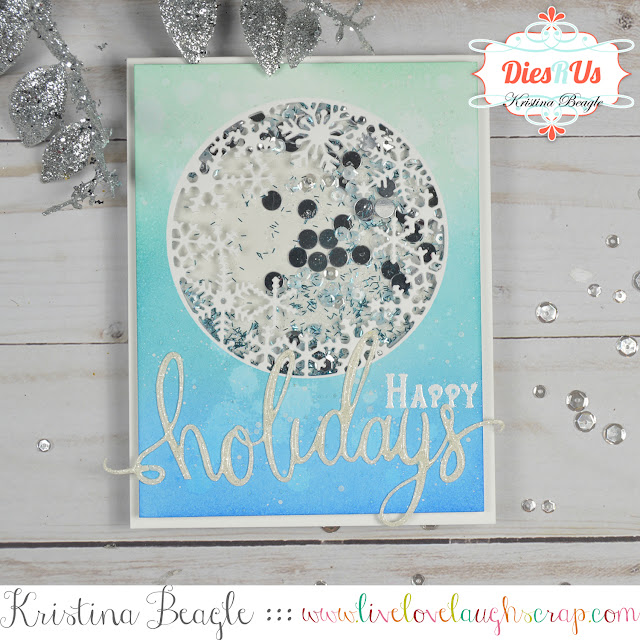
Hi Everyone, Kristina here! This die has just been begging me to make it into a shaker card since I got it. This was my first time using the snowflake ornament fancy die. This is a two piece die that can be used multiple different ways. Whenever I get a multi use die like this, the first thing I like to do is cut it out of some scrap paper in all of the different possible combinations so I can see exactly what my options are.
With this die you can cut either a solid ornament, a snowflake ornament, or like I did just cut the snowflake circle edge.
So here's how I put together this shaker
So here's how I put together this shaker
- Starting with a a2 sized card front, I used a circle that matched the size of the snowflake die, to cut a mask from avery removable label paper and placed on the center of my card front where I would later cut out the snowflake die.
- Next, Using distress oxide inks I blended an ombre like dark to light base. I sprayed the ink based with some water droplets and lifted the ink up with a paper towel to add a little interest, as well as splattering on some white acrylic paint droplets. Once I liked the background I removed my masked and trimmed the base down to 4x5.25
- Now it was time to cut out the snowflake die. I lined the die up into the white space left behind from my mask, and ran through my die cutting machine. I adhered a piece of acetate to the back to be my shaker window.
- To hold my shaker bits I took the same circle die I cut my mask with, and lined it up against a piece of fun foam so I could use this as a nice sturdy shaker base perfectly sized to my window. I adhered the die cut fun foam piece to my acetate backed card front
- Now the fun part, filling the shaker! I added into the shaker window blue/silver/white sequins and glitter. To seal it all in I add another piece of acetate adhered down to the fun foam, and lastly I adhere the whole shebang down to an a2 sized card base.
Then it was time for my sentiment. I had to keep the sparkle going so I die cut the Hero Arts Holidays Fancy Die from some white glitter card stock and adhered it down to the card front before lining up and stamping a "Happy" from a misc. stamp set in my collection, which I heat embossed with white embossing powder. I wanted a little more dimension, so I coated the "Holidays" with glossy accents.
Thanks for stopping by today!
Supplies
 Hero Arts Snowflakes & Ornament Shop at: Dies R Us |
 Hero Arts Holidays Word Die Shop at: Dies R Us |
 Distress Oxide Cracked Pistachio Shop at: Dies R Us |
 Distress Oxide Peacock Feathers Shop at: Dies R Us |
Don't forget to come join in the fun at the Dies R Us Challenge Blog. There's a new challenge theme offered on the 1st and 15th of each month and one lucky randomly drawn winner will receive a gift voucher prize to the Dies R Us Store. For your convenience, all the important Dies R Us links are provided below.


This is fabulous Kristina! Loving the shaker!
ReplyDeleteVery fun and pretty card.
ReplyDeleteWOW this is gorgeous Kristina! I never think to make shakers but LOVE them when I see them! Thanks for inspiration ... beautiful!
ReplyDeleteWhat I gorgeous shaker! I absolutely love it!
ReplyDeleteI love shaker cards, and this one is a beauty!
ReplyDeleteShaker cards are always so much fun :-) Love it!
ReplyDeleteWhat a fantastic sparkling shaker card. Love the whole look of bling behind the snowflakes!
ReplyDelete