
Hello Everyone!
Darlene with you today. I don't know about you, but I'm always in need of birthday cards! Since this Sue Wilson 'Happy
Birthday' panel (CED5406) just happened to be laying on my work table
... die cut and never used, THAT was the starting point for today's
creation.
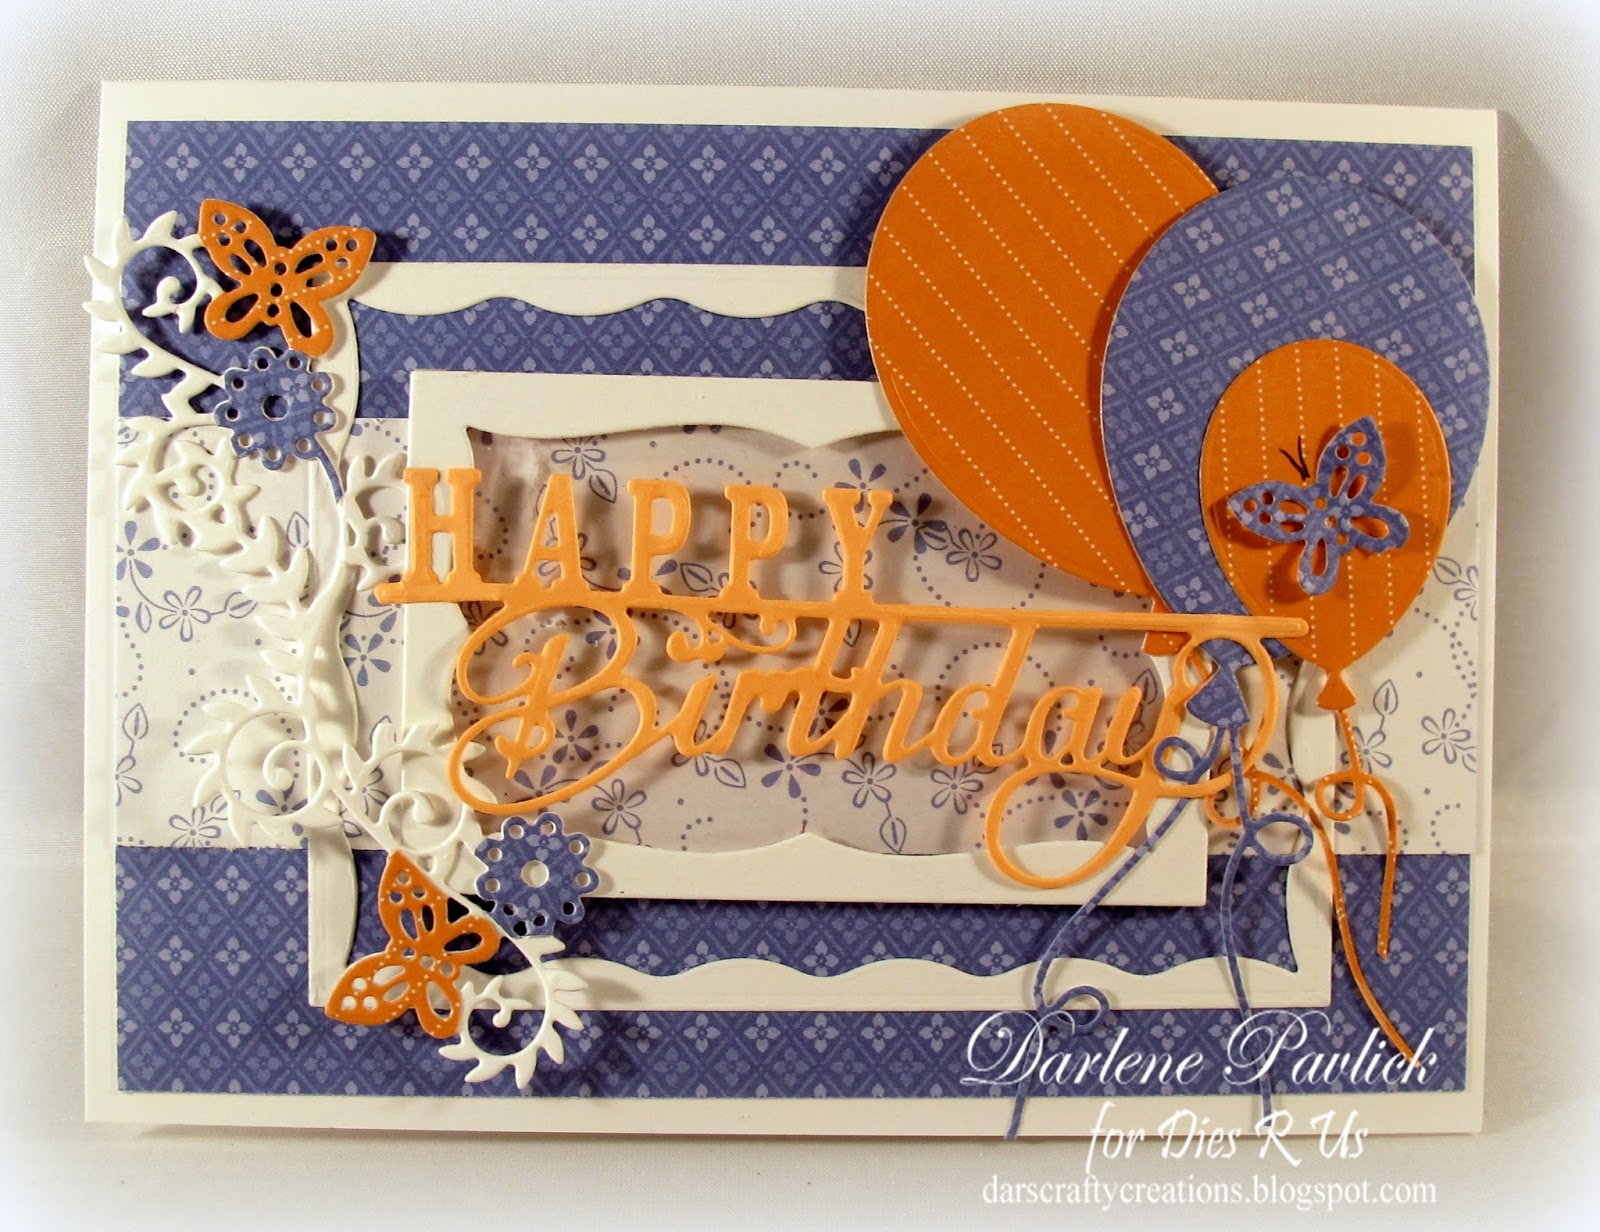
I also had pieces from the Impressions Obsession 'Rectangle 6-in-1 Frame' (DIE242) cut and laying over by one of my die cutting machines ... so why not put them together!
 I
like shades of orange & blue together so I grabbed a panel of
double sided blue paper to use as the background for this Happy Birthday
panel and the fun began.
I
like shades of orange & blue together so I grabbed a panel of
double sided blue paper to use as the background for this Happy Birthday
panel and the fun began.  For
my focus panel, I created a 'window' by cutting a panel of clear
acetate (recycled packing material from metal dies) and glued it to the
back of my smaller frame.
For
my focus panel, I created a 'window' by cutting a panel of clear
acetate (recycled packing material from metal dies) and glued it to the
back of my smaller frame.
Then
I adhered the birthday die cut sentiment just to the right & left
side. To POP it up, I used 3M dimensional tape which was acquired from
Lowe's Home Improvement store.
 Attaching
the raised panel first and then the outer frame piece to be sure the
inside panel was centered properly over the narrow designer panel strip.
Attaching
the raised panel first and then the outer frame piece to be sure the
inside panel was centered properly over the narrow designer panel strip.
AFTERTHOUGHT: I could have added some 'pretties' and turned this into a shaker card! Hmmm ... oh well ... next time!!
NOW COMES THE FUN PART . . . embellishing my focus birthday greeting.
By using scraps from my stash, I die cut the Impression Obsession 'Balloons' (DIE 359)
and positioned them in and around the right side of my focus panel. I
felt it need a little something to 'balance' it so die cut the beautiful
Tutti Designs 'Butterfly Scroll' (TUTTI-103)
three times. Once completely from white card stock, then die cut the
butterfly/flower parts using scraps of the same paper pack used for the
background and balloons. A little fussy cutting / gluing and my card is
complete.

Except for the INSIDE of course!
I had die cut all three sizes of the balloons in the Impression Obsession 'Balloons' (DIE 359)
set so had a few left over. Perfect to use on the inside. So quick
& easy but adds a wonderful pop of coordinating color to the inside
of my card.

Please don't forget to come join in the fun at the Dies R Us Challenge Blog.
There's a new challenge theme offered on the 1st and 15th of each month
and one lucky randomly drawn winner will receive a gift voucher prize
to the Dies R Us Store. For your convenience, all the important Dies R Us links are provided below.

click below for:
and we are now on Pinterest . . .
Please stop back each and every day for amazing inspiration from my team mates!!
Fabulous birthday card Darlene. You've used some lovely dies with a great colour combination! I love how you've placed the sentiment on top of the frame with the balloons behind.
ReplyDeleteFantastic color combination, Dar, and wonderful embellishments on your happy birthday window! I especially like the balloons in coordinating patterned papers, and your recycling. Beautiful and happy!
ReplyDeleteLove your colors and your Designer Papers! The layering of these fabulous dies looks awesome! Such a celebration!!!
ReplyDeleteI've been looking for some bigger than usual balloon dies for my scrapbook pages -- the ones you used will work great. I've added them to my cart. Thanks for sharing your card.
ReplyDeleteWow so cool, I so love these colors, fantastic framing, I have those frame dies on my wish list :) Terrific embellishing with the balloons, flowers and terrific inside too!
ReplyDeleteI just love all these wonderful layers of fun, Darlene! These colors are awesome together as well!
ReplyDelete