Aug 19, 2020

Happy Birthday Card

Happy Wednesday, everyone!

It's Nancy, from The Nickel Nook, here with you today!

This week I'm sharing a simple but special birthday card!
The dies make it simple, and the choice of paper makes it special!

Here's my card:


I used the Bazzill Basics Bling cardstock for my card. 
It is so sparkly and full of glitter.


I started with a white card base, to which I added a green front.
Then I cut a slightly smaller piece of the white bling.


I die-cut both the branch, and the words, from the same green,
and adhered them in place on the white.
Finally, I added some sparkly rhinestones to the center of the flowers.


So simple and yet so special! 
 

Products Used:


* * * * *
Don't forget to come join in the fun at the Dies R s Challenge Blog
 There's a new challenge theme offered on the 1st and 15th of each month 
and one lucky randomly drawn winner will receive a gift voucher prize to the Dies R Us Store.  
For your convenience, all the important Dies R Us links are provided below.


click below for:

Aug 18, 2020

Get More From Your Dies by Making a Your Card Base


Hi Everyone! Luci here from My Crazy Craft Life, using nesting dies to create my card base and layers! I used the Sizzix Heart Framelits Nesting Dies. Be sure to check out the video HERE for all the details!


Check out nesting dies over at Dies R Us.


Here are some dies that would work great!

Tutti Designs Stitched Heart Nesting Dies

The dies I used.

Don't forget to come join in the fun at the Dies R Us Challenge Blog.  There's a new challenge theme offered on the 1st and 15th of each month and one lucky randomly drawn winner will receive a gift voucher prize to the Dies R Us Store.  For your convenience, all the important Dies R Us links are provided below.


click below for:


Aug 17, 2020

Create a tree line...

Welcome crafty peeps...Vicki, from He"artful" Validation of Vicki sharing an easy way to create a tree line on your card or project using the Lavinia Christmas Tree Group Stamp.  Although this stamp is labeled as Christmas, the pine tree design can be used any time of year.

 
I created a tree line as the focal point for this CAS Sympathy card...
 
With Sympathy and Prayers
 
Slim line cards are all the rage right now.  I haven't made many, but this style worked well for the design that I wanted to create.


The finished card size is 3 1/2" x 8 1/2".  I cut the cardstock 7" wide by 8 1/2" long.  Next, I scored at 3 1/2" on the 7" side, folded and burnished for a sharp crease.


I used a stamp platform to create a uniform tree line, moving the stamp while keeping the cardstock stationary with magnets.
 
 
To finish the card, I inked the background sky, gave the trees more color and added some terrain under them.  I double matted with earth tones and used blue stonewash cardstock as the card base.
 
Featured Dies R Us product...
 
Thanks for stopping by...
I hope I've inspired you to use die cuts on your creative projects.
 
Dies R Us is currently having a Design Team Call for the October 2020 - March 2021 term.  If you love creating with die cuts, don't miss this opportunity to become a member of this fabulous team.  Check out the call in the blog sidebar.  Call ends September 1, 2020.
 
Don't forget to stop by the Dies R Us Challenge Blog and play along.  There's a new challenge posted on the 1st and 15th of every month.  One lucky entry, chosen by random draw, will receive a gift voucher prize to the Dies R Us Store.  Check out the links below for easy access...


Vicki

Aug 14, 2020

Jungle Birthday Card

Happy Friday everyone, Mandi here showing off a fun jungle card that uses an elephant die and stamp set. First, create your card base, I used brown cardstock and matted it with dark green cardstock. Set aside. To create the die-cut panel first dry emboss it, I used a woodgrain folder. Offset the die on one edge and run it through your machine. 
Now stamp the elephant toward one edge on cardstock and color. 
Now stamp the leaves and die-cut it. I usually have to do this step twice since I always do this step backward. 
Adhere the stamped cardstock, emboss/die cut panel, and add the finishing touches (sentiment, die-cut, and gems). 
 

Don't forget to come to join in the fun at the Dies R Us Challenge Blog.  There's a new challenge theme offered on the 1st and 15th of each month and one lucky randomly drawn winner will receive a gift voucher prize to the Dies R Us Store.  For your convenience, all the important Dies R Us links are provided below.


Click below for:

Aug 13, 2020

Die Cut Leaves and Mixed Media

 Howdy Y'all!

Mary Ellen here from Creative Time With ME Today I have a fun way to create a mixed media piece using die cuts! 


I have created a video to share with you how I created this card! 


Some of the products that I used in this card are retired. But here are similar items you can find in the Dies R Us site.


Don't forget to come join in the fun at the Dies R Us Challenge Blog.  There's a new challenge theme offered on the 1st and 15th of each month and one lucky randomly drawn winner will receive a gift voucher prize to the Dies R Us Store.  For your convenience, all the important Dies R Us links are provided below.


click below for:
FRIENDS OF DIES R US PINTEREST PAGE

Thank you for stopping by!

Stay Healthy! 

Stay Safe!


Aug 12, 2020

The Sky's The Limit


Sometimes we limit our dreams without realizing the sky's the limit. 


Hi everyone!  Monica of HeartcraftPaper here and today I have a special card for you all.   I am a firm believer in not limiting yourself and allowing your dreams to thrive.  I have had a Lawn Fawn stamp in my stash for some time and I finally came up with a wonderful card for my son to let him know that he should reach for the stars and not limit himself by his own abilities.  My son is on the spectrum and because of this, I really wanted to make sure that he knows nothing can hold him back.  I hope this inspires you to make a new card for your loved ones.


Supplies


Time to float through the skies!


Coloring:
Big Balloon: BG10, BG11, BG13, BG18, C00, C1, BG75, E33, E23, E47
Small Balloon: RV10, RV11, RV13, C00, C1, RV69, E33, E23, E47
Banner:  RV02, RV06, RV09
Stars:  Y000, Yoo, Y11


Once all of the images are colored in and die cut out, it's time to piece together the card.  Using one of the 4.25" x 5.5" cardstock, die cut out a circle from the center in order to make a mask.  Tape the mask over a second 4.25" x 5.5" cardstock.  Blend Black Soot, Sketchbook Print and Shaded Lilac Distress Oxide over the mask.  Once you remove the mask you should have a circle blend to represent a night sky.


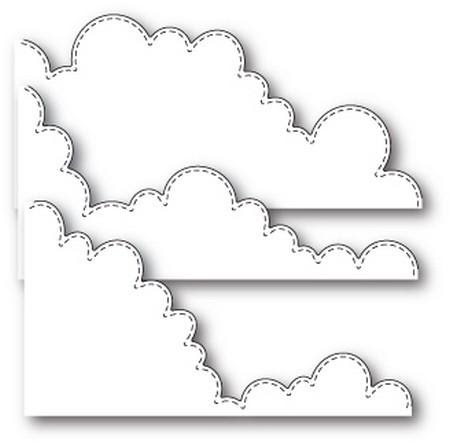
Next, using the Poppystamps Stitched Cloudline dies cut out four sets of clouds from the remaining 4.25" x 5.5" cardstock.  Arrange them to your liking and die cut the grouping with a die.  


Using Shaded lilac, blend some color from the bottom of the cloud clusters upwards.  I ended up using only two of my die cuts.  Adhere the clouds down so that it fits exactly into the circle.


Adhere the smaller of the two balloons to the upper left of the circle using liquid glue.  


In order to add a little more detail t the larger of the two balloons, glue the string of banners to the balloon with liquid glue.  Next using 1/4" double sided tape, place the balloon to the left side of the circle.


Almost done!  adhere the stars randomly on the card.  I used the larger of the stars on the upper right in order to balance the card. 


Time to add the card front to the bard base.  I used liquid glue for this in order to be able to give some wiggle room.  


Finally it's time to add the sentiment.  Stamp out the sentiment "The Sky's The Limit" using embossing ink.  Cover this with embossing and heat embossing with a hot air gun.  Trim the paper down as close to the font as possible.  Using 1/4" foam tap adhere the sentiment on the left side of the card towards the bottom.  


Here is what the end product will look like...


I hope that you enjoyed this project.  I hope that you can make one of your own and share with me.  You can tag me on Instagram @heartcraftpaper.

Until next time!

XOXO - HeartcraftPaper


Don't forget to come join in the fun at the Dies R Us Challenge Blog. There's a new challenge theme offered on the 1st and 15th of each month and one lucky randomly drawn winner will receive a gift voucher prize to the Dies R Us Store.   


https://blogger.googleusercontent.com/img/b/R29vZ2xl/AVvXsEigH2GGoJoFs6II1zex4FdZdwVk2kJQnNOQ_YzIT7kIzE16OSkctnbyFphdKZFyY_DaIX3CSkXaqnBa6CptmLms89KP2vAPdAmQVGn_Kz9CBfHrwHZBO1czkl9Mcl1uhjZnSwOloY84byM/s1600/41787084_10155963671007297_5873524281593298944_n.jpg 


 For your convenience, all the important Dies R Us links are provided below. 


click below for: