Good morning friends ~ Birgit here with a Mother's Day card, featuring some
fabulous dies from Dies R Us. This is a picture heavy post so lets get started.
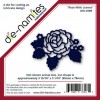
I started by cutting Die-Namites Rose With Leaves three times out of white card stock. On one layer, I adhered some Scrapbook Adhesive to the back of the card stock before running it through my die cutting machine. That way the adhesive was already on the back of the die for easy mounting.
I mounted the die with the adhesive onto my white Spellbinders square panel. This is one of their first die sets released so I'm not even sure it's available anymore but you can cut the square to the size that meets your needs for your project. I also mounted in all the negative spaces of the flower from this die, so the whole image was on the card stock. I then colored each negative space using Copics. Don't worry if your coloring runs onto the white border, as that's going to be covered by the other layers that were previously cut.
The Copic colors I used were: R12, R14, R17, G20, G21, G94, Y11 & Y13.
On the second layer of the die, I colored just the leaves using Copics and adhered it to the bottom layer, making sure it all lined up.
On the third and top layer of the die I simply fussy cut the leaves off the die cut leaving just the flower, which was then glued on the top, again being careful to line it up correctly. This completed the flower portion of the card.
Next, I die cut a Spellbinders Scalloped Square (again, very old) out of light blue card stock and pierced inside the rim of the die through the card stock to give it some interest and detail. The white flower panel is adhered to the scalloped panel and layered again with a Cheery Lynn Designs Nautical Wheeler Doily on the back. Let me just take a moment to say that this die is very intricate and it cut perfectly without shimming in just one turn of my die cutting machine. Incredible and perfect detail!
Next, I positioned the panel onto the card front, a regular A-2 sized card, and stamped the sentiment from My Creative Time's "Pretty Spring Wreath's" in red ink.
The gold metallic "MOM" die is from Cheery Lynn Designs Mom and this comes in a set of two, so it's a really good deal! A few white sequins finish this card off!
Supplies Used that you can find at Dies R Us:
QUICK DESIGN TIP: Before running intricate dies through your die cutting machine, add sheet adhesive to the back so when you cut it, it will be all ready to mount onto your project with adhesive on the back.
 |
click below for:
STORE CHALLENGE BLOG INSPIRATION BLOG |


Be still my heart.....Birgit this is GLORIOUS! I am loving all of those delicious fabulous layers! Great choice of colors too! WOW!
ReplyDeleteA really pretty card Birgit, I love how you have combined all the different dies. The doily is so elegant and makes a gorgeous touch to the card. Another lovely Mother's Day card!
ReplyDeleteOh my this is absolutely Lovely, love the coloring of the rose and leaves, the doily is a sweet touch with it!!
ReplyDeleteBeautiful card with such striking color choices. Thank you for the tutorial on making the rose. I definitely want to try that.
ReplyDeleteOMG! This is drop dead gorgeous. Just love it and hanks for the tutorial.
ReplyDeleteElegant is RIGHT, Birgit! Oh MY!!!! Thank you for the tremendous class in today's post. I never thought about coloring separate layers and then finishing with a clean, crisp layer on top! Your shading is beautiful, but so is the dimension! Fantastic! Also, I like what you said about the adhesive layer. Is there a particular brand you use? Thanks for the tip about spacing the piercings in "ordinary" die cuts, too. WONDERFUL card, and even more wonderful post. Thank you so much! hugs, de
ReplyDelete