Aug 25, 2017

With Love

Hello to you all.
Doreen here, I have a Shabby Chic card to share today
I must admit this is my favorite style of card.


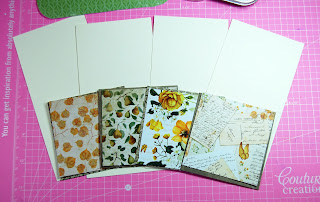
I started as always picking what I was going to use  and
die cut my papers and card.


I then decided to die cut some butterflies out of the designer paper


I then placed everything in position before adhering all my pieces
to my card blank and adding  some flowers, cheesecloth and some twine.

Dies I have used
Sue Wilson Designs - Striplet - Butterflies In Flight


Click below for:


 Don't forget to come join in the fun at the Dies R Us Challenge Blog.  There's a new challenge theme offered on the 1st and 15th of each month and one lucky randomly drawn winner will receive a gift voucher prize to the Dies R Us Store.  For your convenience, all the important Dies R Us links are provided below.

Aug 24, 2017

Silver and White

Hello again!  I have a card for your inspiration and pleasure.  Barbara Campbell here today to show you how you can make an elegant card with dies from the Dies R Us store.  
Here is my card

I started with White and Silver foil card stock.  I have a base of white, then a layer of silver and then more white. On the top white layer, I laid the dies a little wonky.  Like this. 

After that was die cut, I put it on the silver layer, so that it was peeking through. Then I just added the swirls and the circles in a way that I liked.  this really came together quickly and I think it could even made in to a Christmas card.  
I finished the inside too, keeping the same design.  


Here are the dies that I used. 


 Memory Box - Dies - Sheer Circle Trimming              Memory Box Sheer Circle Trimming 

                                           Memory Box - Dies - Elegant Scrollwork
                                                             Memory Box Elegant Scrollwork


I also used some Spellbinder circle dies and a Hello die that I had. There are tons of these dies, in the Dies R Us store.  Please check it out. I hope that I have given you some motivation and inspiration today.
 

Don't forget to come join in the fun at the Dies R Us Challenge Blog.  
There's a new challenge theme offered on the 1st and 15th of each month and one lucky randomly drawn winner will receive a gift voucher prize to the Dies R Us Store
 For your convenience, all the important Dies R Us links are provided below : 


Click below for:


Aug 23, 2017

Portrait of a Lady

HI Dies R US Friends !

Maryvonne with you today for a Birthday card I made for my Older Sister !

" Happy Birthday Man-line ! "

Here is my Card :


I inserted a Fabulous portrait of the
 GRAPHIC 45  papers  " Portrait of a lady"
in a cut made with a black cardstock
with the magnificent Jeanine's Art Dies - Rose Frame .


Inside of my card , with the same
 :


On the back ..


Here are the dies Dies R US used to make this card:
Voici les dies Dies R US  utilisés pour réaliser cette carte:


Don't forget to come join in the fun at the Dies R Us Challenge Blog.  
There's a new challenge theme offered on the 1st and 15th of each month and one lucky randomly drawn winner will receive a gift voucher prize to the Dies R Us Store
 For your convenience, all the important Dies R Us links are provided below 


Click below for:


Aug 22, 2017

A 3x3 Notecard!


Vickie Y with you today sharing a small notecard using a fun die set from Penny Black.

As I was creating this 3x3 notecard, I was reminded of making small lunchbox notes for my daughters while they were in grade school all the way through high school!  I would put a notecard, sometimes in their lunchbox, sometimes it would get tucked inside a textbook or put into their backpack.  Now that school has started, this die set would make creating a lunchbox notecard a cinch and will let someone know how special they are to you!

To created the notecard, I first die cut this set then colored the images using Copic Markers.

The colored die cuts are then layered with the hedgehog on top of the sun/tree die cut.  I used liquid adhesive to adhere the dies together before adhering to the 3x3 top fold noteard.

This was a fun card to create and brought back lots of fond memories!

Die Set Used Found in the Dies R Us online store, Penny Black Hedgehog Scene:
Don't forget to come join in the fun at the Dies R Us Challenge Blog.  There's a new challenge theme offered on the 1st and 15th of each month and one lucky randomly drawn winner will receive a gift voucher prize to the Dies R Us Store.  For your convenience, all the important Dies R Us links are provided below.
click below for:

Aug 21, 2017

A "Tin of Cards"!

Vicki here on this beautiful Monday morning.  Today I'm sharing an altered tin containing mini gift cards.  I taught a class a while back using these tins with Christmas tags in them.  I loved the idea and decided to make a few to give as gifts.


I started by tracing the tin lid and bottom.  The bottom I traced twice and trimmed one of the papers to fit inside the tin.
 

Next, I inked all of the edges before adhering the papers to achieve a vintage appearance to the tin.  I cut a thin strip from the collection pack cover to use around the outside of the lid.  This worked well and showed the image on all of the patterned papers.
 

The top of the tin is embellished with fussy cut and die cut papers.
 

Here are a few angle shots that show the dimension on the tin cover.


I made four mini cards that measure 3x3 covered with the same papers.  They are embellished using die cuts and have various greetings on them. 


And, here is the finished tin and card collection...
 

I really had fun creating all the tin and mini gift cards.  This makes a great gift that keeps on giving!
 
Featured Die Cuts
Memory Box Amana Circle
Memory Box Lorelei Leaf
Memory Box Virtuoso Music*
Poppy Stamps Ornate Tea Set
Prima Crocheted Doily
Spellbinders Fleur de Lis Rectangle Nestabilities
 
Thanks for stopping by the DRUS Blog...I hope you are inspired to use die cuts on all your projects.
Visit the Dies R Us Store and browse their awesome inventory of die cuts to add to your stash!

Don't forget to come join in the fun at the Dies R Us Challenge Blog.  There's a new challenge theme offered on the 1st and 15th of each month and one lucky randomly drawn winner will receive a gift voucher prize to the Dies R Us Store.  For your convenience, all the important Dies R Us links are provided below.


Vicki

Aug 20, 2017

Love You to the Moon and Back!

I've been missing from social media lately - it's just been too nice out to stay cooped up inside! But, I had a blast making this card and trying something new!

I've seen so many "galaxy" cards on Pinterest lately, I thought that this would be a perfect time to try one.

What I Used to Make my Card:
Black Square Card Base, 5" x 5"
Distress Ink in Tumbled Glass, Mermaid Lagoon, Wilted Violet, Black Soot and Blueprint Sketch
Die-Versions Whispers Stitched Nesting Squares, DV-573 (similar squares here)
Die-Versions Whispers Mrs. Moon, DV-627
Tim Holtz Mini Blend Tool
ColorArteTwinkling H20's in Metallic Mica Pewter, Heavenly White and Icicles
My Sentiments Exactly Quick Coloring Frame, Y602
Piccolo Silver Siam Embossing Powder
Embossing Ink
Watercolor Paper
Silver Mirror Card
Navy Blue Card

The first thing I did was make the background.  In order to make the inks look "galaxy" like you start off with the lightest ink, pounce it a few times around your paper and follow with your next darkest ink and so on.  There are many, many videos out there to help you - I actually used 3 different videos, and used what I had on hand.  I didn't take pictures of the very beginning of the galaxy (sorry!), I was so preoccupied I completely forgot.  But, here is where my watercolor paper was looking at about step 3.

And here is the galaxy at step 4.  You can see some of the inks are pounced to
make them darker.  The more variation of color the better your galaxy is going to look.  As I said, I used the ink colors I had on hand (I still don't have every single Distress Ink) and improvised.  

Instead of watered down white acrylic paint, I decided to use my Twinkling H2O's.  These paints are amazing watercolor paints; they shimmer so much! I used a toothbrush dipped in the H2O paint, and splattered the galaxy with a few different colors.
And here is my galaxy.  I also threw some water on it at random times.  I love how it came out, except (isn't there always an exception?) on the right hand side, but, that's no big deal because my die cut will cover that up.  

Setting aside the galaxy to dry, I grabbed some navy blue card and embossed my sentiment on it.  I then used my stitched square dies to cut the sentiment out.  Then it came time to cut out my moon die.  The moon die was the whole inspiration behind this card and I wanted to make sure it wasn't lost in the galaxy.  I debated a bit, cutting the moon out of silver card as well as the mirror card, but ultimately decided the mirror card looked the best.  I trimmed the galaxy down a bit, adhered it to the black square card base, glued the embossed sentiment up in the left hand corner and lastly glued on my beautiful mirror card moon.  Here is the final product.  What do you think? Here's another look:

Thanks so much for reading my post and I hope I've inspired you to try something new! Hugs, Christi  

Don't forget to play along at the Dies R Us Challenge Blog for your chance to win a gift voucher to the Dies R Us Store.  A new challenge begins on the first and fifteenth of every month.  
Be sure to Follow Us on FACEBOOK too. 

click below for:


i