Jul 6, 2021

A Patriotic Birthday

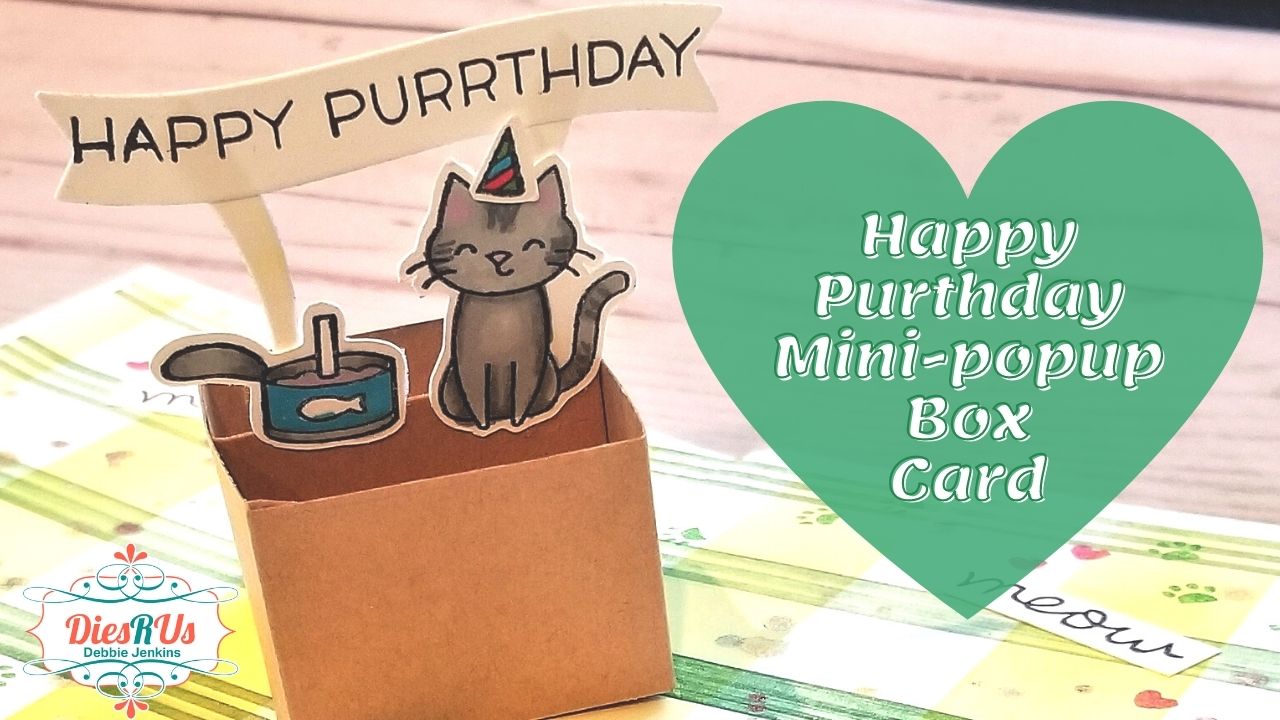
 Hi, I’m Sue SK of Ully Cat’s World and today we are making a 3-dimensional ice cream sundae card to fit in a mini slimline envelope.


The dies we’ll be using are available from Dies R Us include: 

(Here are alternate Happy Birthday Dies to the one I used.)

1. You will need:

  • One card base 11 inches x 3 3/8 inches from heavy white cardstock 
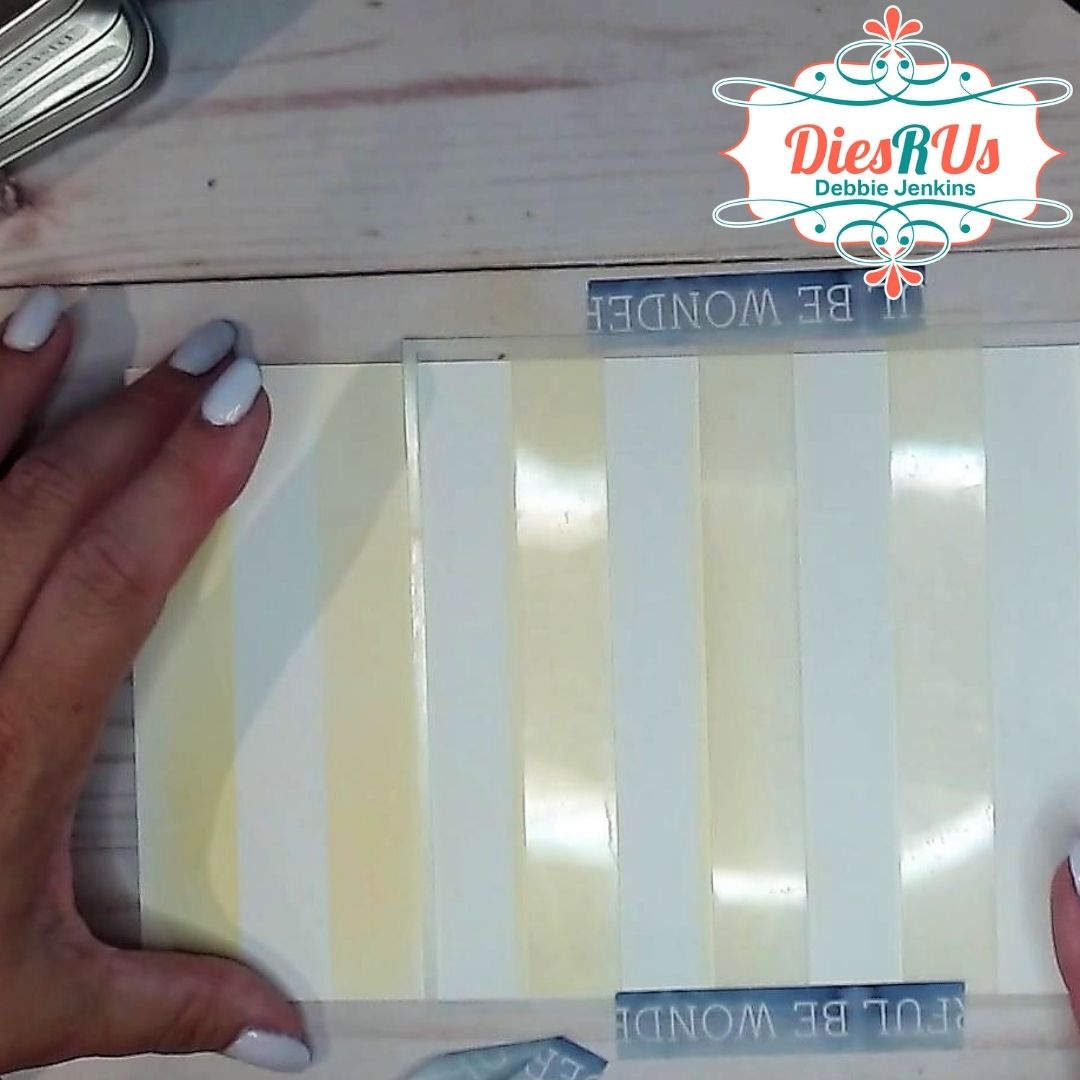
  • One outside star paper 11 inches x 3 3/8 inches
  • One red and white strip inside back paper 4 3/4 inches x 3 3/8 inches
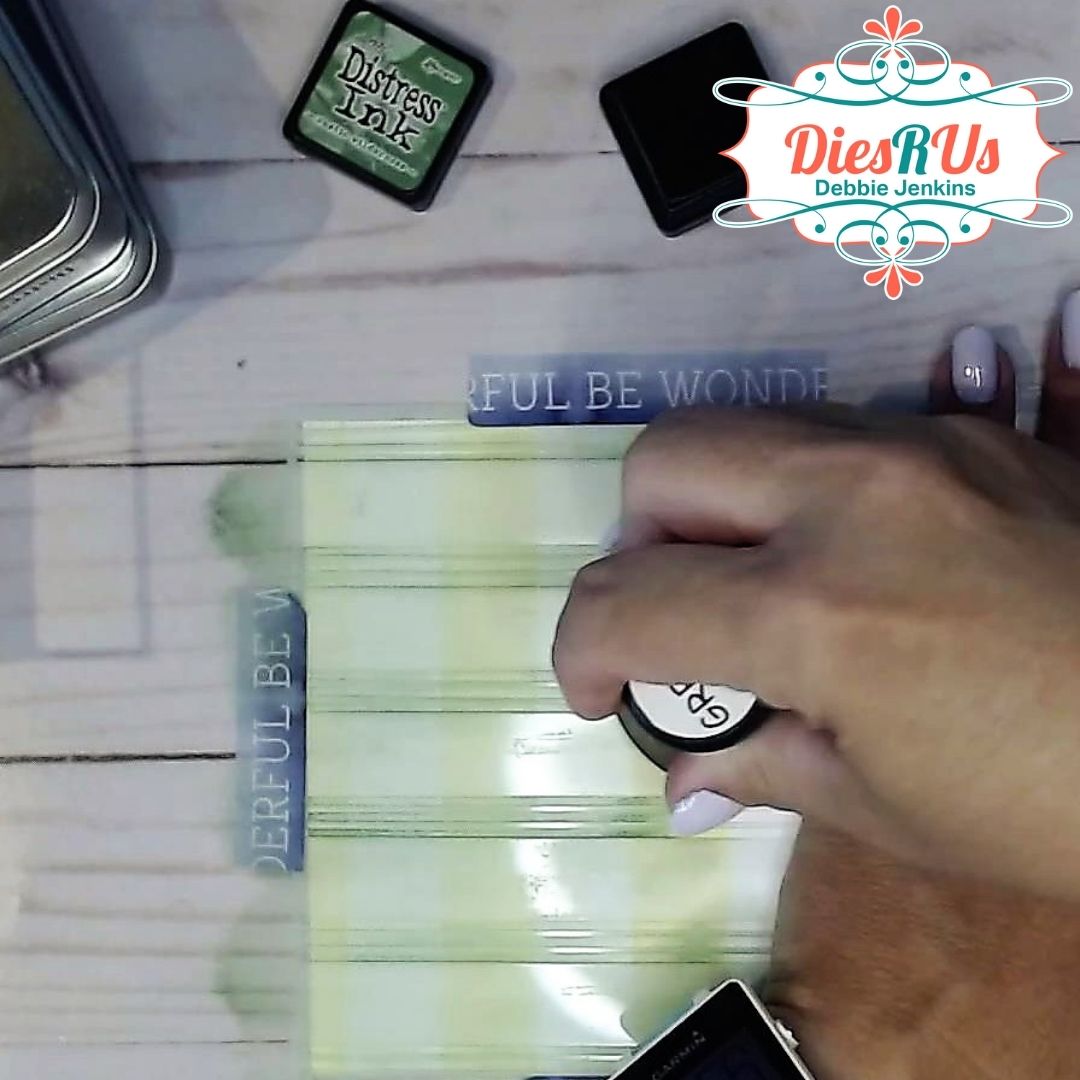
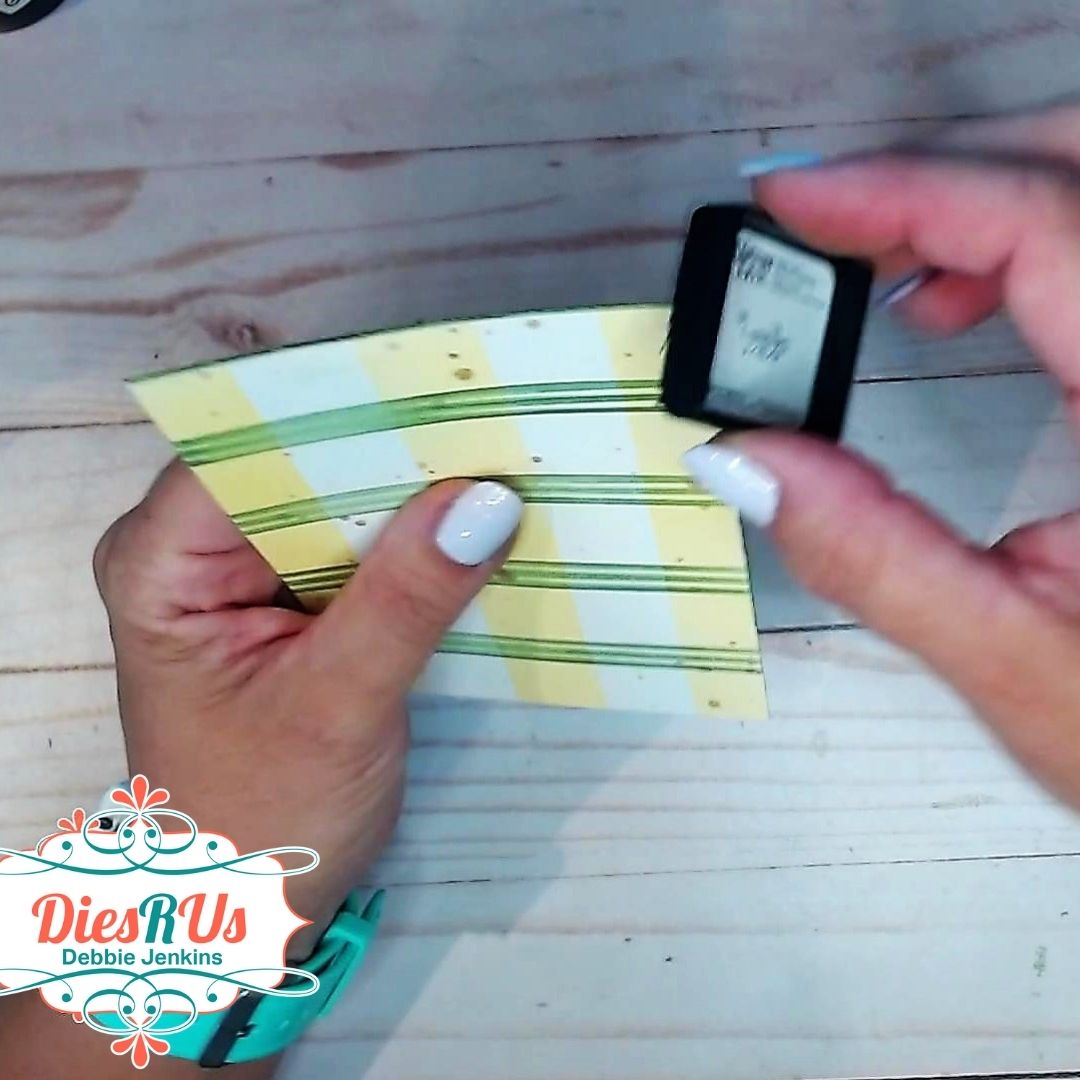
  • One striped, wood-grained inside base paper 6 1/4 inches x 3 3/8 inches 
  • One ice cream dish cut from vellum with details colored with white ink
  • Five ice cream scoops (I used 2 pinks, two white confetti and one chocolate) 
  • Two chocolate toppings (I coated mine with a clear glaze to make it shiny)
  • One whipped cream topping (I used a shiny coated white scrap) 
  • One red cherry (I cut from red card stock, added white gel pen accent, brown cardstock stem and coated with a clear glaze to make it shiny)
  • Two spoons (I cut mine from silver mirror cardstock)
  • Two sets of “You’re Sweet” sentiment – one red and one black or navy blue
  • Two sets of “Happy Birthday” sentiment – one white and one red 
  • Stars and circles for hanging banner and decorations 
  • One paper doily cut in half, 6 inches baker’s twine and clay red, white and blue confetti pieces 
 

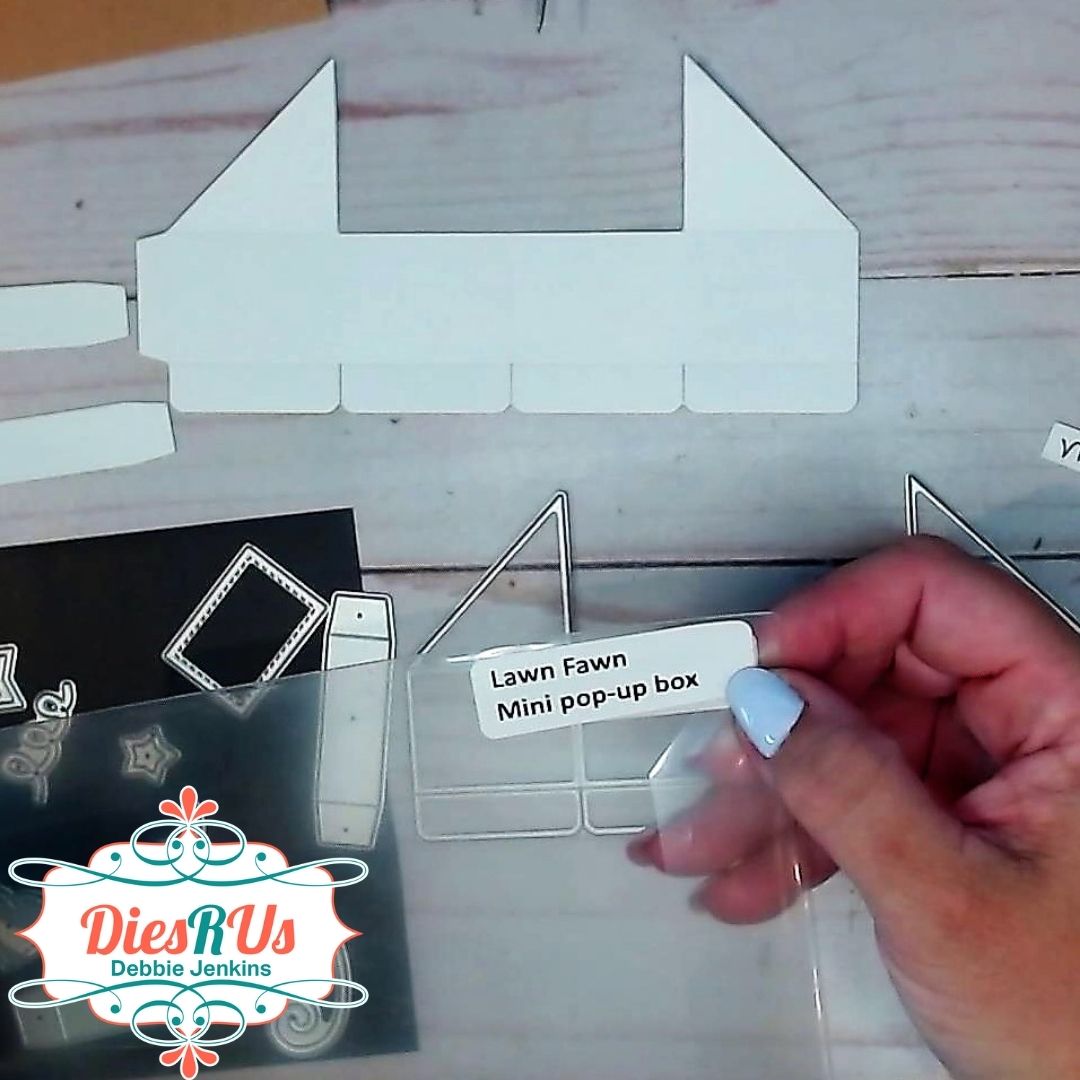
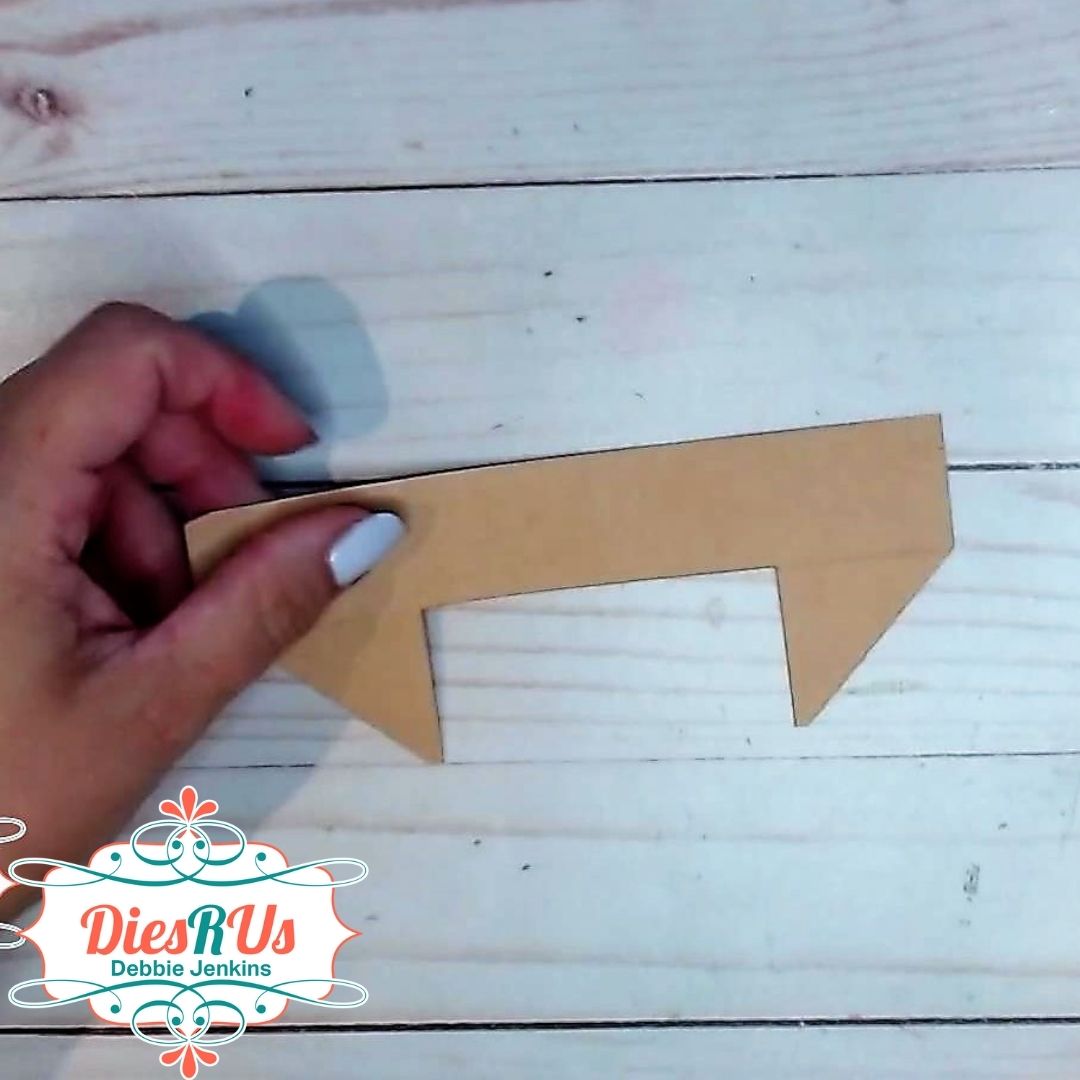
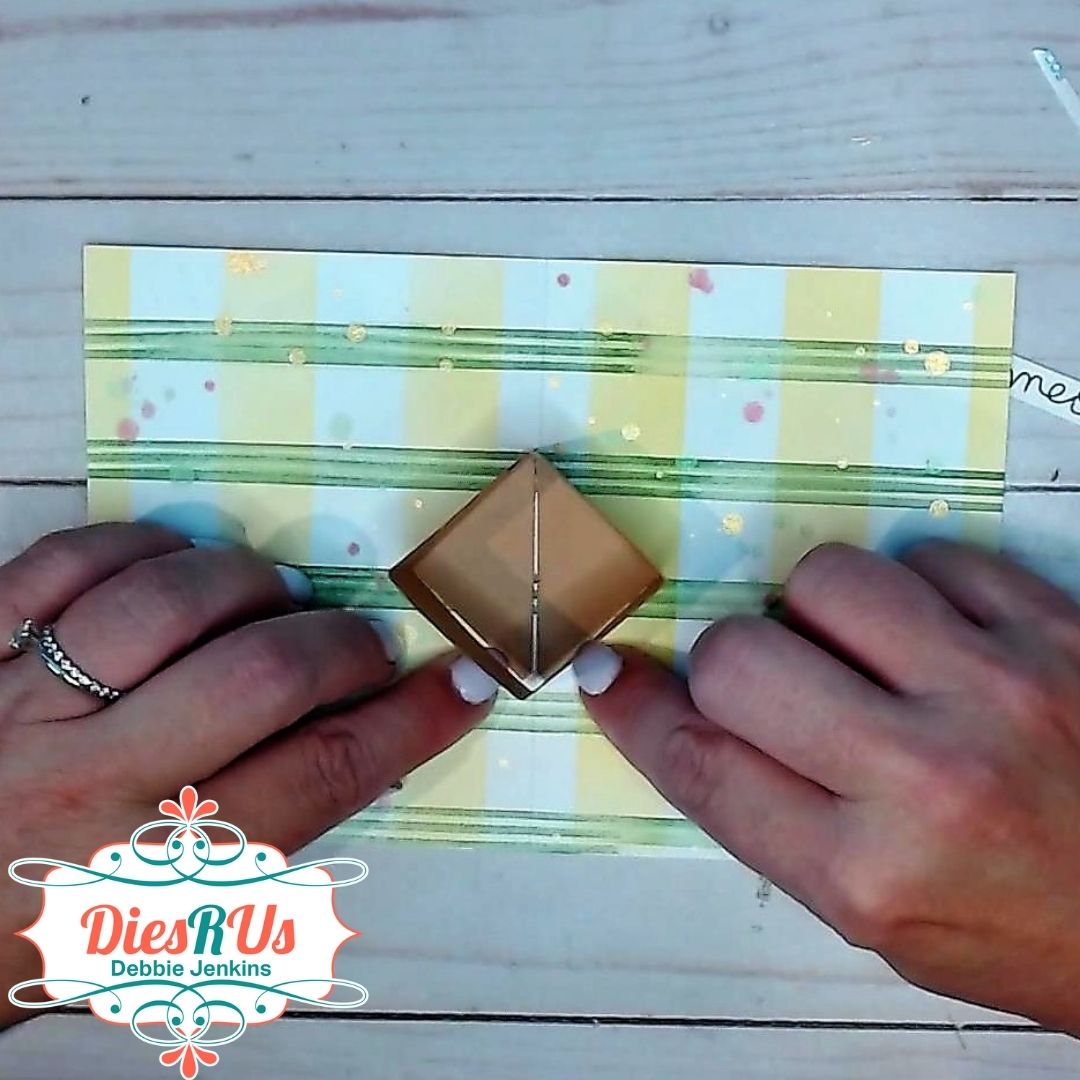
2. Fold the card base at 6 ¼ inches and place pop-up sundae die on fold per package instructions.

3. Follow the photos on working the folds. Start with bottom tier, then second tier and finally the two angled fold on first tier.


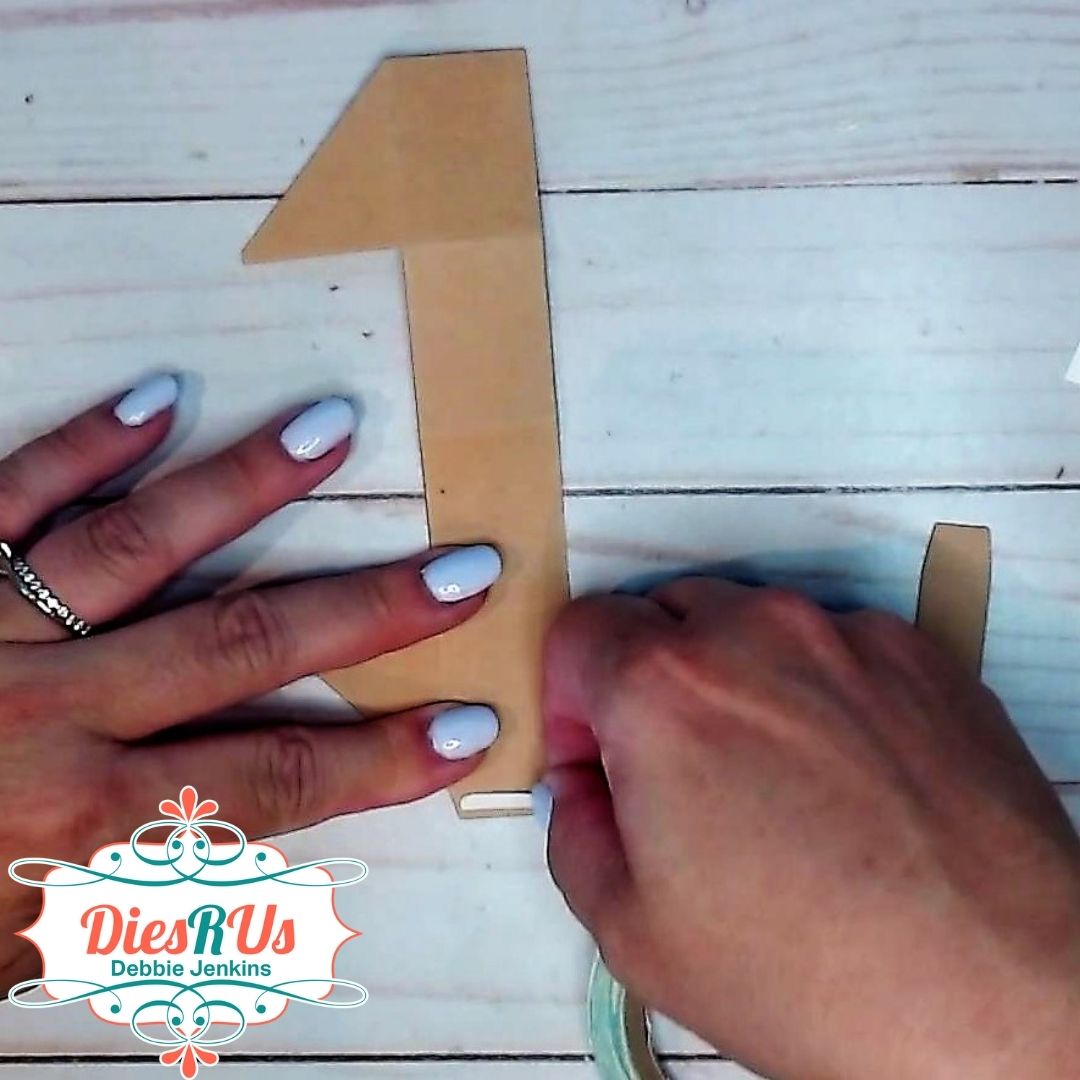
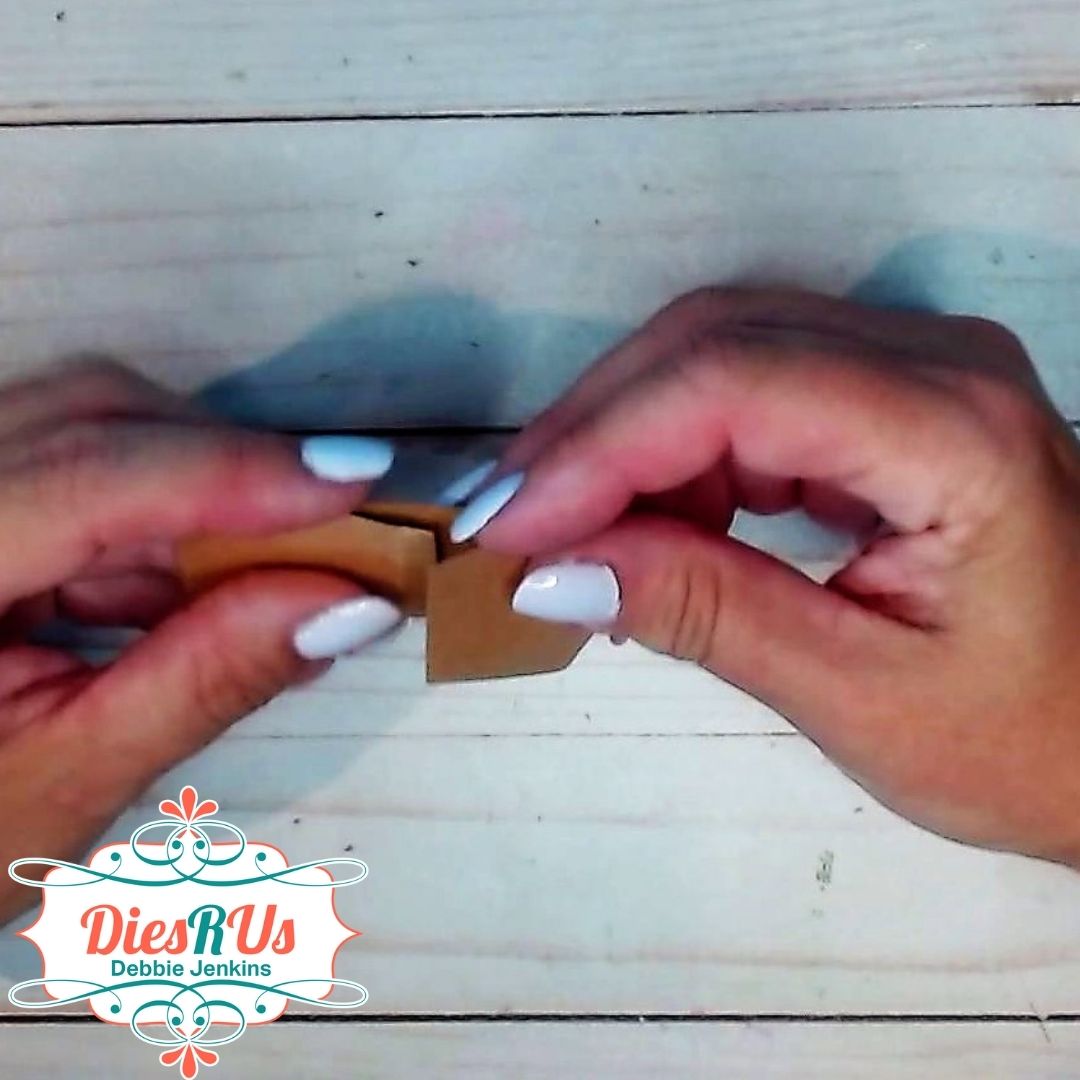
 4. Glue narrow support piece to back of dish stem as marked in photo. 

5. Glue white scrap to fill in rectangular hole in pop-up dish base, if covering with a vellum dish.

6. Place striped inside back and base papers behind/under card base and trace opening with pencil and cut out as shown in photo.

7. Adhere star paper to outside of card base.

8. Adhere inside striped papers to inside of card. Attach the cut-out sections as well.

9. Glue two scoops to pop-up dish and then add glue to back side of vellum dish where white inked decorations are so glue won’t show through vellum. Position vellum dish over pop-up dish base.

10. Attach ice cream scoops, toppings, cherry and one spoon to tiers, making sure that the movement of pop-up is not impaired by these decorations. Add clay confetti sprinkles.

11. Trim and fit a half paper doily under dish. Secure to base with dots of glue at three points.


12. Position and trim the other half of doily to front of card.

13. Glue the two sentiments together off-setting the darker shade in back to create a shadow effect.


14. Position and attach sentiments on front and inside card base.


15. Glue-up stars and circles banner on baker’s twine and glue in the corners over ice cream. Decorate with additional spoon, clay confetti sprinkles and paper stars. 

Hope this sweet card has put a smile on your face and provided some inspiration for your crafting.

 SUPPLIES Used from Dies R Us:

·         Karen Burniston - Dies - Ice Cream Sundae Pop-Up - 1082

·         Karen Burniston - Dies - You're Sweet - 1087

·         Karen Burniston - Dies - Paper Frames Pop-Up -1122

·         Poppy Stamps -Happy Birthday Poe Script

·         CosmicShimmer - Specialist Acrylic Glue - 125ml

·         Sizzix - Big Shot PLUS die cutting Machine


Don't forget to come join in the fun at the Dies R Us Challenge Blog. There's a new challenge theme offered on the 1st and 15th of each month and one lucky randomly drawn winner will receive a gift voucher prize to the Dies R Us Store.  


 For your convenience, all the important Dies R Us links are provided below.


click below for:

STORE

CHALLENGE BLOG

FACEBOOK

INSPIRATION BLOG

FRIENDS OF DIES R US PINTEREST PAGE

Jul 5, 2021

Zen Thanks

Hello, Alicia with you today.  I made a fairly simple card enhanced by themed printed papers and inked cuts.  I began with the  Elizabeth Craft Asian Accessories set.  I knew I wanted the umbrella shade to be cut from a pretty floral paper.  I chose the background paper and cut the rest of my pieces.


I cut the umbrella handle and rocks in white card stock.  I used Distress inks to color them.


I manipulated the embossed lines in the umbrella to create dimension.  I cut the sentiment from coordinating paper.  The resulting card is about as clean and simple as my work gets.  Therefore, it's my zen thank you card.


Products from the Dies R Us store:

 Elizabeth Craft Asian Accessories set


Distress Oxide Ground Espresso ink

other products:
Die Cuts with a View Far East papers
White card stock

Don't forget to come join in the fun at the Dies R Us Challenge Blog. There's a new challenge theme offered on the 1st and 15th of each month and one lucky randomly drawn winner will receive a gift voucher prize to the Dies R Us Store. For your convenience, all the important Dies R Us links are provided below.

https://blogger.googleusercontent.com/img/b/R29vZ2xl/AVvXsEjCjT8pw_L9T-z6-KjvbFtjxltch0jDrbOVSRoR7-pMeQw8lEYfIDENxvu0UYve6R3ZP9GqtyyTDEJbdtSMk3bGQBx_Y3u5-ayMxatDG7IHMgflmEHGKjuk1fXzqacoc_aa78anm5BPmKz1/s320/*logo%2Bcollage.pages.jpg

click below for:

STORE

CHALLENGE BLOG

FACEBOOK

INSPIRATION BLOG

FRIENDS OF DIES R US PINTEREST PAGE

Thanks for stopping by


Jul 2, 2021

Christmas Artist Trading Coins

Hello, crafty Dies R Us fans! Leslie here from Love To Scrap 2 and I’m stoked to be back on the blog today with another awesome DT inspiration project! I created a set of four Christmas Artist Trading Coins featuring the amazing Memory Box Joy Circle, Dove Circle, Peace Circle and Fancy Deer Circle dies paired with some pretty patterned paper, and a couple of them have some glitter washi tape on the backgrounds. I am a certified ATC fiend and have a growing collection that I started several years ago, and if you know me, you know that I typically don't actually trade them because I'm greedy that way, lol! ;)


ATCs - both cards and coins - are so much fun (and rather addictive), so let's get started!

1. Using the Memory Box Joy CircleDove CirclePeace Circle and Fancy Deer Circle dies, cut elements for each coin from white, light purple and brown cardstock. 


2. Punch eight 2-1/2" circles from white cardstock (two or each coin for added stability) along with four circles from patterned paper. Choose some glitter washi tape if desired.


3. Add the glitter washi tape to the patterned paper circles and then adhere the die cut elements to the patterned paper backgrounds. 


4. Adhere the patterned paper backgrounds to the coin bases along with the sentiments, and you're finished! I have to point out that I originally cut a light blue 'peace' die cut and it blended in too much with the light blue snowflake background so I cut a white one which is much easier to see! ;)


Dies R Us products used:
Memory Box Joy Circle
Memory Box Dove Circle
Memory Box Peace Circle
Memory Box Fancy Deer Circle

Don't forget to come join in the fun at the Dies R Us Challenge Blog. There's a new challenge theme offered on the 1st and 15th of each month and one lucky randomly drawn winner will receive a gift voucher prize to the Dies R Us Store. For your convenience, all the important Dies R Us links are provided below.

https://blogger.googleusercontent.com/img/b/R29vZ2xl/AVvXsEjCjT8pw_L9T-z6-KjvbFtjxltch0jDrbOVSRoR7-pMeQw8lEYfIDENxvu0UYve6R3ZP9GqtyyTDEJbdtSMk3bGQBx_Y3u5-ayMxatDG7IHMgflmEHGKjuk1fXzqacoc_aa78anm5BPmKz1/s320/*logo%2Bcollage.pages.jpg

click below for:

STORE

CHALLENGE BLOG

FACEBOOK

INSPIRATION BLOG

FRIENDS OF DIES R US PINTEREST PAGE


Thanks so much for stopping by today - we'll see you next time!

Scrappy hugs,
Leslie


Jul 1, 2021

Happy Purthday Mini Pop-up Box Card


Hi Guys! I'm Debbie from Debbie J’s Crafting Corner, here today sharing how I used several stamp and die sets from Lawn Fawn to create this Mini Pop-up Box Card.

I love showing the process when I’m creating.  I hope my tutorial and video help you see that, if I can make it, You Can Too!

I used the following stamps and dies from Dies R Us:

Lawn Fawn - Mini Pop-up Box dies 

Lawn Fawn - Meow you Doin' Stamp set


Check out the video showing how I created this fantastic card!


Video Chapters

  • Introduction: 00:00

  • Coloring: 1:00

  • Stenciling the background: 5:00

  • Splatter!: 6:20

  • Decorating the Front: 7:30

  • Creating the pop-up: 9:22

  • Decorating the inside: 11:11

Coloring with Parkoo Markers

I’m still practicing with these new-to-me alcohol markers (so far, I do like them. You can check out the unboxing and other videos where I use them on my YouTube Channel).  And today, I’m coloring up a bunch of kitties.

The idea for this box is taken from my own cats… if there is box in the floor, the kitties will sit in it.  As the meme goes “If I fitz, I sitz”.

Anyway, they love them enough that we tend to leave boxes from new deliveries on the floor for a few days so they can play (and sometimes fight over them).

Stenciling the Background

I decided to give the kitties a rug to play on.  

So I stenciled a couple of 8 ½ x 5 ½ cardstock panels with the Honeybee Plaid Background Stencil and some Distress Inks.


I cut one of the panels down to smaller then A2 size. Then I added a little spatter with some diy shimmer sprays made from Perfect Pearls and water. 


I inked the edges, and that finished up the “rug” background for the front of the card.

Making the popup

Next I started working on the popup by cutting out the main piece from the mini pop-up box die set.

I don’t want a white box… so I cut it out of kraft cardstock and cut off the 4 top tabs.

To assemble the box, I folded along the score lines and added some score-tape to the tab.

After lining the tab up with the other end, and attaching them together. We can add it to the other stenciled panel.  I’ve already folded it in half. So, I added a generous amount of adhesive to the triangle shaped tabs, folded them under the box and lined them up with the middle score line of the panel.

There are also a couple of “bridge” dies.  These create pieces to go across the inside of the box so you have a place to adhere your characters and decor.

I cut one of these and attached it inside the box.

Next it’s time to decorate!

Here are some photos of the finished card.

Thank you so much for dropping by.  I hope you enjoyed this project and would love to hear what you think of this card.

Please leave me a comment down below!


Be sure to check out my YouTube Channel, Blog, Pinterest, and Instagram for more inspirational projects.  I also have a fun Facebook Group where you can share your projects with other fantastic creators.  We would love to see what you create, so come join us!


Head back to the Dies R Us Blog tomorrow for more fabulous inspiration from the DRU Inspiration design team.


Be sure to check head over to Dies R Us Challenge Blog.  We love to see what you create, and this is a perfect place for you to share your creativity.  


PLUS, there is a new challenge theme offered on the 1st and 15th of each month, and one lucky randomly drawn winner will receive a $10 gift certificate to the Dies R Us Store.  


Thanks so much for stopping by. And remember, if I can make it, YOU CAN TOO!