Apr 13, 2016

The Sky's the Limit

Hey everyone, it is Deanna here again back with another  Die R Us post.  Here is what I have for you today.


For this card I started with white card stock that I cut and scored to make a 4 1/4" X 5 1/2" card base.  Next I cut a piece of watercolor paper at 4 1/4" X 5 1/2".  Using some light blue watercolor paint, I painted the entire piece of paper so it looked like the sky.

Next using Lawn Fawn Blue Skies stamps and matching dies I stamped my balloons and clouds onto watercolor paper.  I colored the images with some watercolor pencils.  Once I finished coloring the images I die cut them out.

Once I had the images cut out I stamped my sentiment with some dark blue ink onto the sky blue watercolor paper.  I then arranged the clouds and my balloons onto the paper and adhered them down.  Finally I adhered the sky watercolor paper to the entire front of my card.

I hope you will join in on the fun over at the Dies R Us Challenge blog.  Be sure to pop over to the Dies R Us store to do some shopping while you are here. And don't forget to like us on our Facebook page.  You don't want to miss out on anything that is happening at Dies R Us.

Follow Dies R Us!
click below for:
STORE
CHALLENGE BLOG
FACEBOOK
INSPIRATION BLOG

Apr 12, 2016

Happy Birthday!!

Hello everyone!
Patricia here with my first inspirational creation for you today! I wanted to make a lovely Birthday for a friend. I was so excited with all of my new dies and did not know which one to use so I choose to use my new Chandra Stem die from Memory Box to make my card.

 I die cut the Chandra Stem twice on the top white layer without pulling it out of the layer, I used scrap papers from the clutter on my desk. Add the ribbon, yellow sequins and the clear rhinestones.
I love the outcome of this cute and simple Birthday card!

Please be sure to take a minute and check out all the fabulous dies available at the Dies R Us Store!  AND, don't forget we have a Dies R Us Challenge Blog too!  A fun new challenge is offered on the 1st and 15th of each month with a PRIZE VOUCHER offered to one lucky winner each challenge.  It could be YOU!
 I’ll see you again soon.  Have a happy day!

Patricia

Follow Dies R Us!

click below for:
STORE
CHALLENGE BLOG
FACEBOOK
INSPIRATION BLOG

Apr 11, 2016

Enjoy the Journey


Some people have trouble making masculine cards but there are so many great dies at the Dies R Us Store, you can find so much inspiration to use for those guys in your life.  I decided to use Cheery Lynn Designs- Steampunk Corner and Memory Box - Mini Gears. I also used Spellbinders A2 Distressed Edges dies.


I started out with a Kraft card stock base, cut brown and cream card stocks with my Spellbinder A2 distressed edges dies. Used DCWV Foiled Cardstock to cut my corners and gear dies.  On the cream card stock I used distress inks of crushed Olive, tea dye and Rusty hinge with a sponge dauber to add color to the background and then stamped the background using Tim Holtz, The Journey stamp set for the sentiment, arrow and clock face.

I couldn't get a good picture with both corners showing the shine of the corner die, but you can see it on the top right die and the gears.


TIPS

I love using metal papers and dies for cutting out my gears but you can also emboss a piece of card stock with silver, gold or bronze embossing powder and then cut out the dies.

My other tip is to use removable tape or if you have bought more washi tape then you could ever use in a life time, then you could also use that to hold your item that you are cutting out in place as it goes through your machine, that way you will get a clean cut, with no slippage.


Click below for:

Thanks so much for stopping by and check back every day for more great inspiration from all the girls on the design team.  

Apr 9, 2016

Cupcake Love

Hello friends~ Birgit here and I'm excited to be posting my first project for the Dies R Us inspiration blog!
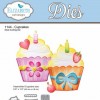
I'll start right off with a couple of birthday cards I made using the really sweet Cupcake dies from Elizabeth Craft Designs.


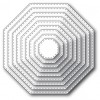
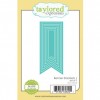
I started by cutting all the pieces from the cupcake die set in white card stock, except for the liners, which I cut from colored card stock. I added distress inks to color up the cupcake pieces and then assembled them. I cut two Stitched Octagon Layers from Memory Box using white and a coordinating color card stock for each cupcake. I layered the cupcakes on the octagon layers and placed a Cheery Lynn doily behind one and a Taylored Expression fishtail banner behind the other.

My cards feature the following Dies R Us products:


QUICK DESIGN TIP: ~ For die sets than have many small components, try cutting them all out of white card stock and adding the color to each piece using your favorite coloring medium. This saves time by not having to cut all the pieces out individually using different colored card stock and also gives your die cut shapes a softer look.

Be sure to stop by every day for a daily dose of fresh ideas from the Dies R Us design team. You can also visit the Dies R Us facebook page and "Like" us along the way!
Visit the Dies R Us challenge blog for your chance to win a gift certificate to the Dies R Us Store.

Thanks so much for stopping by! Blessings~ Birgit 

Follow Dies R Us!
click below for:
STORE
CHALLENGE BLOG
FACEBOOK
INSPIRATION BLOG


Apr 8, 2016

Butterflies in Flight: Sending Hugs


Hi Everyone!   It's Ann here with a bright and springy card for today's inspiration.

I used the new Sue Wilson die called Butterflies in Flight (CED1611).  It can be used in so many ways...........on my card I chose to cut it out with the frame that comes with it.   This is what the die looks like:


 If you decide not to use the frame, then the die cut stays on the card and will not detach, giving your card a totally different look which can be seen on my personal blog.

To make my card, I first cut the swirled part of the Butterflies in Flight with the frame using blue glitter paper.  To make sure the frame came out centered perfectly all around the swirled part, I taped the dies together with some painter's tape.  Then I cut out six butterflies on vellum that I colored with Copics.   These butterflies are exactly the same size as the ones cut into the design part of the die.  No paper piecing involved here.  Simply turn the swirled frame die cut over, match up the butterflies in their correct spots,  and glue them on with a glue pen.


Cut the frame with the swirled part attached and some of the butterflies.


Turn the frame part over, run a glue pen along the white swirled area where the butterflies will go, and press on  your cut out butterflies.


This is what the panel will now look like (for demo purposes, I only used two of the four butterflies).

After cutting out the "sending hugs" from the Frantic Stamper Accessory Words #3 (FRA9467), also in glitter paper, I mounted it all on a piece of white card stock that was layered on a piece of blue glittered card stock.  The overall card measures 5 x 6.5".

Don't forget to play along at the Dies R Us Challenge Blog for your chance to win a gift voucher to the Dies R Us Store.  A new challenge begins on the first and fifteenth of every month.  Be sure to Follow Us on Facebook too.

Apr 7, 2016

Birds, Borders and Boo-Boo's


Greetings, Crafty Friends! Donna here with my first post as a new Dies R Us Inspiration Design Team Member!
The Dies R Us  on-line store carries a huge assortment of amazing dies by several manufacturers.

Have you ever... ?

Have you ever planned a design in your head, and then made one boo-boo after another so that your project ends up completely different?
 THAT'S what happened with this card.
(Please click on any of the photos to see up-close details)


My card features the following Dies R Us Products:

TIP:

Change the appearance of die cut "frames" by adding borders to them:

TIP:
It is not necessary to use the dies within a die set to create pretty frames. Change it up by using other dies (like circles, ovals or shapes) rather than what the manufacturer has put together.
This gives you the ability to create frames to suit your project needs:

TIP:

Mark frequently used dies to help expedite your crafting:


The Poppy Stamps Grassland Border does not have a cut edge on the bottom, making it ideal for wide borders of grassy layers, or turned upside down for icicles. It's a long die, but can be cut apart to use in patches (shown in the base of the card). It can also be fussy cut in a shape, shown in the sample below:

TIP:

How to customize the sizes of your panels while keeping the details of the dies (like the piercings on the Sue Wilson set):


Boo Boo Time!

While the stencil for the Fleur de Elegance die is beautifully detailed, I was displeased with the way the ink looked around the decorative portion of the die cut. It was too dark. To fix that, I resorted to glitter. Probably opaque white embossing powder would have been easier:
AFTER:
I used a very large transparent chunky glitter and SNS Waterfall Ultrafine Glitter to "distress" the problem area and hide the ink:

If you'd enjoy learning more about how this card was made, digital tips, and all the products used, please visit my blog post here

See you next time!

Follow Dies R Us!
click below for:
STORE
CHALLENGE BLOG
FACEBOOK
INSPIRATION BLOG


Apr 6, 2016

Thanks

Hey everyone, Deanna here and I am excited to present to you my first Design Team post for Dies R Us.  Here is what I made for you today.
I started with a turquoise card stock cut and folded to make a 4 1/4" X 5 1/2" base. Next I added a black mat cut at 4" X 5 1/4".  I then took some watercolor paper and cut it to 3 3/4" X 5".  I inked the watercolor paper with Squeezed Lemonade, Abandoned Coral and Peacock Feathers distress ink.  Once I had all the colors on the paper the way I wanted them I lightly spritzed it with some water then dried the paper with my heat tool.

My flowers are from the Poppystamps Olivia Blossoms die.  I cut them out of yellow and used a yellow colored pencil to highlight the embossing in the middle of the flower. For the sentiment I used a die from Impression Obsession Thanks Word.

Are you up for a challenge? Then stop by the Dies R Us Challenge Blog and join in. The current challenge is to use scallops!  And, don't forget to stop by and like our Facebook page. Of course, you will want to stop by the Dies R Us store site to check out the huge selections of dies they have.  Thanks for stopping by. Be sure to return tomorrow for another great post by our Design Team.


Follow Dies R Us!
click below for:
STORE
CHALLENGE BLOG
FACEBOOK
INSPIRATION BLOG


Apr 5, 2016

Thinking of you

Hello everyone
Patricia here with my first inspirational creation for you today!
I decide to make a lovely but sweet card for my BFF who lost her grandma recently, a card just to remind her that I am here for her.
 I used my FAV Lunette Butterfly Die from Memory Box and the cutest DIE 152-N from Impression Obsession. I've always wanted to make a diagonal cut out card but since it was out of my comfort zone I was afraid to try it..... but today I did!! and I Love the delicate sweetness of the Die cut border is so simple but yet so delicate!

  
 I did want the card to be so neutral so I die cut Lunette butterfly using aqua card stock and stamped the clear stamp "Thinking of you" sentiment using black memento ink. To accent it a bit more added the clear rhinestone and lime hologram sequin.  I really love the outcome of this card!!

Please be sure to take a minute and check out all the fabulous dies available at the Dies R Us Store!  AND, don't forget we have a Dies R Us Challenge Blog too!  A fun new challenge is offered on the 1st and 15th of each month with a PRIZE VOUCHER offered to one lucky winner each challenge.  It could be YOU!
 I’ll see you again soon.  Have a happy day!

Patricia

Follow Dies R Us!
click below for:
STORE
CHALLENGE BLOG
FACEBOOK
INSPIRATION BLOG


Apr 4, 2016

Baby Announcement

Hi I am so excited to be posting my first project for the new Design Team.

Our Youth Pastor and his wife just had their first baby, so I made this little desk top photo display and announcement for them. Since I haven't given it to them yet, I didn't get their permission to use the photo of their son so I used a picture of our daughter that is 26 years old. They have a picture of their son in a baseball uniform laying next to a baseball bat which gave me the inspiration for this project.  They are St. Louis Cardinal Fans so I just had to use my Poppystamps Cheery Cardinals on top of his name Memory Box - Parker Upper Alphabet. Instead of putting two pictures on the base, I made a tag with his stats using Poppystamps Pinpoint Main Street tags. For the letters on the tag I used Die-versions Editor in Chief font for the numbers I used Die-Versions Peppermint Font .

That is just what I love about this craft, we can personalize a project.  You could use this same idea on a plaque or Scrapbook page.

Editing this post with the actual picture of Owen on the first picture:


Here is a view from the side


If you are interested in seeing how I put together the base you can head over to My Blog where I have some instructions for you.

Don't forget to stop by every day to see more inspiration from all the ladies on the team, and I will be back next Monday with a card to share. Visit our Dies R Us challenge blog for your chance to win a gift certificate to the Dies R Us Store .

Thanks so much for visiting with us today,

Apr 1, 2016

Saying Hello and Good-Bye

Hello Dies R Us Fans!

Today we sadly say good-bye to the current design team  ...

Diane, Sherri and Leslie!
These ladies have shared so many AMAZING creations using die cuts and the staff at Dies R Us can not thank them enough for all their hard work and dedication!

Happily, you will still be able to see die cutting creations from both Diane and Sherri over at our Dies R Us Challenge Blog!   But sadly, we will be loosing Leslie from both blog sites.  We wish her all the best in her personal and crafting life.

As for me, Darlene, you'll still be seeing me around, as I was asked to be DT Coordinator for the new DT which I quickly replied YES!  LOL ... call me crazy!  The new DT is anxious to get started and looking forward to sharing their styles in creating with die cuts.

Our new Dies R Us Design Team will begin sharing their creation with you on 
Monday, April 4th.

We have TWELVE ... yes 12 ladies on the team now!

Please extend a Welcome and Say Hello to ...

Berni Cuttino

Patricia Chalas

 Connie Griffin
  
Birgit Norton

Deanna Mulder

Ann Greenspan
 
 Donna Phelan

 Natalya Trofimova
 
Janice Rohde

Olivia Marmara
 Paper Dreams by Olivia

Donna Ellis
 Creative Smiles

Wait ... that's only 11 ????
Oh yea ... me ... lol

Darlene Pavlick, DT Coordinator

We hope you'll stop back frequently to draw inspiration from
these talented ladies!  

Please don't forget about our new challenge in progress at the
Dies R Us Challenge Blog!  
The theme is:  USE SCALLOPS