Showing posts with label floral card. Show all posts

Apr 21, 2021

Floral Thank you

 Hello Friends,

Diane here with Pretty Fun Stuff to share with you my Dies R Us Spring card inspiration.  Today I have a pretty little lilac, pink and white A2 sized Thank you card.


This card was really simple to create with the Tutti Designs Multi Floral Background die available at Dies R Us.  The item number is Tutti-640.  


Simple Card Instructions:
I cut a piece of pink card stock at 8 1/2 X 5 1/2, scored it in the middle at 4 1/4.  This makes an A2 sized card.  Then I cut a piece of purple glitter cardstock at 4 X 5 1/4.  Then using the floral background die by Tutti Designs, cut it out of 110 lb  white card stock. Next cut out any die cut butterfly and either stamp your sentiment or in this case die cut your sentiment using any type of sentiment die.  Then glue it all on your card front base.  Place your purple glitter layer first, then your floral background die cut, next place your butterfly on the card and then your sentiment.  Your done.  Simple, easy and fun card to make.


Here is another simple card using this lovely die.  This time I cut it out of black card stock and used a multi-colored background paper for added color and interest.  I cut a blue silhouette butterfly and a Thank you die for my sentiment.


Products used from Dies R Us:

Tutti Designs "Multi Floral Background" Tutti-640


There's lots of butterfly dies to choose from...here is a good one.

Butterfly Dies available at Dies R Us:  https://www.diesrus.com/search?page=5&q=Butterfly+dies


Sue Wilson has some great sentiment dies available at Die R Us:  Follow the link for some great examples:  https://www.diesrus.com/search?q=Sue+Wilson+mini+sentiments
If you have them, I would encourage you to use butterfly dies and sentiment dies you already have in your stash.  But these are some excellent options for you.


Here's another look at both cards I created for you.  I hope you enjoyed this time we spent together today.  Thanks for stopping by the Die R Us blog today. Hugs, Diane


Don't forget to come join in the fun at the Dies R Us Challenge Blog.  There's a new challenge theme offered on the 1st and 15th of each month and one lucky randomly drawn winner will receive a $10 gift certificate to the Dies R Us Store.  For your convenience, all the important Dies R Us links are provided below.


click below for:


Thanks so much for stopping by.


May 15, 2019

Hey Gorgeous!

Happy Wednesday my crafting friends!  Kristina Hein here to bring you today's project.


I just love how you can take an all white die and create something so colorful!  The floral die is Botanical Spray from Frantic Stamper Inc.  Here it is before coloring:


And here it is all colored up!


Here are the lovely Copic markers I used.


Once I finished coloring the floral die, I got to work on creating the sentiment.  This time I used the Hey Gorgeous die from Pinkfresh Studio.


I cut the shadow layer out of a bright green glitter cardstock.  The fine black word layer I cut out of black paper that I sprayed some shimmer spray onto.  I applied Stick It to the back of the black cardstock before cutting out the letters since they are so fine.  Then I peeled off the backing and adhered to the glitter shadow layer.  Now for the card base.

The card base itself is made out of Neenah Solar white 110lb cardstock.  Next I cut a layer of black cardstock using a stitched rectangle die from Elizabeth Craft Design.  I played around with the placement of the floral die cut until I found the perfect spot.  Some of it hung over the edge of the panel so I strategically cut here and there.  I then just tucked the cut off pieces back in different spots.  No sense wasting any of that loveliness!  I used liquid glue to adhere all of the it to the black layer.  I used the same liquid glue to adhere the "gorgeous" word into place.  For the "hey" portion of the word I used foam tape so it would pop out above the floral die cut.  

After I took a step back and gave it the once over.  I decided that it just felt too plain for my taste.  I splattered white paint all over the black panel.  Once it was dry, I went in with White Blizzard Nuvo drops.  I placed a few random drops and then added some to the flower centers.  Once the drops were dry (I waited several hours to be sure!) I glued the black panel to the card base.  And I called it done!

Check out all that sparkle!


And one last photo...


Supplies Used:

Stick It Adhesive sheets
Shop at:
Dies R Us
Neenah Solar White
Neenah Solar White
Shop at:
SBC | EH
Tombow Mono Multi Liquid glue
Shop at:
SBC | EH
Therm O Web Foam Tape
Shop at:
SBC | EH
White Bizzard Nuvo drops
Shop at:
Dies R Us
Botanical Spray Frantic Stamper
Shop at:
Dies R Us
Hey Gorgeous Pink Fresh Studio
Shop at:
Dies R Us
Stitched Rectangles Elizabeth Craft Design
Shop at:
Dies R Us

Come on over and check out all of our great links!


See you soon!
~Kristina H.


Mar 20, 2019

Bodacious florals

Hey there fellow crafters!  Kristina H here today with a lovely floral card to share.


I was inspired to create this card in order to use some pieces of paper I had laying on my desk.  I recently purchased the new alcohol pearl inks and had been playing around with them.  I just knew I needed to use these papers to create something lovely!

Here are all the pieces I used today.


This card only uses 3 dies and no stamping at all!  


I have a dark gray, A2 sized card base, another piece of dark gray cardstock cut to 4" x 5 1/4", a piece of white cardstock cut to 4" x 5 1/4", and a piece of heavy vellum cut to 2 1/4" x 4 3/4".  

The first thing I did was to put Stick It adhesive onto the back of the dark gray cardstock.  Then I taped the Diamond Galore panel die to the gray cardstock.  


I strongly suggest you use the precision cutting plate that comes with your particular die cutting machine.  I ran it through several times to make sure it was completely cut.  Then I poked out all of the negative pieces.


Here is the piece of alcohol pearl ink Yupo paper piece that I cut up to use for the flowers.  I didn't get a chance to snap a photo of the green piece but you can see it in the video.


I went ahead and cut out the flowers once from the red Yupo piece and once from the blue Yupo piece.  I also cut out the because from the red Yupo and the white cardstock.


Once I had all of my pieces cut, I went to work building the card base.  I peeled the Stick It backing paper off of the diamond die cut panel and adhered it to the white cardstock.  Then I adhered the white cardstock onto the gray card base.


Next I put foam tape on the back of the red flowers but only in some spots.  These dies actually have cut lines in the flower.  I wanted to add extra dimension to the flower so these areas were more prominent.


Here are the flowers glued onto the green flower stems.  I also glued the red because die cut piece onto the white because die cut piece.


I added liquid adhesive to the back of the flower piece and glued it onto the vellum.  I put an acrylic block on top to help hold it in place until it was dry.  


After that, I turned the whole vellum piece over and added liquid glue behind parts of the flower piece.  This way my glue would be hidden since I'm using vellum.  I adhered it to the card base.

The very last step was to glue the because die cut into place.  I lined my card base up with the grid on my mat to make sure it was straight.  Then I just eyeballed it to put it in place!  


And a close up to show you all the color in the red flowers!


I sure hope you have enjoyed my project today.  I even managed to make a video!  Check it out below.


Supplies listed below:

Stick It Adhesive sheets
Shop at:
Dies R Us
Penny Black Bodacious die
Shop at:
Dies R Us
Frantic Stamper Just Because die
Shop at:
Dies R Us
Frantic Stamper Diamonds Galore
Shop at:
Dies R Us
Neenah Solar White
Neenah Solar White
Shop at:
SBC
Tombow Mono Multi Liquid glue
Shop at:
SBC
Ranger Alcohol ink - Deception
Shop at:
SBC
Ranger Alcohol ink - Enchanted
Shop at:
SBC
Ranger Alcohol ink - Smolder
Shop at:
SBC
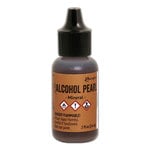
Ranger Alcohol ink - Mineral
Shop at:
SBC
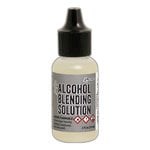
Ranger Alcohol Blending Solution
Shop at:
SBC
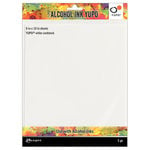
Yupo paper
Yupo paper
Shop at:
SBC


Be sure to check out all of our great links below!

See you soon!
~Kristina