I was inspired to create this card in order to use some pieces of paper I had laying on my desk. I recently purchased the new alcohol pearl inks and had been playing around with them. I just knew I needed to use these papers to create something lovely!
Here are all the pieces I used today.
This card only uses 3 dies and no stamping at all!
I have a dark gray, A2 sized card base, another piece of dark gray cardstock cut to 4" x 5 1/4", a piece of white cardstock cut to 4" x 5 1/4", and a piece of heavy vellum cut to 2 1/4" x 4 3/4".
The first thing I did was to put Stick It adhesive onto the back of the dark gray cardstock. Then I taped the Diamond Galore panel die to the gray cardstock.
I strongly suggest you use the precision cutting plate that comes with your particular die cutting machine. I ran it through several times to make sure it was completely cut. Then I poked out all of the negative pieces.
Here is the piece of alcohol pearl ink Yupo paper piece that I cut up to use for the flowers. I didn't get a chance to snap a photo of the green piece but you can see it in the video.
I went ahead and cut out the flowers once from the red Yupo piece and once from the blue Yupo piece. I also cut out the because from the red Yupo and the white cardstock.
Once I had all of my pieces cut, I went to work building the card base. I peeled the Stick It backing paper off of the diamond die cut panel and adhered it to the white cardstock. Then I adhered the white cardstock onto the gray card base.
Next I put foam tape on the back of the red flowers but only in some spots. These dies actually have cut lines in the flower. I wanted to add extra dimension to the flower so these areas were more prominent.
Here are the flowers glued onto the green flower stems. I also glued the red because die cut piece onto the white because die cut piece.
I added liquid adhesive to the back of the flower piece and glued it onto the vellum. I put an acrylic block on top to help hold it in place until it was dry.
After that, I turned the whole vellum piece over and added liquid glue behind parts of the flower piece. This way my glue would be hidden since I'm using vellum. I adhered it to the card base.
The very last step was to glue the because die cut into place. I lined my card base up with the grid on my mat to make sure it was straight. Then I just eyeballed it to put it in place!
And a close up to show you all the color in the red flowers!
I sure hope you have enjoyed my project today. I even managed to make a video! Check it out below.
Supplies listed below:
 Stick It Adhesive sheets Shop at: Dies R Us |
 Penny Black Bodacious die Shop at: Dies R Us |
 Frantic Stamper Just Because die Shop at: Dies R Us |
 Frantic Stamper Diamonds Galore Shop at: Dies R Us |
 Neenah Solar White Shop at: SBC |
 Tombow Mono Multi Liquid glue Shop at: SBC |
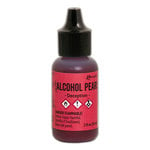 Ranger Alcohol ink - Deception Shop at: SBC |
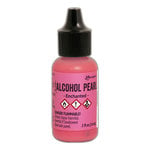 Ranger Alcohol ink - Enchanted Shop at: SBC |
 Ranger Alcohol ink - Smolder Shop at: SBC |
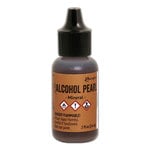 Ranger Alcohol ink - Mineral Shop at: SBC |
 Ranger Alcohol Blending Solution Shop at: SBC |
 Yupo paper Shop at: SBC |
See you soon!
~Kristina


This is beautiful! Very elegant looking!
ReplyDeleteJust beautiful
ReplyDeleteWOW this is just beautiful Kristina! Thanks for all the tips & tricks! Awesome inspiration!
ReplyDeleteYou have put this together so well. Everything pulls together wonderfully!
ReplyDelete