Showing posts with label Masculine Card. Show all posts

Jan 6, 2021

Have a Good Day!

 Hello Crafty Friends,


Diane here to share with you a quick card.  This is a great card to say hello or just to let someone know that you are thinking of them.  I used the "Have a Good Day" die by Tutti Designs. 


I cut a white card base 8 1/2  x 5 1/2 & scored it at 4 1/4 (A2 size).  I cut a piece of blue snowflake paper (from the paper pack) measuring 4 1/8 x 3 1/2 and added it to my card front.  Then I cut a piece of boarder paper measuring 4 1/8 x 2 1/4 and adhered it to my card.

Next, I die cut the "Have a Good Day" out of the brown designer paper from the paper pack.  I cut it again in off white cardstock.  I cut off the coffee fumes from the off white piece and layered it onto the brown allowing for a slight shadow effect.

Next I took a scrap of dark red cardstock that was laying on my desk and adhered the coffee cup to it.  Then, I fussy cut around the cup so that it looks like I have a dark red cup.  Then I adhered it to my card.  I thought about adding some flowers but, I thought that I really wanted to make this for anyone, male or female, so I didn't add any flowers this time.  I really enjoyed this cute little die and hope you would too.


In addition to white, dark red and off white cardstock here are the other products I used to create this card:


Tutti Designs:  Have a Good Day die


Don't forget to come join in the fun at the Dies R Us Challenge Blog.  There's a new challenge theme offered on the 1st and 15th of each month and one lucky randomly drawn winner will receive a $10 gift certificate to the Dies R Us Store.  For your convenience, all the important Dies R Us links are provided below.

click below for:


Thanks so much for stopping by.

Have a Good Blessed Day!


Jan 1, 2021

Masculine Double Slider Surprise Card

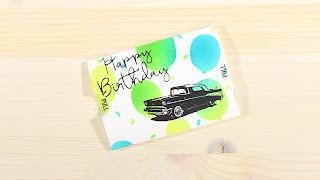
 Happy New Year! Amanda here....today, I am sharing a masculine Double Slider Surprise Card. I made this card for my Grandpa's upcoming birthday. Shhh....don't show him. Don't worry, he's not one for YouTube and blogs. LOL!


As usual, I have prepared a video tutorial for you today. Below that will be a couple more finished card pictures and the supply list.


Supply List

  • Lawn Fawn Double Slider Surprise Dies - Currently, Out of Stock, but check out the other great Lawn Fawn Dies on the DRU Site!


  • VersaFine Clair - Nocturne
  • Simon Says Stamp - Graduation Celebration Layering Set Stencils
  • Distress Inks
    • Mowed Lawn
    • Peacock Feathers
    • Squeezed Lemonade
  • Unity Stamps - For the Guys
  • Black Glimmer Foil
  • Spellbinders - Happy Birthday Glimmer Plate - No name. It was a starter plate included with Glimmer Machine

If you enjoyed my video/blog post today, I would greatly appreciate it if you followed me on social media.

YouTube: http://www.youtube.com/c/RiseandProcraftinate

Facebook: fb.me/RiseAndProcraftinate

Instagram: https://instagram.com/riseandprocraftinate

Pinterest: www.pinterest.com/RiseandProcraftinate


Don't forget to come join in the fun at the Dies R Us Challenge Blog. There's a new challenge theme offered on the 1st and 15th of each month and one lucky randomly drawn winner will receive a gift voucher prize to the Dies R Us Store. For your convenience, all the important Dies R Us links are provided below.

https://blogger.googleusercontent.com/img/b/R29vZ2xl/AVvXsEjCjT8pw_L9T-z6-KjvbFtjxltch0jDrbOVSRoR7-pMeQw8lEYfIDENxvu0UYve6R3ZP9GqtyyTDEJbdtSMk3bGQBx_Y3u5-ayMxatDG7IHMgflmEHGKjuk1fXzqacoc_aa78anm5BPmKz1/s320/*logo%2Bcollage.pages.jpg

click below for:

STORE

CHALLENGE BLOG

FACEBOOK

INSPIRATION BLOG

FRIENDS OF DIES R US PINTEREST PAGE

Thanks for stopping by!


Dec 8, 2019

YOU Make the World a Better Place!

Hello all, Samantha here!

I hope you take a second and stop by the Dies R Us store because there are SO MANY GOODIES! 

Today, I am sharing a card I made with a galaxy theme!

Its just in my nature to make everything sparkly, and pink! So, generally I have a tough time making masculine cards. However these two sets from Karen Burniston made it so easy!


For this base, I started out with a slight shimmer navy card stock. I then used regular white cardstock to create my galaxy base. This was created with Adirondack inks. If you've never played around with these, you ought to because they are so much fun!

So, once the galaxy background was created. I got to work cutting out  my dies! Karen Burniston makes assembly so easy with her You Tube videos! So that's what I used, to assemble this card together. I, did however switch the rocket to pop up the side of the card, instead of the bottom. 

The ring around the space ships, were actually die cut with washi tape! 


Avery Elle - Sentimentals
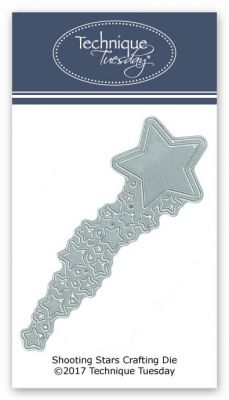
Shooting Stars Crafting Dies

Thermoweb - 3D Foam Squares - White .25" 176/Pkg
Thanks so much for checking out my cards today! I hope you have a great day!
hope that I was able to inspire you to use your dies, create a project, and come play along with us at the Dies R Us Challenge Blog for your chance to win a gift voucher to the Dies R Us Store.  A new challenge begins on the 1st and 15th of every month.  Be sure to follow us on Facebook and Pinterest too.

Jun 13, 2019

Masculine Cards with Elizabeth Craft Circle Background


Hi Everyone, Happy Thursday, Kristina here today with some masculine cards using a background die from Elizabeth Craft.

I've wanted to do a paper piecing type technique with this die every since I got it, but was intimidated by the need to keep track of all the pieces. But I found a simple method to easily produce the effect, and get multiple cards in the process. I went with three different colors for my background, which produces three different cards. In hindsight I would've rather done 4 or more so there was less options for colors to be next to each other.

Onto the process:

I ran the die and paper through my die cut machine. I kept it sandwiched between my cutting plates and flipped the whole sandwich over so that the cut side was up. With all of the piece still in the die, I stuck down a piece of Avery removable label paper (masking paper) to cover the back.


I used my tool n one to carefully remove the die, leaving the positive and negative space die cuts adhered to my label paper.


Once I was done, I had a panel for each of my colors, with all of the pieces where they go. 


To begin assembly, I first ran the circle frame through my Xyron machine and stuck it down to an a2 sized card base. From there, I simply transferred the circle from the label paper over into their "frame"


From there I embellished the card with a sentiment, some nuvo drops and ranger liquid pearls. 

Thanks for stopping by today! 

Supplies


Elizabeth Craft Circle Background
Shop at:
Dies R Us

Don't forget to come join in the fun at the Dies R Us Challenge Blog. There's a new challenge theme offered on the 1st and 15th of each month and one lucky randomly drawn winner will receive a gift voucher prize to the Dies R Us Store. For your convenience, all the important Dies R Us links are provided below.


click below for:


Jun 12, 2019

Just for Dad

Howdy and hello crafty friends!  Kristina Hein here today with a Father's Day card to share.


Here's a picture I took of most of the supplies I used in the creation of this card.


The first thing I did was to cut 1/2" wide strips of the navy, light blue and red cardstock. They don't have to be a particular length.  Just long enough to place at a diagonal on the card base.


I laid them across the card base and just loosely marked the edges with pencil.  This was my cheat so I didn't put too much adhesive on the back of the strips.  I used a scratch piece of cardstock to line up with the pencil marks, flipped the strip over and added glue.  I then attached them to the card.


I flipped the whole card over and trimmed off the excess paper.

Next I cut out all of the die cut pieces I needed for the card.  The sentiment die is the Father's Day Line Border die from Lawn Fawn. I cut it out of red and blue.  The grill items are from the Elizabeth Craft Designs Backyard Barbeque set.  The vellum piece was cut out using Elizabeth Craft Designs Stitched Rectangles dies.


Sorry about the glare!  I used a shiny, metallic black cardstock for the grill pieces and metallic silver for the grill tools.  I did sponge a bit of Spiced Marmalade distress oxide ink on the bottom of the flame pieces for more definition.  Now let's build the card!

I started by piecing the grill elements together.  I am using a vellum piece behind the grill to mute the stripes of cardstock.  So I laid the vellum on top (do not glue!) while I was working in order to get the placement of the grill just right.  The grill, along with other elements, will be a place for me to hide the glue on the vellum!


I should mention that I cut the wheel out of black foam and then just a flat black piece of cardstock.  I wanted it to look different from the main grill.

Behind the lid of the grill, I used little pieces of foam tape to pop it up.  I used a liquid glue to adhere the grill tools.  I cut the Lawn Fawn Father's Die line die out of both red and navy.  This die is too long to fit in the space I had available so I just trimmed it down into individual words.  Very easy to do.  I did have a little bit of panic when I couldn't find the apostrophe but I found it!  I used the Zig 2-way glue on the back of the words and glued them in place.

Here is the back of the vellum panel so you can see the foam and adhesive.


Then I put it onto the kraft card base.  I put some acrylic blocks on it until I was sure the glue was dry. 

Here is a side view of the completed card so you can see the shine from the grill.  It looks like a real grill does!


And one more picture of the finished card.


You'll probably notice that the version above looks slightly different than the first picture.  I actually made the card twice because I forgot to take photos.  Oopsie., but I was able to add a few more details.  I used three different colors of Nuvo drops and I sponged a little Spiced Marmalade behind the flames.  I can't pick a favorite version!

Remember, Dies R Us sells a LOT more than just dies and they are adding more each day.  Be sure to take your time to check out all the goodies!


Supplies Used:
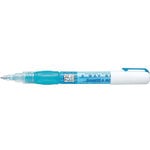
Zig 2-Way Glue Pen - Squeeze and Roll
Shop at:
Dies R Us
Tombow Mono Multi Liquid glue
Shop at:
SBC | EH
Therm O Web Foam Tape
Shop at:
SBC | EH
Tim Holtz Idea-ology 8x8 Metallic - Jewels
Shop at:
SBC
Stitched Rectangles Elizabeth Craft Design
Shop at:
Dies R Us
Spiced Marmalade Distress Oxide
Shop at:
Dies R Us
Backyard Bbq Elzabeth Craft Designs
Shop at:
Dies R Us
Father's Day Line Border Lawn Fawn
Shop at:
Dies R Us
White Nuvo Drops
White Nuvo Drops
Shop at:
Dies R Us
Red Berry Nuvo Drops
Shop at:
Dies R Us
Midnight Blue Nuvo Drops
Shop at:
Dies R Us

Come on over and check out all of our great links!


See you soon!
~Kristina H.