Showing posts with label JeaninesArt Die. Show all posts

May 13, 2021

Sweet Hello Card Set


Greetings Dies R Us fans!   Chris here today and I am excited to share this sweet Hello Card set I created.  This card set features Jeanine's Art - Classic Butterflies & Flowers - Butterfly Frame Dies  and Paper Rose  - Fine Script Layered - Hello Dies. 


Card #1 

I love how detailed this die is! Save the die cut Center for Card #2. 
Die cut shadow from Paper Rose  - Fine Script Layered - Hello

Using ScraPerfect Best Glue Ever with the No Clog Writing Tip adhere "Hello" to shadow. 


Cut patterned paper slightly smaller than card base and adhere to card base.  Adhere Flower Frame to card with ScraPerfect Best Glue Ever with the No Clog Writing Tip.  The no Clog tip makes adding just the right of adhesive super easy on this intricate die cut. 


Add layered hello to card to finish. 

Card #2

On front of card base die cut "flower" from Jeanine's Art - Classic Butterflies & Flowers - Butterfly Frame Dies 


Adhere flower die cut (left over from Card #1) to  the inside of Card #2, aligning with die cut window on the front of card. 

Stamp butterfly from Finnabair - Cling Stamp - Don't Forget To Fly onto flower.  Add faux stitching around card and die cut flower. 

 
Die cut a HELLO to add finishing touch to Card #2. 

I hope you are inspired to get creative with your die cuts. Don't forget to come join in the fun at the Dies R Us Challenge Blog. There's a new challenge theme offered on the 1st and 15th of each month and one lucky randomly drawn winner will receive a gift voucher prize to the Dies R Us Store.  


 For your convenience, all the important Dies R Us links are provided below.


click below for:

STORE

CHALLENGE BLOG

FACEBOOK

INSPIRATION BLOG

FRIENDS OF DIES R US PINTEREST PAGE


May 15, 2020

Butterfly Bookmarks

  Hello everyone, Mandi here, from MJ's Kraze, Today, I will be sharing with you on how to use your dies in creating fun felt bookmarks. 


   The first step is to get some stiff felt. I found out this works better for intricate dies than the felt sheets. I am working with Jeanine's Art Classic Butterflies. I cut two of the outer outline die and one in the detail die. 

   With your favorite liquid fabric glue apply adhesive to one side of the die cut. Place a paperclip in on top of that. Apply to the out die cut and sandwich the pieces together. 

   Now onto gluing the detail piece. Here is a tip, spread the glue to the back with a toothpick. This is where you want to make sure you use a non-toxic glue since this will get on your fingers. Now, place it on top of paperclip sandwich.

    That is all it takes to create these fun bookmarks that work great in planners. 

Dies R Us Product Used:

Don't forget to come to join in the fun at the Dies R Us Challenge Blog.  There's a new challenge theme offered on the 1st and 15th of each month and one lucky randomly drawn winner will receive a gift voucher prize to the Dies R Us Store.  For your convenience, all the important Dies R Us links are provided below.


Click below for:
FRIENDS OF DIES R US PINTEREST PAGE

Thanks for stopping by!


Jan 28, 2019

Easter Bunny is on his way!

 Lena here with you today to share an Easter card. Yes, I know it's still a little early, crafting friends, but I thought I'd get a little ahead this year with my Easter cards :-)


Isn't this Easter Bunny by Die-Versions, just the cutest? You can get it at the Dies R Us store right HERE.  It won't be around for very much longer, so get your shopping done today.


This is what the card looks like when closed and ready for mailing.


And here is a full view of the inside of the card.

Now for a quick pictorial of how I put this super easy card together.


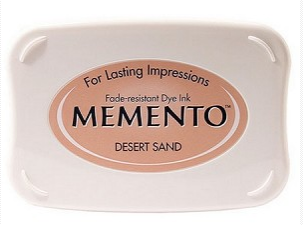
I began by cutting out the background twice using the Art of Living Frame by Jeanine's Art.  Once out of the blue patterned paper and once out of solid pink card stock. Then I cut out the bunny and after getting all my bits and pieces together, I assembled it. Using a small sponge dauber, I sponged all the edges of the bunny with Memento Desert Sand ink.


In order to add a little more interest to my scene, I used a few cuts of the Small Beach Grass
by Impression Obsession, and a few more of the Easter Eggs that come with the Easter Bunny die. Using a FineLine Bottle Applicator, I adhered the frame and the Easter Bunny scene to a 5.5" x 5.5" pink easel card base.

 For the inside, I cut another Art of Living Frame out of the patterned paper, and another little piece of grass and a couple more of the Easter eggs. To mat the sentiment, I used the inner circle of Anja's Circle from Marianne Design, then used a small circle from Memory and cut out 3 white mats.  I adhered them to each other to give it a little dimension and to make a little wedge for the easel part of the card to work :-)
And, voila, my first Easter card for 2019 was done :-)

The Marianne Design dies are normally under Special Orders in the store.  Every so often, Dies R Us runs a big sale on international dies. During these times, you will find dies from companies such as Marianne Designs, Lea'bilities, and Joy Crafts among others. The best way to know about these fabulous sales is to subscribe to the Dies R Us Newsletter.  When you go to the store's home page,  scroll down to the bottom.  There you will find a box where you can enter your email address and be put on their mailing list.

For your convenience, I've listed the materials I used on this card,
and have linked them to the Dies R Us  store:

Easter Bunny by Die-Versions


Art of Living Frame by Jeanine's Art

Anja's Circle - Marianne Designs


Small Beach Grass by Impression Obsession


Memento Desert Sand


FineLine Bottle Applicator

I hope I was able to inspire you to use your dies, create a project, and come play along with us at the Dies R Us Challenge Blog for your chance to win a gift voucher to the Dies R Us Store.  A new challenge begins on the 1st and 15th of every month.  Be sure to follow us on Facebook too.


Till next time,
Crafty hugs,


Dec 25, 2018

Stunning Christmas cards to celebrate today... Merry Christmas


Hi .. How are you today. This DT project for Dies R Us showcases some very fussy die cut Christmas cards made using Scraperfect Best Glue Ever with the non clog writing tip. They are really easier to make than they look. The dies are so detailed and stunning.... Your going to love these 2 dies for sure.

Supply List:
Ink: Tim Holtz Vintage Photo
Machine/ tools: Big Shot Express, Misti
Paper: Pion Design- Gramma's Attic - Christmas Joy paper,
Other: Cardstock, accents

Using the fabulous stunning fussy dies... .I cut them in black.

I used white cardstock matted with black card stock to base the amazing design.

I put the Pion image into the diamond shape ... it was perfect.
The other card was easy.. just circle cut the image to fit the circular section of yet another amazing stunning die cut.


Don't forget to come join in the fun at the Dies R Us Challenge Blog.  There's a new challenge theme offered on the 1st and 15th of each month and one lucky randomly drawn winner will receive a gift voucher prize to the Dies R Us Store.  For your convenience, all the important Dies R Us links are provided below.
click below for:

Thanks for visiting... hope to see you again soon, Have a great day.