Showing posts with label Die-Versions. Show all posts

Mar 13, 2020

Kitty Wishes

Hey everyone, Anne here to share a sweet little birthday card with you. I love stamping as much as I love dies and this card reflects both 💖.


The following dies were used to create this card:


Die-Versions - Pretty Packages (although this is no longer available, any of these would work)


To start out, I die cut the Bamboo Frame from watercolor paper. You will be stamping on the negative piece in the center, so be sure to save that part too.


Nest, using a stamp positioner and Archival ink, I stamped my image onto the negative piece of watercolor paper.  


Using Zig Clean Color Real Brush Watercolors, I colored the image and the Bamboo frame.  The image will be inset back into the frame.

My card base is a piece of kraft cardstock.  I wanted the front to have texture so I dry embossed it using an embossing folder.  This dimensional embossing folder gave it lots of texture. 


For the inside of the card, I die cut several of the presents and quickly colored them using glitter markers. You can also see the texture on the inside back of the card front too. 


Here's one final look at today's birthday card.


Hope you've enjoyed today's project.  Come back on Monday for more fabulous inspiration from our design team.

Don't forget to come join in the fun at the Dies R Us Challenge Blog.  There's a new challenge theme offered on the 1st and 15th of each month and one lucky randomly drawn winner will receive a gift voucher prize to the Dies R Us Store.  For your convenience, all the important Dies R Us links are provided below.


click below for:
FRIENDS OF DIES R US PINTEREST PAGE

Thanks for stopping by!


Feb 7, 2020

Cat Pop - Up


Hi everyone, Anne here today to share a fun pop up birthday card with you.


closed

open (with belly band)


I've used the following dies to create this card:


I've made this twist pop up a few times and it gets easier each time I make it.  I do however, still watch Karen Burniston's You Tube video each time to refresh my memory 😀.


Start out by deciding the length and width of the inside portion of your pop up. Score it in the middle and then place this die on the score line.  Line up those little tabs right in the center on your score line.  Then die cut it.


Train your folds to fold in the correct way and then add glue from the outer edge to the points.  


Add the arm mechanisms to each side.


Again, train the folds to fold properly before adding the die cut panels.  You will need to die cut the panel twice and then adhere the tabs together to create the four panel pop up base.


Next up, add the panels and then begin decorating.  

The recipient of this card was turning 80 and is a huge cat lover (she has a bunch of white cats), so I went with that theme. 


I die cut all my pieces and added yellow glitter to the "80th" using a glueless glitter technique.  This is such an easy way to add glitter without all the mess, especially if your die cuts are small.  Start out by adding VersaMark to your die cut, then heat set with Clear embossing powder. Add VersaMark to the top again, but this time, cover it with your glitter.  Then heat set it.  You'll see the glitter melting into the first layer of embossing powder.  When you use this technique your glitter stays put and doesn't come off.


For my Happy Birthday sentiment, I used an older die because the size of these letters fit perfectly.  I die cut it out from white cardstock and then snipped off the letters at the base to make individual letters.


I used more dies that are included in the Twisted Panel Pop Up set to finish my decorations.  This is a close up of the decorated panels.


I added a few more layers to create an overall larger card and decorated the top portion with a strip of cats from the Impression Obsession set.

Hope you've enjoyed today's card.  Come back on Monday for more fabulous inspiration from our design team.

Don't forget to come join in the fun at the Dies R Us Challenge Blog.  There's a new challenge theme offered on the 1st and 15th of each month and one lucky randomly drawn winner will receive a gift voucher prize to the Dies R Us Store.  For your convenience, all the important Dies R Us links are provided below.


click below for:
FRIENDS OF DIES R US PINTEREST PAGE

Thanks for stopping by!


Jan 28, 2019

Easter Bunny is on his way!

 Lena here with you today to share an Easter card. Yes, I know it's still a little early, crafting friends, but I thought I'd get a little ahead this year with my Easter cards :-)


Isn't this Easter Bunny by Die-Versions, just the cutest? You can get it at the Dies R Us store right HERE.  It won't be around for very much longer, so get your shopping done today.


This is what the card looks like when closed and ready for mailing.


And here is a full view of the inside of the card.

Now for a quick pictorial of how I put this super easy card together.


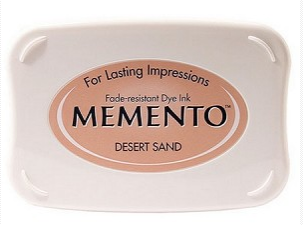
I began by cutting out the background twice using the Art of Living Frame by Jeanine's Art.  Once out of the blue patterned paper and once out of solid pink card stock. Then I cut out the bunny and after getting all my bits and pieces together, I assembled it. Using a small sponge dauber, I sponged all the edges of the bunny with Memento Desert Sand ink.


In order to add a little more interest to my scene, I used a few cuts of the Small Beach Grass
by Impression Obsession, and a few more of the Easter Eggs that come with the Easter Bunny die. Using a FineLine Bottle Applicator, I adhered the frame and the Easter Bunny scene to a 5.5" x 5.5" pink easel card base.

 For the inside, I cut another Art of Living Frame out of the patterned paper, and another little piece of grass and a couple more of the Easter eggs. To mat the sentiment, I used the inner circle of Anja's Circle from Marianne Design, then used a small circle from Memory and cut out 3 white mats.  I adhered them to each other to give it a little dimension and to make a little wedge for the easel part of the card to work :-)
And, voila, my first Easter card for 2019 was done :-)

The Marianne Design dies are normally under Special Orders in the store.  Every so often, Dies R Us runs a big sale on international dies. During these times, you will find dies from companies such as Marianne Designs, Lea'bilities, and Joy Crafts among others. The best way to know about these fabulous sales is to subscribe to the Dies R Us Newsletter.  When you go to the store's home page,  scroll down to the bottom.  There you will find a box where you can enter your email address and be put on their mailing list.

For your convenience, I've listed the materials I used on this card,
and have linked them to the Dies R Us  store:

Easter Bunny by Die-Versions


Art of Living Frame by Jeanine's Art

Anja's Circle - Marianne Designs


Small Beach Grass by Impression Obsession


Memento Desert Sand


FineLine Bottle Applicator

I hope I was able to inspire you to use your dies, create a project, and come play along with us at the Dies R Us Challenge Blog for your chance to win a gift voucher to the Dies R Us Store.  A new challenge begins on the 1st and 15th of every month.  Be sure to follow us on Facebook too.


Till next time,
Crafty hugs,


Oct 31, 2018

Not too spooky

Happy Halloween!  Kristina H. here today to share a not so spooky halloween card.


This card looks like a lot of work but it really is pretty easy to recreate.  The main die I used for this card is Spooky Pumpkin by Die-Versions.  

I first cut the die with an orange piece of cardstock.  I then strategically placed the different pieces of cardstock on the die and ran it through my die cut machine.  I did it with the polka dot paper (Lawn Fawn), the silver glitter paper, orange patterned paper (Doodlebug) and the green paper (Doodlebug).  I then used a fine tip pair of scissors and a craft knife to cut out the pieces that I needed.  

I used the Zig 2-way Glue Pen and adhered all of the layers onto my base piece cut from the orange cardstock.  I had a scrap piece of black cardstock that I added a little shimmer to it and put it behind the pumpkin.  I needed this to look like one cohesive unit so I went back and cut another whole piece out of white cardstock.  I carefully trimmed out everything on the inside so I just had the pumpkin outline and glued it in place.

While the pumpkin die was drying, I turned my attention to the cardbase.  I started with a 4 3/4" x 4 3/4" white cardbase.  I found a couple different halloween papers in my stash.  The black cobweb piece is cut to 4 1/2" x 4 1/2".  The purple bat piece was first cut out using the largest die from Tutti Designs Stitched Nesting Circles set.  I highly recommend this set because you will use it a lot!  I'm currently trying to collect several of the other stitched die sets by Tutti Designs.  There are TONS in the store.  Check them out HERE.

Next I sponged Dusty Concord Distress Oxide ink all around the edges of the circle.  I backed it with foam tape and adhered it to the black paper.  Then I added the pumpkin die cut.  Again I used the Zig 2-Way glue (love this stuff!)  

As my final touch I used a sentiment from Lawn Fawn Pick of the Patch.  I prepped the black paper with anti-static powder, stamped it with Versamark ink and applied silver embossing powder.  I heated it up until the powder melted.  I trimmed the pieces down and hand cut the banner edge on the right side.  These were then adhered on top of the pumpkin with foam tape.  Ta da!!


Supplies used:


I sure hope you enjoyed today's project!  Be sure to check out all of our links below.  See you soon!

~Kristina H


Come join in all of the fun at the Dies R Us Challenge Blog.  There's a new challenge theme offered on the 1st and 15th of each month and one lucky randomly drawn winner will receive a gift voucher prize to theDies R Us Store.  For your convenience, all the important Dies R Us links are provided below.


click below for: