Showing posts with label Memento Inks. Show all posts

Mar 1, 2020

Poppy Inspirational!

Hello all, Samantha here!

I hope you take a second and stop by the Dies R Us store because there are SO MANY GOODIES! 

Today, I am sharing a card made with a Poppy flower. This one was so much fun, as I incorporated a coloring as well. I haven't done one in ages! 

The create your own poppy flower by Lawn Fawn was so easy to use! I wanted to add texture to the flower so I put the pieces through my crimper.

I also took the Memento Ink, and darkened the edges of the flower, just to give it a bit of depth.

I used Elizabeth Crafts - Dotted Scalloped Ovals to frame the image up. I then added pearls to the dots in the frame. I also used the circles for the sentiment, and outlined that with the memento inks as well. 

Thanks so much for checking out my card today! I hope you have a great day!
hope that I was able to inspire you to use your dies, create a project, and come play along with us at the Dies R Us Challenge Blog for your chance to win a gift voucher to the Dies R Us Store.  A new challenge begins on the 1st and 15th of every month.  Be sure to follow us on Facebook and Pinterest too.

Feb 17, 2020

Valentine Star Easel Card

Hello crafting friends.  I hope you all had a wonderful Valentine weekend.  Lena here today sharing a fun Valentine card I made for my hubby.


Isn't it cute?


Here is a side view.


This is the back of the card and where you can stamp your greeting and write your personal message.


This card comes apart and folds flat for mailing. My card base was 5" x 6" and as you can see it fits in an A9 envelope which does not require extra postage to send it within the US or to send it overseas.

Now for a quick description:

I don't have a pictorial for you, but I do have the link to the tutorial video I followed.  Sam is great with her easy to follow instructions.  You can find the link here --> Star Easel Card.

I cut all the pieces of the card base, mirror card stock and patterned paper.  I used Memento Lady Bug ink to shade in all the edges of the patterned paper to give it a little more definition.  Then I cut a scalloped circle and a regular circle and adhered them together to make the background mat for cupid.  Lastly, I cut the cupid in red card stock and adhered it to the mat. I used foam dots to stick it down on the "star" part of the card.  I think this is such a fun card to make and it doesn't take long at all.  And best of all, you can practically do it in any size you like.  I prefer the rectangle shapes as I feel the "star" is more defined, but you can make them as square cards too!  This explanation is also on the tutorial video I linked to above.

As always, here is a list of the materials I used, 
each linked to the Dies R Us store, for your convenience.


Please note that you can use any scalloped circle/regular circle combination, so if Dies R Us are out of the Spellbinders dies, you can use Lawn Fawn, Impression Obsession, or Elizabeth Craft Designs, just to name a few that will work and are currently in stock at the store. Similarly, you can enter "Cupid" in the store's search bar, and there will be many other options to replace the cupid I used, which is currently out of stock.

I'd like to remind you  that our sister store is now opened.  Didi Crafts has warehouses located in the USA and Canada, and although it carries some of the same products as Dies R Us, you will also be able to purchase a huge variety of crafty supplies for a variety of crafts.  Having this sister store means that our Canadian crafting friends won't have to worry about huge taxes or shipping fees.  Isn't that great?!  Go take a peek and be pleasantly surprised!


Thank you for stopping by today.  I hope that I was able to inspired you to use your dies, create a project, and come play along with us at the Dies R Us Challenge Blog for your chance to win a gift voucher to the Dies R Us Store.  A new challenge begins on the 1st and 15th of each month.  Be sure to follow us on Facebook and Pinterest too.


Feb 3, 2020

Nautical Wishes

Hello all, Samantha here!

I hope you take a second and stop by the Dies R Us store because there are SO MANY GOODIES! 

Today, I am sharing a masculine nautical card. I love all things beach themed and decided to turn it into a card.


This one was pretty simple to put together, and it's partly because of the Marianne's Creatable dies! They turn any project into an effortless masterpiece


Here is the inside of the card with the birthday wishes!

Fine Line Glue Applicator

I used a few dies from Marianne Designs.  Dies R Us often have special order sales and it's during these sales that you can purchase overseas dies at a very reasonable price.  The best way to know about these special order sales is to subscribe to their newsletter.

Thanks so much for checking out my card today! I hope you have a great day and that I was able to inspire you to use your dies, create a project, and come play along with us at Dies R Us Challenges for your chance to win a gift voucher to the Dies R Us store.  A new challenge begins on the 1st and 15th of every month.  Be sure to follow us on Facebook and Pinterest too.


Jan 20, 2020

LLama tell you ...

Hello Dies R Us friends.  Lena here today sharing a Llama Valentine card.
Did you catch the wonderful sales that Dies R Us recently had on international dies? If you know me, then you know that I bought more than my fair share :-)


So here is my cute little llama.  I used Eline's Alpaca die set from Marianne Design, to create my cute llama.  And yes, this is actually an Alpaca and yes, there is a difference between an Alpaca and a Llama. In case you're interested, the main differences are Llamas have more of an elongated face, longer ears and they are quite a bit larger.  But for my Valentine card, I decided that this would be a llama, otherwise, I would not be able to use the sentiment I wanted. 😀


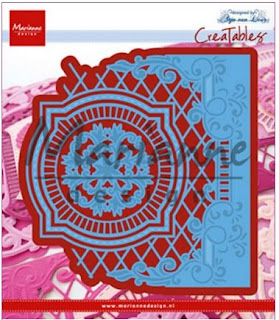
I used Anja's Vertical Fold Oval to create the base of the card.


Even though there are several layers on this 5.5" x 5.5" card, and the llama is foam dotted onto the oval, it is still a pretty flat card and easy to put in the mail without having to use extra postage.

Let me show you how quickly this card came together.


First I die cut all pieces in the alpaca die set, out of white card stock.


Next I used copic markers to colour in all the bits and pieces.


Once the llama was put together, I worked on the card.  I used an 11" x 5.5" piece of white card stock and scored it at 5.5".  Next I divided the front of the card in half.  In my case, since my card is 5.5" x 5.5", my halfway mark was at 2.75".  Please remember that this needs to be done on the inside of the card on the front panel.  I marked the top and bottom and drew a faint line in pencil to help me align the oval fold die.  To ensure that it was really straight and centre, I used the grid on the mat to help me position the die.  I then secured it with two pieces of washi tape and sent it through the die cutting machine.


In order to make the llama stand out more, I used Memento's Rose Bud ink to shade the edge of the oval mat, which is included in the Vertical Fold Oval die.
All that was left to do was to use some pretty papers, use foam squares to adhere the llama to the oval mat, and voila first Valentine card of 2020 is done :-)  I almost forgot to tell you that when I was taking the pics, I didn't like all the empty space around the llama, so I added a few little hearts that I die cut using the Confetti Heart Plate by Poppystamps.


Before I write the list of the supplies I used, I wanted to share some exciting news with you.  Dies R Us now has a sister store called Didi Crafts, which has warehouses located in the USA and Canada.  Didi Crafts carries some of the same products as Dies R Us, but most are different and you will be able to purchase a huge variety of crafty supplies for a variety of crafts.  Having this sister store means that our Canadian crafting friends won't have to worry about huge taxes or shipping fees.  Isn't that great?!  Go take a peek and be pleasantly surprised!

Now for the list of supplies I used,
 each linked to the Dies R Us store, for your convenience.


I'm sure you know by now, but for all the newbies to Dies R Us, I would like to mention that  every so often, Dies R Us runs a big sale on international dies. It's during these special sales that you will find dies from companies such as Marianne Designs, Lea'bilities, and Joy Crafts among others. The best way to know about these fabulous sales is to subscribe to the Dies R Us Newsletter.  However, if you want to replicate this card, and you don't want to wait for the next "Special Orders Sale",  take a look at the Dies Section of the store.  You'll be able to find many substitutes that will work just as well :-)

Thank you for stopping by today.  I hope that I was able to inspired you to use your dies, create a project, and come play along with us at the Dies R Us Challenge Blog for your chance to win a gift voucher to the Dies R Us Store.  A new challenge begins on the 1st and 15th of every month.  Be sure to follow us on Facebook and Pinterest too.


Till next time,