Showing posts with label Halloween. Show all posts

Sep 29, 2021

Halloween Houses

Hi all! I am so excited to share my little Halloween Houses with you! Halloween is my favorite holiday; I love all the spookiness, the decor and costumes and since the weather is cooler, yet not that cold yet, it just can't get much better!  I think we should have Halloween at least once a month so everyone could dream up great costumes and buy candy without feeling guilty :)  These Halloween Houses are so easy to make and you can find all the dies you need at Dies R Us - truly one stop shopping with great prices! 


What I Used to Make my Houses:
I used the following on both houses;
Lawn Fawn Scalloped Treat Box, #LF1232
Lawn Fawn Scalloped Treat Box Halloween Add On Dies, #LF1487
Card in Black, Yellow, White, Orange, Brown and Grey


I am calling this house House #1.  In addition to the above products I used the following:
Lawn Fawn Spooky Village Stamp Set, #LF2014 {sentiment}
Die-Namics Stitched Fishtail Sentiment Strips, #MFT-1123


I cut the actual house out of heavy black card, as well as the the doorknob and one bat.  The roof, door and windows were cut out of grey card; yellow card was used to add a warm glow to the windows.  I added some spooky brown trees to each side of the house, the back has a window and a cute ghost.  Lastly, I added the sentiment.  These houses are so cute in person, they are small, the perfect size for  gift card and you can make them to match almost any occasion, including just because! You can make a beach house, a winter house, a spring themed house and even a dog house!  I am sure Lawn Fawn will continue making add on options for the treat box as it's a great seller and so adorable, even with no add on! 

On to House #2.  I used the products listed about as well as some orange card and the following:
Lawn Fawn Pick of the Patch Stamp Set, #LF1754

Lawn Fawn Pick of the Patch Die Set, #LF1755
Lawn Fawn Costume Party Stamp Set, #LF1458 {sentiment}
Embossing Ink
Hero Arts White Embossing Powder
Acetate

I constructed the little house using grey card, used a darker grey for the roof and black for the door and windows.  I backed the windows and door with yellow card and used some brown trees on each of the sides.  I also made a pumpkin and added it to one side along with a tree.  The back of the house has a black cat and a window.  This one is my favorite of the two houses because I also added 2 black bats "flying" above the house with the help of some acetate strips.  I love them!  I embossed the sentiment with white embossing powder on black card and trimmed it to fit the spot on the roof.

These are perfect for a small, snack sized candy bar or a few truffles {dark chocolate, of course!} and if I don't give them away, I know they will come out to decorate for Halloween year after year.  They are easy enough to make using an assembly line, enlist some help from the kids or friend, and you can make a whole class worth in no time! And who knows, I may construct an entire village of spooky little treat boxes! I hope I have inspired you to dig out some dies and enter the Dies R Us monthly giveaway; just be sure you use products that Dies R Us carries and you could win!  Thanks so much for stopping by and I'd love to know which house you like the best, just drop a note in the comments :) Thank you all for all your support during my Design Team time here at Dies R Us!  This is my last post and I had a lovely time.  Stay safe and see you soon! Oh and HAPPY HALLOWEEN!!!  Christi

Don't forget to come join in the fun at the Dies R Us Challenge Blog. There's a new challenge theme offered on the 1st and 15th of each month and one lucky randomly drawn winner will receive a gift voucher prize to the Dies R Us Store. For your convenience, all the important Dies R Us links are provided below.

https://blogger.googleusercontent.com/img/b/R29vZ2xl/AVvXsEjCjT8pw_L9T-z6-KjvbFtjxltch0jDrbOVSRoR7-pMeQw8lEYfIDENxvu0UYve6R3ZP9GqtyyTDEJbdtSMk3bGQBx_Y3u5-ayMxatDG7IHMgflmEHGKjuk1fXzqacoc_aa78anm5BPmKz1/s320/*logo%2Bcollage.pages.jpg

click below for:

STORE

CHALLENGE BLOG

FACEBOOK

INSPIRATION BLOG

FRIENDS OF DIES R US PINTEREST PAGE


Sep 28, 2021

Where the Skeletons Live

 Hello, it’s Sue of Ully Cat’s World and today we are making a slimline pop-up Halloween card using Karen Burniston dies. 


You will need:

·         One lightweight white cardstock 8 3/4 inches x 3 7/8 inches

·         One lightweight white cardstock 9 inches x 3 7/8 inches scored and folded 1/4 inch from top

·         Two black spider web paper 8 3/4 inches x 3 7/8 inches

·         Two orange leaf paper 8 1/4 inches x 3 7/16 inches

·         One orange leaf paper8 3/4 inches x 3 7/8 inches

·         Two 1 1/2-inch circles

·         Cut from House & Fence Pop-Up set

o   One green patterned cardstock platform

o   Two black fences coated with clear gloss

o   Two path stones from gray or black inked with white

·         Cut from Holiday House Set

o   Two houses complete houses including roof, trim, windows and door (I cut the door from a skeleton paper. The orange and red papers had a shiny coating on them.)

·         Cut from Tree Pop-Up Set

o   Two trees from gray paper

o   One set of oak leaves from orange sparkle paper

·         Cut from Halloween Charms set

o   One Happy Halloween from black paper

o   Three blacks from Happy Halloween oval in black

o   Two spiders from black and use die stencils and white gel pen to ink in face

·         Cut from Winter Charms set

o   One large fir tree

o   One small fir tree

·         Save trimmed strips for additional decorations.


Do a practice layout before adhering pieces to front panel (
I decided I didn’t want the windows boarded up if the skeletons lived there.)


Use strong red double-sided tape on the platform tabs and on the top tab of longest white card base piece. See photo for exact location of tape. Adhere the longest card base to shorter base. The tab will be on the card back.


Use Scor-tape on the decorative paper panels, placing on the backside of panel around all edges. To make the panels easier to position, peel back tape at all corners and fold backing paper so the tails stick out from edges as shown in the photos. Once positioned where you want press down corners and then peel off backing paper on each side and press down to adhere.


Once all layers of decorative papers have been adhered to cover all four sides of card base, place the platform on the bottom inside of card with taped edges just below the case base fold as shown in photo. Hold center tab down and peel off tape from it and the two platform tabs. Fold down card base top and adhere base to it. Fold down front tab of platform to desired position. Peel backing off tape and adhere to base. Platform should pop up when card is opened. Fold the two strips cut with platform die and glue into slots as shown in photo.


You can now decorate the card. Assemble houses as shown on packaging. Glue tall trees to inside top panel before gluing house to pop-up piece on platform. Glue tiny fir trees to strips on platform. One of the orange circles is glued behind the Happy Halloween sentiment on the front. Trim fence to fit the edge of platform and bend back one section to be a gate. Trim off the gate’s “foot” as it will be a catching point when the card is opened and closed. It is easier to glue down the stone path before gluing on the fence.


The finished card will fit into a #10 business envelope.

Hope this fun card has put a smile on your face and provided some inspiration for your crafting. 😊

Dies from Dies R Us:

·         KarenBurniston - Dies - Holiday House-1144

·         KarenBurniston - Dies - House & Fence Pop-Up - 1015

·         KarenBurniston - Dies - Tree Pop-Up -1005

·         KarenBurniston - Dies - Halloween Charms- 1058

·         KarenBurniston - Dies - Winter Charms -1018

·         1 ½ inch circle

Additional Supplies Used from Dies R Us:

·         CosmicShimmer - Specialist Acrylic Glue - 125ml

·         Sizzix - Big Shot PLUS die cutting Machine

·         Scor-Pal- Scor-Tape 1/4"


Don't forget to come join in the fun at the Dies R Us Challenge Blog. There's a new challenge theme offered on the 1st and 15th of each month and one lucky randomly drawn winner will receive a gift voucher prize to the Dies R Us Store.  


 For your convenience, all the important Dies R Us links are provided below.


click below for:

STORE

CHALLENGE BLOG

FACEBOOK

INSPIRATION BLOG

FRIENDS OF DIES R US PINTEREST PAGE


Oct 14, 2019

Halloween Card Set

Hello all, Samantha here!

I am so excited to be one of the newest DT member's here at Dies R Us

Today, I am sharing a card set I made for Halloween. They were quick to put together, but have such a cool effect. I personally love creating backgrounds with the Memento Inks because you can create so many different scenes!


My first step was to cut out a circle to use it as a mask to create the moon!
I created my scene with the colors from light to dark - Sweet Plum, Grape Jelly, Elderberry, Paris Dusk, London Fog, Tuxedo Black

My next step was to use my Cut 'n' Boss to cut out all my different dies. Once those were cut, I assembled it to the card and placed the witch over the moon. I used some scrap yellow cardstock to place behind the pumpkins and the haunted house - just to give it a little PIZAZZ! 

 I actually made a set of 6, 2 of each scene! The little ghosts were actually part of a Halloween Party Paper Cut out set.


Impression Obsession io Steel Die # DIE029-P Halloween Hill Die US American Made


Thanks so much for checking out my cards today! I hope you have a great day!
hope that I was able to inspire you to use your dies, create a project, and come play along with us at the Dies R Us Challenge Blog for your chance to win a gift voucher to the Dies R Us Store.  A new challenge begins on the 1st and 15th of every month.  Be sure to follow us on Facebook and Pinterest too.

Oct 1, 2018

Welcome to Boo-ville!

Good morning all! Lena here today to kick off the month of October with a Halloween project. Our new DT term also starts today and I can't tell you all how excited I am to be back on this amazing team of very talented ladies.
So without further ado, here is my U-card entitled Boo-ville.


  I cut an extra strip of orange card stock to place in the centre so I could attach the middle layer - like a box card :-)


This card measures 8" x 6". It folds down for mailing and fits perfectly in an A9 envelope.

And now to share a quick pictorial of  how I put this card together and the materials I used.


As I mentioned above, this type of card fold is called a U-card. It looks pretty amazing and it's so quick to put together. I've placed a pic of the template above.


Next, I used the Halloween Hill Town die set and the Halloween Landscape Layers die set from Impression Obsession, and since I wasn't too sure how it was all going to fit, I cut out multiples of  the various layers.

Now it was just a matter of putting it all together.
I cut a few extra bats to place in the background. The witch and moon is a Jolee sticker.  However, if you have small dies of a witch and a moon, you can put it together very easily. It took making this card to realize that the witches I have are all too big :-) 


I wasn't too sure where to put my greeting, but then I realized that the back was just the perfect place for it.
The sentiment is computer generated. I sponged the edges with Memento London Fog ink and added a couple of spiderwebs for good measure. :-)

Here is a quick recap of the materials I used to make this card:


Zig 2-Way Glue Pen - Squeeze and Roll


I'm so happy you stopped by today.  I hope I was able to inspire you to use your dies, create a project, and come play along at the Dies R Us Challenge Blog for your chance to win a gift voucher to the Dies R Us Store.  A new challenge begins on the first and fifteenth of every month.  Be sure to Follow Us on Facebook too. 


Till next time,
Crafty hugs,

Oct 9, 2017

EYE "heart" YOU


Hi my new Dies R Us friends,

It's Sandy here, don't ya just love Halloween and all the fun & cuteness that goes along with it?  I know I do.  I really like the colors and images and the different ways everyone interprets them.  I'm sharing an easel card with you today  - so let's get started.

The finished size of this card is a standard A2 which is 5.5" X 4.25".

Cut one panel (shown in black) that measures 5.5 X 4.25".  Back panel.
Cut top panel (shown in orange dotted) that measures 5.25 X 4"
Cut another panel (shown in green print) that measures 4" X 1.5
Cut panel (shown in black) that measures 3.75" X 2"
Cut one panel that measures 3.75" X 11".   This will be the easel potion of the card.
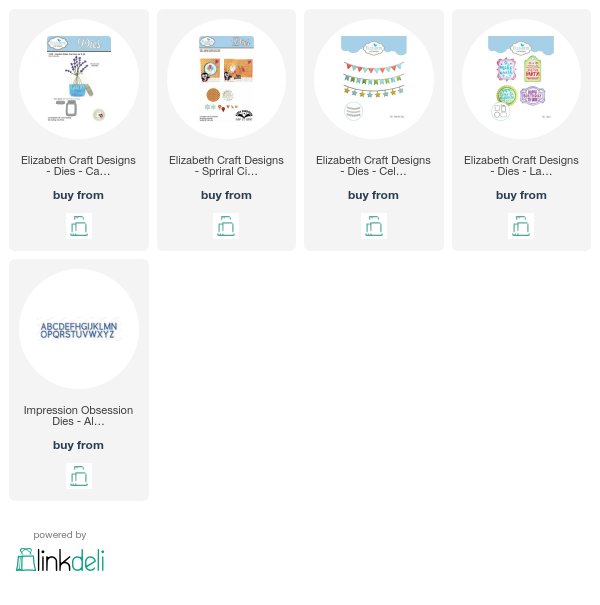
Using the Impression Obsession Alphabet die, cut out the words eye & you.
Using the ECD die Spiral Circle Pull Card, by Karen Burniston, cut one heart.
Using the EVD die Celebration Flags, cut two banners.
Stamp and cut out Happy Halloween using ECD die Labels 1.
Fun Foam was used here, 3 pieces  measuring 5" X 3.75 are needed.
The ECD Canning Jar die was used for this card.  Cut one lid.


Begin by placing the Canning Jar die in the position you desire on two pieces of fun foam.  Run through die cutting machine.  This is a wafer thin die so it will only cut through one thickness at a time but it will leave an impression on the second piece of foam so you can later line the die up in the exact place you have the first one.  See below.  Cut all three pieces of foam.


Stack and glue the three pieces together making sure you glue well around the jar opening.  You can see my glue above, it will dry clear.

Glue the decorative panel of paper (green) on the front panel (orange dotted) at the bottom.


Place front panel face down and line up die to match the foam pieces, remove foam and run through die cutting machine.  Save die cut jar.   Place acetate panel between front panel and foam.  Attach foam to front panel.

Cut tops off  previously cut foam jars, stack and glue back in place as shown in the circle above.


Using jar section cut from the front panel, decorate with eyeballs.  I used googly eyes but any type you have can be used.

Place jar with eyes in opening, glue can be used on top portion of jar to hold in place.  This portion will be covered by the lid and won't show.  I used tape on the back side of jar to hold in place while adding the back panel.

Add twine to lid if desired.  I wrapped twine around twice with tape on the back and then added a separate bow with as glue dot.  So much easier than trying to tie it.


On the long panel, score at 5.5" and again at 7.5" as shown above.  Crease on the score line to create the easel.  Attach smallest section to bottom of front panel.


This panel in .25" narrower than the card front making it easy to add.


Add decorative panel (shown in circle) to the card using foam tape to hold the front panel.
Finish the decorating and you are good to go.

All dies used are linked below.
Hope you will give it a try,
Sandy


Don't forget to come join in the fun at the Dies R Us Challenge Blog.  There's a new challenge theme offered on the 1st and 15th of each month and one lucky randomly drawn winner will receive a gift voucher prize to the Dies R Us Store.  For your convenience, all the important Dies R Us links are provided below.

STORE

DIES R US INSPIRATION BLOG

DIES R US CHALLENGE BLOG

DIES R US FACEBOOK PAGE