Showing posts with label 3D Foam Squares. Show all posts

Mar 16, 2020

Ironman Birthday!

Hello crafting friends and welcome back.
Lena here today sharing a fun Ironman birthday card I made for my son.

The front of the card ...

and when you open it up, Ironman flies above the city!!  😀
This is such a fun die from Karen Burniston, and can be adapted to so many occasions.


In order to keep within the theme of Ironman flying above the city, I used a few clouds to cover the original moon die cut.  My clouds were cut by hand, since the only dies I have are too small.  I will list a different option in the list of supplies below, one that I'm planning on getting with my next order.
I used one of the crosshatch squares to make a mat to place on the inside of the card. This is where I will write my message.  I also used a few foam squares to pop up the reactor on the front of the card.


It was such an easy card to put together.  The papers are all digital, so it was easy to size to the correct measurements to fit this 5.5" x 5.5" card. Even though there the Reactor is on foam dots and there is the "flight" mechanism on the inside, it does not add a lot of bulk to the card, so you shouldn't have to add extra postage.   Ironman and his Reactor Arc were sourced from Google.  To see an assembly tutorial, by Karen Burniston, on how to make the Rocket Pop-up card, please click HERE

As always, here is the list of supplies I used, each linked to the Dies R Us store
for your convenience.

Karen Burniston


Karen Burniston


Nesting Clouds
Yvonne Creations
I especially love this set because there are a variety of clouds in various different sizes, but if you enter "clouds" in the search bar, there are many others to choose from.


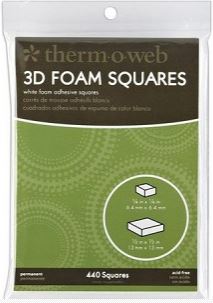
3D Foam Squares


Thank you for stopping by today.  I hope that I was able to inspired you to use your dies, create a project, and come play along with us at the Dies R Us Challenge Blog for your chance to win a gift voucher to the Dies R Us Store.  A new challenge begins on the 1st and 15th of each month.  Be sure to follow us on Facebook and Pinterest too.


Before I end this post, I'd like to remind you that our sister store is now open. 
Didi Crafts has warehouses located in the USA and Canada.  It has some products the same as Dies R Us, but in addition, it carries international dies and other crafty supplies for a variety of crafts.  Go take a peek and be pleasantly surprised!


Till next time!

Crafty hugs,
 

Feb 17, 2020

Valentine Star Easel Card

Hello crafting friends.  I hope you all had a wonderful Valentine weekend.  Lena here today sharing a fun Valentine card I made for my hubby.


Isn't it cute?


Here is a side view.


This is the back of the card and where you can stamp your greeting and write your personal message.


This card comes apart and folds flat for mailing. My card base was 5" x 6" and as you can see it fits in an A9 envelope which does not require extra postage to send it within the US or to send it overseas.

Now for a quick description:

I don't have a pictorial for you, but I do have the link to the tutorial video I followed.  Sam is great with her easy to follow instructions.  You can find the link here --> Star Easel Card.

I cut all the pieces of the card base, mirror card stock and patterned paper.  I used Memento Lady Bug ink to shade in all the edges of the patterned paper to give it a little more definition.  Then I cut a scalloped circle and a regular circle and adhered them together to make the background mat for cupid.  Lastly, I cut the cupid in red card stock and adhered it to the mat. I used foam dots to stick it down on the "star" part of the card.  I think this is such a fun card to make and it doesn't take long at all.  And best of all, you can practically do it in any size you like.  I prefer the rectangle shapes as I feel the "star" is more defined, but you can make them as square cards too!  This explanation is also on the tutorial video I linked to above.

As always, here is a list of the materials I used, 
each linked to the Dies R Us store, for your convenience.


Please note that you can use any scalloped circle/regular circle combination, so if Dies R Us are out of the Spellbinders dies, you can use Lawn Fawn, Impression Obsession, or Elizabeth Craft Designs, just to name a few that will work and are currently in stock at the store. Similarly, you can enter "Cupid" in the store's search bar, and there will be many other options to replace the cupid I used, which is currently out of stock.

I'd like to remind you  that our sister store is now opened.  Didi Crafts has warehouses located in the USA and Canada, and although it carries some of the same products as Dies R Us, you will also be able to purchase a huge variety of crafty supplies for a variety of crafts.  Having this sister store means that our Canadian crafting friends won't have to worry about huge taxes or shipping fees.  Isn't that great?!  Go take a peek and be pleasantly surprised!


Thank you for stopping by today.  I hope that I was able to inspired you to use your dies, create a project, and come play along with us at the Dies R Us Challenge Blog for your chance to win a gift voucher to the Dies R Us Store.  A new challenge begins on the 1st and 15th of each month.  Be sure to follow us on Facebook and Pinterest too.


Jan 20, 2020

LLama tell you ...

Hello Dies R Us friends.  Lena here today sharing a Llama Valentine card.
Did you catch the wonderful sales that Dies R Us recently had on international dies? If you know me, then you know that I bought more than my fair share :-)


So here is my cute little llama.  I used Eline's Alpaca die set from Marianne Design, to create my cute llama.  And yes, this is actually an Alpaca and yes, there is a difference between an Alpaca and a Llama. In case you're interested, the main differences are Llamas have more of an elongated face, longer ears and they are quite a bit larger.  But for my Valentine card, I decided that this would be a llama, otherwise, I would not be able to use the sentiment I wanted. 😀


I used Anja's Vertical Fold Oval to create the base of the card.


Even though there are several layers on this 5.5" x 5.5" card, and the llama is foam dotted onto the oval, it is still a pretty flat card and easy to put in the mail without having to use extra postage.

Let me show you how quickly this card came together.


First I die cut all pieces in the alpaca die set, out of white card stock.


Next I used copic markers to colour in all the bits and pieces.


Once the llama was put together, I worked on the card.  I used an 11" x 5.5" piece of white card stock and scored it at 5.5".  Next I divided the front of the card in half.  In my case, since my card is 5.5" x 5.5", my halfway mark was at 2.75".  Please remember that this needs to be done on the inside of the card on the front panel.  I marked the top and bottom and drew a faint line in pencil to help me align the oval fold die.  To ensure that it was really straight and centre, I used the grid on the mat to help me position the die.  I then secured it with two pieces of washi tape and sent it through the die cutting machine.


In order to make the llama stand out more, I used Memento's Rose Bud ink to shade the edge of the oval mat, which is included in the Vertical Fold Oval die.
All that was left to do was to use some pretty papers, use foam squares to adhere the llama to the oval mat, and voila first Valentine card of 2020 is done :-)  I almost forgot to tell you that when I was taking the pics, I didn't like all the empty space around the llama, so I added a few little hearts that I die cut using the Confetti Heart Plate by Poppystamps.


Before I write the list of the supplies I used, I wanted to share some exciting news with you.  Dies R Us now has a sister store called Didi Crafts, which has warehouses located in the USA and Canada.  Didi Crafts carries some of the same products as Dies R Us, but most are different and you will be able to purchase a huge variety of crafty supplies for a variety of crafts.  Having this sister store means that our Canadian crafting friends won't have to worry about huge taxes or shipping fees.  Isn't that great?!  Go take a peek and be pleasantly surprised!

Now for the list of supplies I used,
 each linked to the Dies R Us store, for your convenience.


I'm sure you know by now, but for all the newbies to Dies R Us, I would like to mention that  every so often, Dies R Us runs a big sale on international dies. It's during these special sales that you will find dies from companies such as Marianne Designs, Lea'bilities, and Joy Crafts among others. The best way to know about these fabulous sales is to subscribe to the Dies R Us Newsletter.  However, if you want to replicate this card, and you don't want to wait for the next "Special Orders Sale",  take a look at the Dies Section of the store.  You'll be able to find many substitutes that will work just as well :-)

Thank you for stopping by today.  I hope that I was able to inspired you to use your dies, create a project, and come play along with us at the Dies R Us Challenge Blog for your chance to win a gift voucher to the Dies R Us Store.  A new challenge begins on the 1st and 15th of every month.  Be sure to follow us on Facebook and Pinterest too.


Till next time,


Dec 2, 2019

Thinking of You

Hello Dies R Us friends. Lena here today sharing a Thinking of You card that I'm going to send to a very dear friend who is going through the necessary medical tests to undergo a stem cell transplant.


It was easy and fun to create this very serene scene. I used various dies from a few different companies. I have listed them all below, with links to the Dies R Us store, for your convenience.


I love the Water Lily pop up on the inside on this peaceful pond.
Other than plain die cutting, the only thing that took a little bit of time was making the frame so it could be a different colour. However, if you have an electronic cutting machine it's really easy to do.  If you don't have an electronic cutting machine, you can always trace it and cut it by hand.


So to use the Silhouette I first traced my die onto a piece of white card stock.  Next I scanned it and saved it as a jpeg pic.  Then I uploaded it to the silhouette and cut.  Easy peasy and now I have a saved file that I can use in future.


It's important to make a small mark on your die and card stock cut piece so you know which side is up.  There is always a small difference in the width and length of the die.  By knowing which side is up, you'll be able to set in place correctly.


I cut out all my bits and pieces and coloured them using copic markers and a variety of Memento inks to create the scene I wanted.


Lastly, it was time to finish off the inside.  I began by cutting and adhering the Water Lily and went from there.  This card took a little longer to put together than my usual, but it was fun and relaxing putting the image in my head onto the card. 😀

As promised, here is the list of the materials I used:

FineLine Bottle Applicator

As you can see from the above list, I used a few dies from Marianne Designs and one from Joy Crafts.  Dies R Us often have special order sales and it's during these sales that you'll be able to purchase overseas dies at a very reasonable price.  The best way to know about these special order sales is to subscribe to the store's newsletter.  You'll find the sign up form on the home page of the store.  All you have to do is enter your email address and you're all set to receiving all the specials that the store runs frequently on overseas dies and local ones too.

Thank you for stopping by today.  I hope that I inspired you to use your dies, create a project, and come play along with us at the Dies R Us Challenge Blog for your chance to win a gift voucher to the Dies R Us Store.  A new challenge begins on the 1st and 15th of every month.  Be sure to follow us on Facebook and Pinterest too.