Showing posts with label Creative Expressions. Show all posts

Aug 18, 2021

With Love and Sympathy

  Hello Friends,

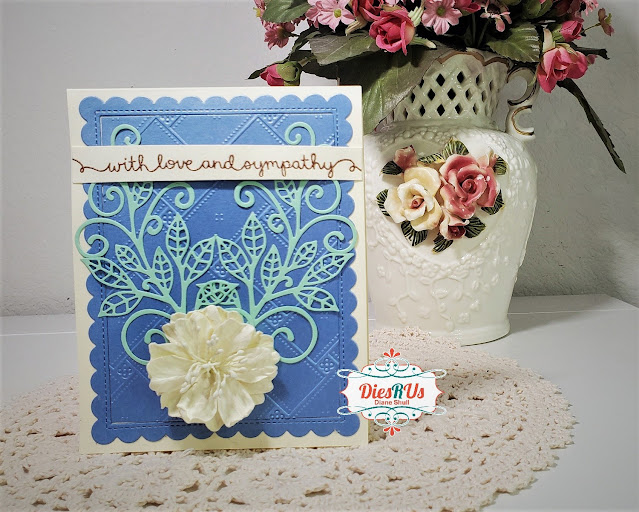
Today I have an easy to make, elegant, sympathy card to share with you.  This card was created using solid colored papers, dies from Dies R Us and a stamp from Dies R Us.  The focal die is from Creative Expressions by Sue Wilson and it's called Finishing Touches - Grand Vinery.  This leafy vine die is absolutely lovely.  I have used the whole die, but you can also cut it down and use pieces of it in any design.

Come take a look!


Card Recipe:

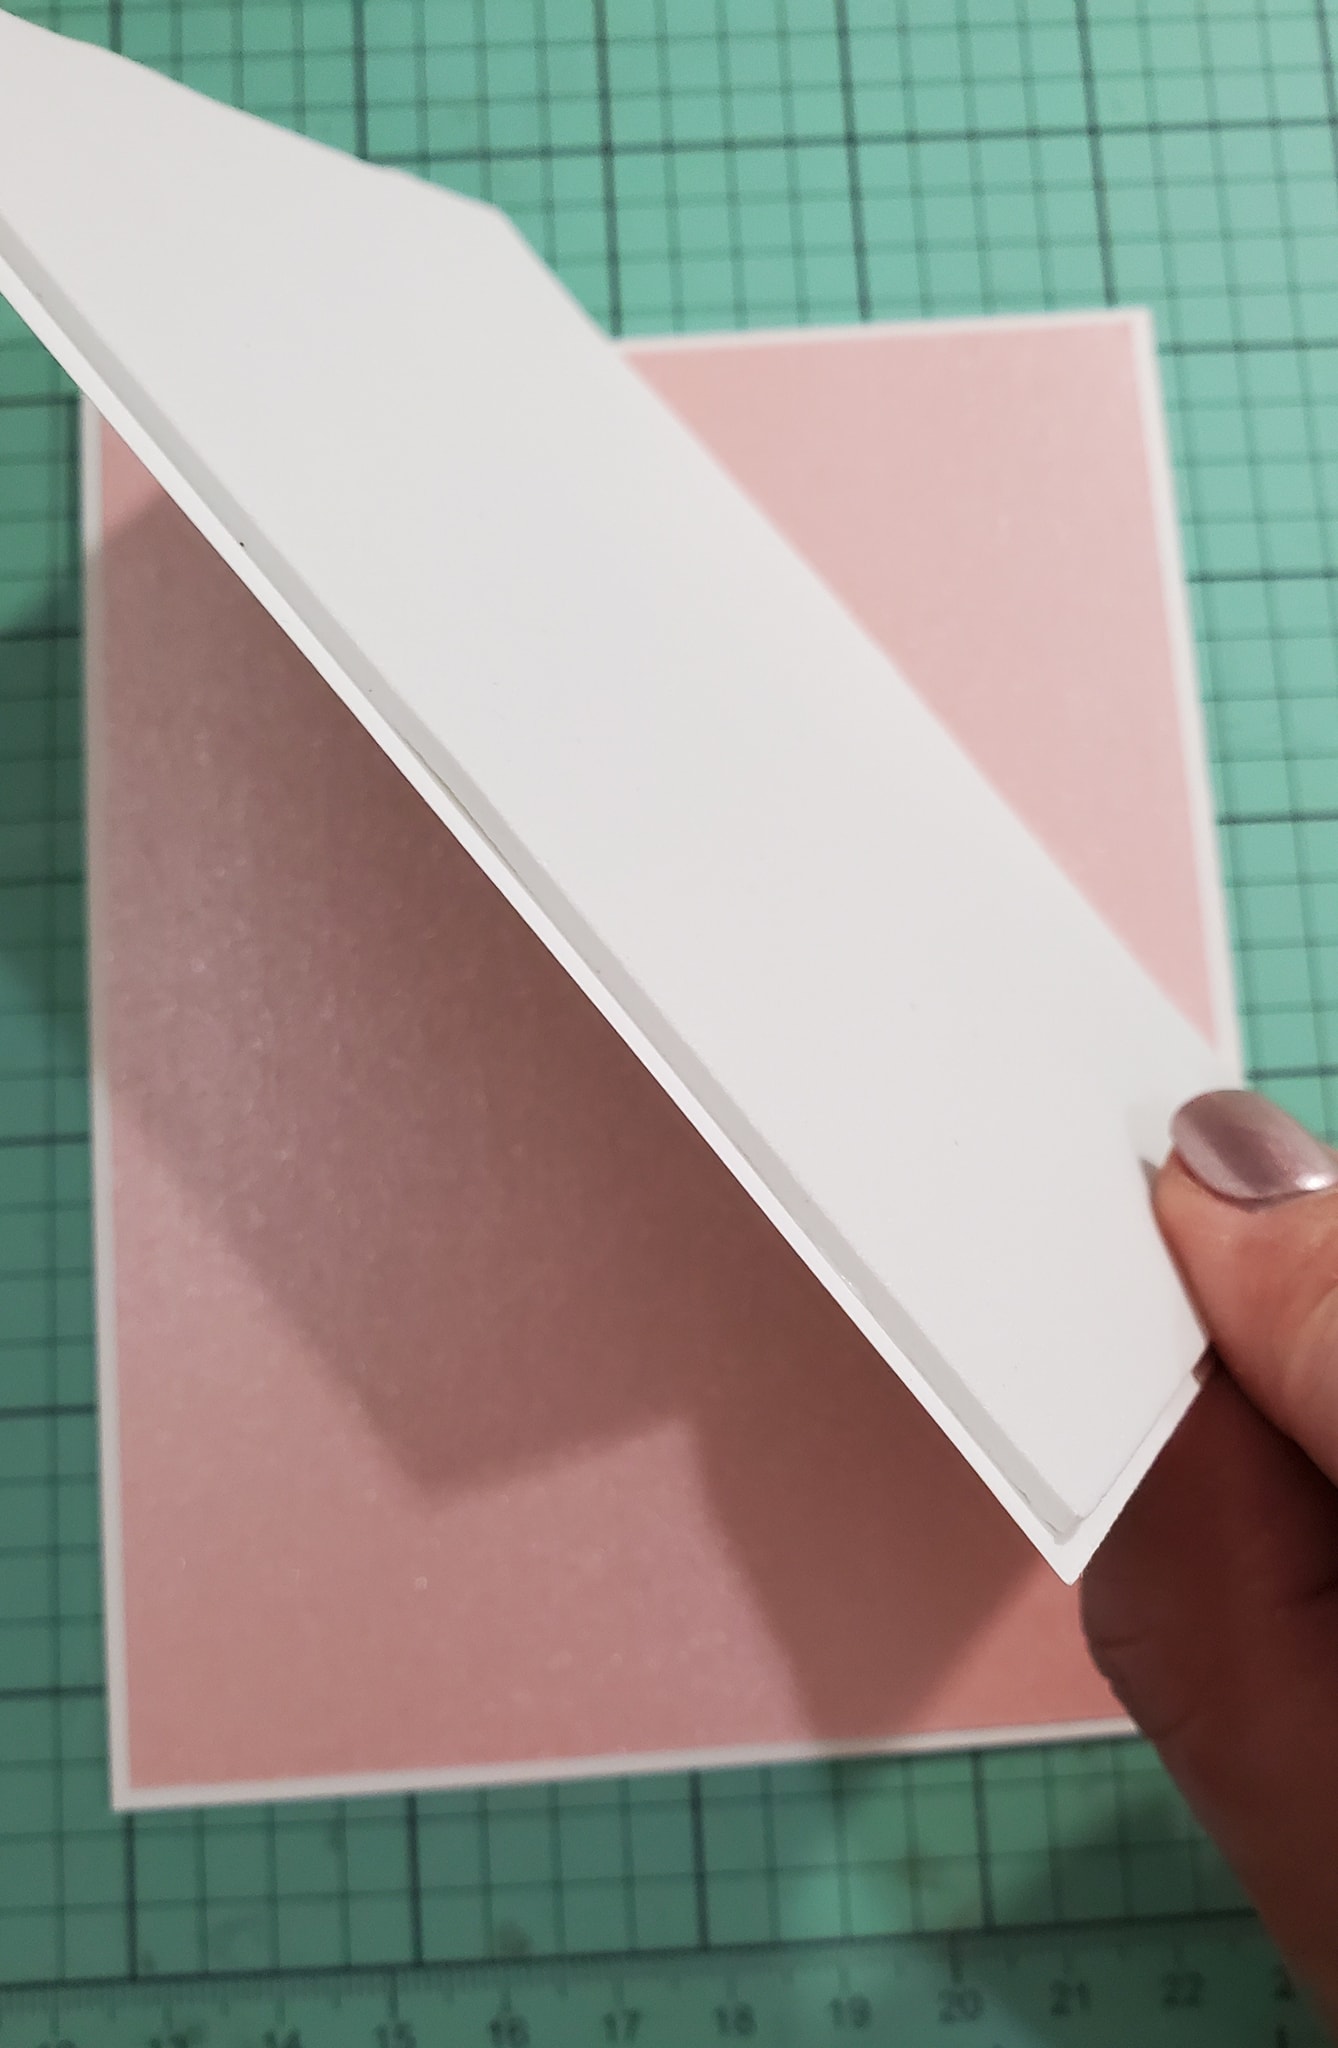
I began with a ivory card base measuring 4 1/4 X 11 and scored it in half at 5 1/2.

Next, I decided on the colors to use.  I chose metallic blue, ivory and a pastel green.  I decided to use an ivory colored flower from Little Birdie Crafts.

Then I cut my dies.  I cut metallic blue cardstock using the Lawn Fawn Stitched Scalloped Rectangle Frames.  I took the inner rectangle and place it in my embossing folder from Anna Griffin called, "Matelasse."  This is a lovely basket weave design to add a little interest to the front of the card.  Using the Creative Expressions Finishing Touches, Grand Vinery die, I cut some pastel green leaves.  Next, I stamped the Lawn Fawn Sentiment, "with love and sympathy" using the Scripty Sayings stamp set in VersaMark and covered it in Copper embossing powder by Zing.  Then heated it up with my heat gun to melt the embossing powder for a raised appearance.  Next, I just cut my sentiment in a strip to go across the front of the card.

  Then I just put it all together as seen below.  So pretty!


Here is a photo of the Die R Us supplies I used for this card:


Here are the links to the design elements:

https://www.diesrus.com/products/lawn-fawn-stitched-scalloped-rectangle-frames-dies?_pos=1&_sid=dfdc3f129&_ss=r

https://www.diesrus.com/search?q=Finishing+touches

https://www.diesrus.com/products/lawn-fawn-scripty-sayings?_pos=1&_sid=37e55d4fb&_ss=r


Thank you for looking!

Be sure to visit Dies R Us for this and many more fantastic dies and stamps for all you crafty creations.


Don't forget to come join in the fun at the Dies R Us Challenge Blog. There's a new challenge theme offered on the 1st and 15th of each month and one lucky randomly drawn winner will receive a gift voucher prize to the Dies R Us Store.  


For your convenience, all the important Dies R Us links are provided below.


click below for:

STORE

CHALLENGE BLOG

FACEBOOK

INSPIRATION BLOG

FRIENDS OF DIES R US PINTEREST PAGE


Aug 11, 2021

Seychelles Card

 Hello Friends,

Today I have an elegant pink and white "thinking of you" card to share.  This card was created using papers from Michaels and dies from Dies R Us.  The focal die is from Creative Expressions by Sue Wilson and it's called Seychelles (kind of like Sea Shells).  It's from the Indian Ocean Collection. 

 Come take a look!


Card Tutorial:

I began with a card base.  White 110 lb cardstock measuring 4 1/4 X 11, score it in half at 5 1/2.

Next decide on the colors to use.  I chose metallic pink, metallic vanilla and white cardstock from Michaels's Art & Crafts Store.

Next cut out the dies using Creative Expressions; Indian Ocean Collection - Seychelles.  I used the largest two and the smallest two dies, cut them out in pink metallic papers.  Then the middle two dies, cut them in vanilla metallic paper.


Using the outline dies, I cut the shadow layers from 65 lb white cardstock.


In this photo you can see each layer, the white shadow to the pink large die cut, the white to the inner vanilla die cut, and the white shadow layer to the smallest decorative die cut.


Adhere each metallic layer onto the white shadow layer.  As seen above.

Next stack each layer using foam squares or dimensional dots, placing the smallest die onto the next larger die until you have a Seychelles medallion for the focal of your card.


Next cut your background papers from the two colors you chose from. 
Cut them a slight bit smaller than your base card.


Then add foam to the smallest layer.  This will add additional dimension to the card.


Next cut out the flowers using the Elizabeth Craft designs, #1029-Bunch of Flowers 3 die using 65 lb white cardstock.  Then cut the leaves out of white cardstock using Karen Burnistion #1059-Autumn Elements.


In the photo above, you can see the Seychelles die all put together, the base layers and the white die cut flowers.

Adhere the base layers together to your liking, then add the completed Seychelles die cut to the front of the card.

At this point you may shape the flowers and leaves with an embossing tool or leave them as is.
Set them aside. We will add them to the card soon.

Lets work on the sentiment:  You may add any sentiment you like.  The stamp set I used has many options to choose from.  I used the Scripty Sayings by Lawn Fawn.


Choose your saying and stamp your sentiment with VersaMark ink.  This is a clear ink that allows you to use embossing powder to stamp and enhance the look of your sentiment.  I used a stamping platform in case I wanted to stamp my image multiple times for a more bold appearance.


Here I am adding the white embossing powder by Zing.


Below, I am using a heat tool to warm up the embossing powder.  This leaves a raise image and adds additional texture to the card.


Next, cut the sentiment into a strip.  I added fish tails to the right hand side of mine.


Putting it all together:  


The next step is adhering all the elements together onto the front of the card.   Add the sentiment strip using pop dots and glue.  Add leaves and the flowers using additional pop dots for more dimension.  Add rhinestones or pearls into the centers of the flowers for more bling.

Here is another look at the finished card.  I hope you are inspired today.  Thank you.


Products used:


This was such a Fun project.  I hope that you will give it a try. Be sure to visit Dies R Us for this and many more fantastic dies and stamps for all your crafty crestions.


Don't forget to come join in the fun at the Dies R Us Challenge Blog. There's a new challenge theme offered on the 1st and 15th of each month and one lucky randomly drawn winner will receive a gift voucher prize to the Dies R Us Store.  


For your convenience, all the important Dies R Us links are provided below.


click below for:

STORE

CHALLENGE BLOG

FACEBOOK

INSPIRATION BLOG

FRIENDS OF DIES R US PINTEREST PAGE


May 25, 2021

Alice In Wonderland Frame Card

Good morning!!  It's Lisa again, this time with an Alice In Wonderland themed square card.  I don't make a ton of square cards because they require extra postage, but every now and then I have a die that just screams "square card" and this Yvonne Creations Playing Cards Frame die definitely fits that category.

The minute I saw this die from Yvonne Creations I knew I wanted to make an Alice in Wonderland card with it.  I paired it with this Cheshire Cat stamp from Creative Expressions.

Since I had to wait for the ink to dry, I started by stamping the image on a 4" x 6" piece of Neenah Classic Crest Solar White 80lb cardstock.  While that set, I cut the frame once out of black cardstock and once out of silver shimmer text weight cardstock.  I put adhesive sheets on the back of the cardstock before cutting it so I could easily layer and attach them to the card.


See those negative space pieces in the top left corner? Since they have adhesive on them, I'll save them to cut sentiments and other small die cuts out of for future projects.

At this point, I decided that I wanted the frame to be more dimensional, so I wanted to cut three more layers of black cardstock to build up.  But since my inked background would need to dry, I went back to my stamped panel to ink it first.


This is where I made a mistake, but I didn't realize it until I went to cut it out.


When I taped the die down to cut out the center, I made the stripes of ink too wide, so the pink wasn't showing up.  So I had to stamp it and color it again.

I forgot to take a photo of the process, but I used scraps of red and black matte glitter cardstock to cut the hearts, diamonds, clubs and spades out, then I fussy cut all the frame away from the shapes and layered them onto the stacked frames.  I taped the negative die cut insert with my stamping into the frame first, then adhered it to my card base.  Clear AB rhinestones finished it off.


I hope this inspires you to play around with layering dies and using the negative part of the frame die as well.  Have a crafty day! --Lisa

Products Used:


Don't forget to come join in the fun at the Dies R Us Challenge Blog. There's a new challenge theme offered on the 1st and 15th of each month and one lucky randomly drawn winner will receive a gift voucher prize to the Dies R Us Store.  


 For your convenience, all the important Dies R Us links are provided below.


click below for:

STORE

CHALLENGE BLOG

FACEBOOK

INSPIRATION BLOG

FRIENDS OF DIES R US PINTEREST PAGE


May 18, 2021

Slimline Sea Life Scene

Happy Tuesday everyone!  Lisa here with a oceanic slimline card!  These are my favorite cards to make right now, I just can't get enough of the slimline layout.  This card actually came together completely differently than I intended it to.  Originally it was going to be a shaker card using aqua watercolor-printed acetate instead of clear.  This is going to be a little photo heavy to show how I put everything together.

Here's some close ups to see all the layers and dies I used.


Foil can be hard to photograph, but I just love working with it.  And when paired with glitter cardstock, it just pops.

I picked out the dies I intended to use, both from Paper Rose, one of my favorite companies as of late.  Unfortunately, Coral Circle is out of stock, but the Under The Sea Border is available.

I know the round die is called Coral Circle, but I thought it worked well for seaweed or seagrass as well.  That's the look I was going for when I started to put the card together.  I hit my first snag when I tried to cut the first shaker hole with the Coral die.  The acetate cardstock I was using is kind of brittle, and it cracked in half.

The top piece stuck to the plate of my Big Shot, I needed my paper piercer to dig some of it out. So I decided to put the acetate under the glitter cardstock instead of on top.  I guess I could've layered another piece of clear or even the colored acetate under that and still go with a shaker, but I went with cardstock instead.

I now needed more dies to fill in the space on the card, so I picked these three out.  Creative Expressions Mermaid, Memory Box Mermaid Wonder Frame, and Impression Obsession Mermaids.  I wound up not using the Memory Box die for this particular card.

I started to think the acetate wasn't showing up enough on its own over either the card base of the glitter cardstock, so I added some rainbow holographic foil to back it, slightly offset. I wanted to show both foil pieces by themselves so you could really see not only the detail of the die but that I reverse cut one of them.  I didn't want the coral going in the same direction on both frames.  The acetate didn't show a wrong-or-right side of the die cut, and the foil hid it really well too.  You can hardly tell that the one on the left was cut on the backside of the foil.


I forgot to take a picture of the dies, but I used Tutti Designs Nesting Stitched Circles to cut the glitter cardstock layer.  There's a circle in that set, I think it's the third smallest one, that's just under three inches wide, so it was perfect to layer over the Coral Circle, since it's 3" wide.


This was one of those situations where the more I added to this card, the more I wanted to add.  Fish, starfish, seahorses.  I think with sea life projects, more is more.


Normally when I'm working with tiny die cuts, I put 1/2" Scor Tape on back of the cardstock before cutting it so they're easy to attach to my project.  I wanted this card to have a little more dimension though, so I used Glue Dots instead.  I used the Mini ones and cut some in half or quarters to put under the tiny pieces.  I didn't use adhesive on any of the Coral Circle detailed pieces so that it would move and have dimension.

I hope you find inspiration from this card to create your own sea life themed project.  Have a crafty day! --Lisa

Products Used:


Don't forget to come join in the fun at the Dies R Us Challenge Blog. There's a new challenge theme offered on the 1st and 15th of each month and one lucky randomly drawn winner will receive a gift voucher prize to the Dies R Us Store.  


 For your convenience, all the important Dies R Us links are provided below.


click below for:

STORE

CHALLENGE BLOG

FACEBOOK

INSPIRATION BLOG

FRIENDS OF DIES R US PINTEREST PAGE


Mar 28, 2021

Wings

Hi everyone Happy Monday.  I am back with another post for Dies R Us using the Frames and Tag die from the Madeleine Sue Wilson collection.

I diecut the first layer of the die using white cardstock and then use some black mirror paper followed by another layer of white cardstock for the center. This die set is so gorgeous it is hard to truly see the true beauty of the set in the photos.
I used some patterned paper from Pinkfresh Studio to create my card which went beautifully with the die and added a sentiment from Scrapiniec to complete the overall look. 
I hope everyone enjoyed my post and thanks so much for stopping by everyone!!

Don't forget to come join in the fun at the Dies R Us Challenge Blog. There's a new challenge theme offered on the 1st and 15th of each month and one lucky randomly drawn winner will receive a gift voucher prize to the Dies R Us Store. For your convenience, all the important Dies R Us links are provided below.

https://blogger.googleusercontent.com/img/b/R29vZ2xl/AVvXsEjCjT8pw_L9T-z6-KjvbFtjxltch0jDrbOVSRoR7-pMeQw8lEYfIDENxvu0UYve6R3ZP9GqtyyTDEJbdtSMk3bGQBx_Y3u5-ayMxatDG7IHMgflmEHGKjuk1fXzqacoc_aa78anm5BPmKz1/s320/*logo%2Bcollage.pages.jpg

click below for:

STORE

CHALLENGE BLOG

FACEBOOK

INSPIRATION BLOG

FRIENDS OF DIES R US PINTEREST PAGE

Thanks for stopping by!