Showing posts with label Mixed Media. Show all posts

Jun 10, 2021

Using Your Die Cuts in Mixed Media


Summer Greeting!  Chris here and today I am super excited to share this "Freedom Canvas" I created using some of my new dies and supplies from DiesRUs.  So many times I forget to create something besides greeting cards!  But dies are so versatile and can be used in your mixed media projects too!  So let me show you how I created this canvas. 

To recreate this project you will need :

Dies R Us Supplies

Scrap Man Collage Honeycomb Die

Scrapman Trellis Die

Elizabeth Craft Design Small Butterfly Die

Karen Burniston Flowers & Bee Die set

Distress Oxide Inks - Broken China, Faded Jeans

Finnabair - Cling Stamp - Don't Forget To Fly

Nuvo Crystal Drops - Red


Other Supplies 

5x7 inch canvas, card stock, adhesive, water, Archival Ink, Stencil brush to apply ink


So let's get started with our project!

Start your canvas by applying your Distress Oxide ink onto the canvas.  


Keep blending and adding ink until you are satisfied with your canvas. 

Sprinkle water drops onto your canvas and let dry. 

Die cut Scrap Man Collage Honeycomb Die from white card stock. 

Using your Scrapman Trellis Die, cut 2 trellis from black card stock. 

Die Cut your Butterfly using  the Elizabeth Craft Design Small Butterfly Die.  I choose a purple embossed card stock for the butterfly wings.  


Adhere your die cut honeycomb to your canvas. 

Taking your 2 die cut trellises, flip one so that it is facing the opposite direction. Adhere together along the trellis line. 
 Adhere trellises together along the trellis line to create a larger die cut. 

Adhere larger Trellis die cut to your canvas. 


Using your Finnabair - Cling Stamp - Don't Forget To Fly stamp "Freedom Stamp onto Bottom left side of canvas with archival ink. 
Using your Karen Burniston Flowers & Bee Die set, die cut leaf stems from varying colors of green card stock. 

Adhere these leaf stems to your canvas. 
Die cut flowers from the Karen Burniston Flowers & Bee Die set.  Note I again used an embossed card stock for extra texture. 


Adhere the center of your flowers to your canvas. Lift the edges of your flowers to add more dimension to your canvas. 

You can see the extra dimension this gives to your flowers. 

Add Nuvo Crystal Drops - Red to the centers of all your flowers. 
Gently Fold your die cut butterfly along the body and adhere  to your canvas. Just look at how the butterfly pops off the page!

 
Here is a final look at the finished project. I hope you are inspired to get creative with your die cuts. 


Don't forget to come join in the fun at the Dies R Us Challenge Blog. There's a new challenge theme offered on the 1st and 15th of each month and one lucky randomly drawn winner will receive a gift voucher prize to the Dies R Us Store.  


 For your convenience, all the important Dies R Us links are provided below.


click below for:

STORE

CHALLENGE BLOG

FACEBOOK

INSPIRATION BLOG

FRIENDS OF DIES R US PINTEREST PAGE


Thanks for stopping by


Apr 8, 2020

Be Happy!

Happy Wednesday, friends!

It's Nancy, from The Nickel Nook, back to share a fun new inspiration project,
using fun dies from Dies R Us!

Here's what I made:


I wanted to make something pretty, that might encourage you,
and maybe even make you happy! :o)

I cut all four pieces from: chipboard, decorative paper, and yellow cardstock.
I adhered the decorative paper to the front of each piece, 
and then inked all the edges.

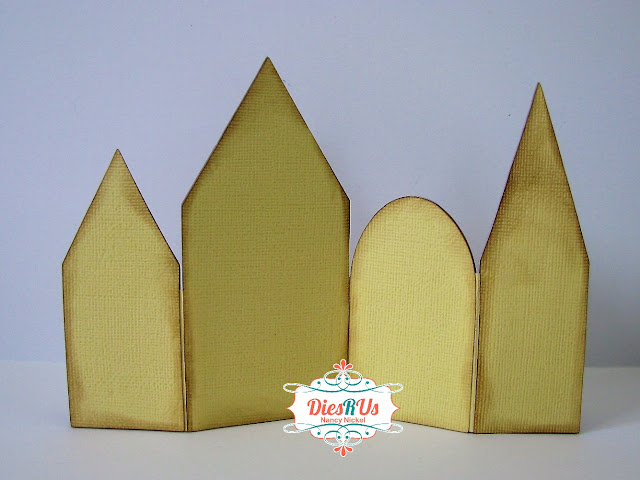
Here's the back:


I added yellow cardstock hinges to the back of the pieces
before covering them with the yellow cardstock cuts. 
I then inked all around the back too. 

I then grabbed some fun texture stamps,
and did some stamping over the front of the dwellings.

I cut/embossed/inked all the words from yellow cardstock,
I chose a series of words that I thought would be fun.
It's like the active process to becoming happy! 


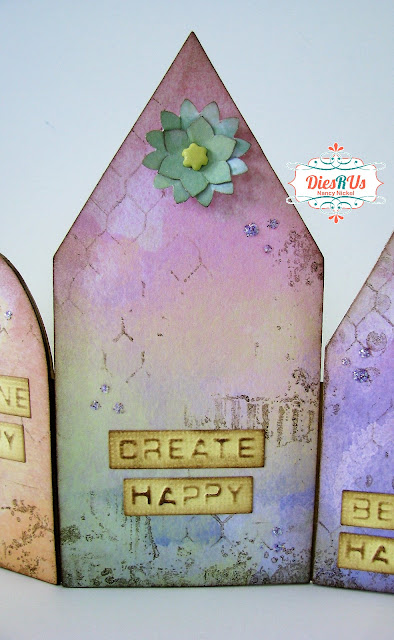
First we "HOPE FOR HAPPY".
I added a little punched/layered flower, and some pretty Stickles dots.


Next, we "IMAGINE HAPPY".
I added a few more Stickles dots for a little sparkle.


Then we "CREATE HAPPY".
Maybe by making a fun project like this one!
I added another punched flower, and more Stickles dots.


Finally, the process helps us "BE HAPPY"! 
One smaller flower, along with more sparkle!


There you have it! 
I hope you enjoy my fun project!
I'll be back soon with more!

* * * * *

Dies R Us Product Used:


* * * * *
Don't forget to come join in the fun at the Dies R s Challenge Blog
 There's a new challenge theme offered on the 1st and 15th of each month 
and one lucky randomly drawn winner will receive a gift voucher prize to the Dies R Us Store.  
For your convenience, all the important Dies R Us links are provided below.


click below for:
FRIENDS OF DIES R US PINTEREST PAGE

Thanks for stopping by!