

Hello and welcome back to the Dies R Us Inspiration Blog. I'm Monica of HeartcraftPaper and today I have a shaker card tutorial for you! With the 4th of July quickly approaching I thought this would be a wonderful theme for today's card. I was inspired to use three specific dies that really went well with my them and worked perfectly for a shaker card. I hope that you find this informative and inspirational.


Supplies:
1/4" Foam Tape
Sequin Mix of Red, White & Blue
5" x 5" White Cardstock
5.5" x 5.5" Brushed Metal Black
Exacto Knife
5" x 5" Transparency Film
5.5" x 5.5" Card Base
Let's Get Crafting!
First I started by blending Candied Apple Distress Oxide on the top portion and then Blueprint Sketch on the bottom side, leaving a swatch of white in the middle.


I followed by die cutting out using my two star dies. I made the Starry Border die sit further down on the card than the Twinkle Breeze. This gives it a look of raining stars down the card.


Using the Happy Peek-A-Boo die, I placed the top plate about 1/2" from the edge of my cardstock in order to create a partial cut. I didn't want it to cut all of the way in purpose.


Here I cut using an Exacto Knife connecting the ends of the die cut to cute out the section left.

A couple of the stars cut out of the edge of the paper so I taped them back in and added a few stars back in so that I would have a 1/4" border.


I cut the Brushed Metal Black paper to 5" x 5". I then turned it over and traced around the red, white and blue cardstock.


Using an Exacto knife I cut 1/4 of an inch from the line.


Using 1/8" double sided tape I lined around the outer edge of the white cardstock. I then adhered the white cardstock to my black paper. This created an edge for my card, but left the shaker element open.


Using my Exacto Knife I cut out any pieces that were peeking out of the star cut outs. This was just to clean up my work a little bit more.

For this step I cut my transparency film to 5"x 5". I adhered it to the back of my piece with the 1/8" double sided tape.


To make the shaker well I liked the edges of my shaker piece with 1/4" foam tape. I then used a dryer sheet to wipe gently over the film to remove static.


Here is the mix of sequins in red, white an blue I used. I also added glass beads to this as well.

I place the sequin mix onto the center of my card base. Then I peeled off the covering off of the foam tape and adhered it down.


I then added a few red, white and blue rhinestones to my card here and there.

I hand wrote out the sentiment so the whole card would say "Happy 4th Of July." I trimmed it so that it would be narrow against the font. I then added the contrasting Blueprint Sketch around the edges of my sentiment.


Using cut pieces of the 1/4" foam tape I adhere this down to my card on the lower right. Just over the "y".

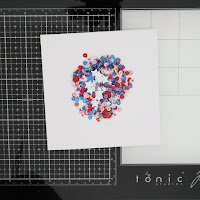
Here is the what the finished product will look like.

Thank you for reading this step-by-step tutorial. I hope that you come back and enjoy many of the other inspirational posts.
XOXO - HeartcraftPaper

Don't forget to come join in the fun at the Dies R Us Challenge Blog. There's a new challenge theme offered on the 1st and 15th of each month and one lucky randomly drawn winner will receive a gift voucher prize to the Dies R Us Store.

For your convenience, all the important Dies R Us links are provided below.
click below for:


