Showing posts with label Stencil. Show all posts

Apr 23, 2020

Happy Mother's Day 2020

Howdy Y'all!

Mary Ellen here from Creative Time With ME! Mother's Day is just around the corner. That's why, I am so excited to share this Happy Mother's Day card, with y'all!

I have created a video to share with you on how I created this card!


Supplies used (not listed under the card picture)
Post-It Tape
Transparency Film or Junk Mail (something you can use to create a stencil)
Wendy Vecchi Make Art Stay-tion
Xyron

Steps to create this card:
1. Grab your supplies.
2. Create a stencil with the hearts panel die.
3. Apply Post-It Tape to mask off sections of your cardstock the stencil doesn't cover.
4. Take your makeup brush to apply ink through the stencil.
5. Repeat steps 3 & 4 until the card front is covered with the hearts.
6. Cut the sentiment piece 4 times and layer them up on the card front.
7. Take your embellishment pieces and place around the card.
8. Stick in an envelope and give to your Mom or Mother-in-law (or another beloved female member of the family) on Mother's Day

Paper: CTMH White Daisy, Black
Ink: CTMH Candy Apple
Accessories: CTMH Black & White Dots, Enamel Outlet Glitter White Enamel Dots, Kat Scrappiness Heart Panel Die, Happy Mother's Day Die, Amazon Makeup Brush

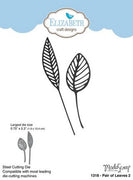
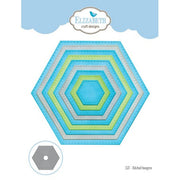
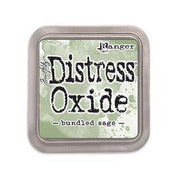
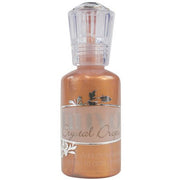
Some of the products are no longer available in the Dies R Us site. But here are similar items you can find there.


Don't forget to come join in the fun at the Dies R Us Challenge Blog.  There's a new challenge theme offered on the 1st and 15th of each month and one lucky randomly drawn winner will receive a gift voucher prize to the Dies R Us Store.  For your convenience, all the important Dies R Us links are provided below.


click below for:
FRIENDS OF DIES R US PINTEREST PAGE

Thank you for stopping by!

Stay Healthy! 

Stay Safe!

Stay Crafty!


Jul 14, 2019

Hello Card

Hello Crafty Friends - Annie here with a featuring some Hexagons and Leaves dies.


Let's get started

First, I trimmed the Kraft cardstock to 8" x 9". Then, I scored the cardstock from top to bottom at 4"I then creased the card base. 
  

Next, I taped the card base to a clipboard and using the stencil I applied some of the Glitter Paste. I then gently peeled off the tape and place the card base onto my craft table and I did some splatters with the Heidi Swapp Bronzer Colorshine. I then set it aside to dry. 
   

Next, I die cut from heavyweight White cardstock the following: 2 of the tall leaves, 1 small hexagon, 2 hexagon frames (I created those by nesting the hexagons and running them through the die cutting machine together), 4 hello words. I also die cut 1 hello word from the Metallic Copper cardstock.

Then, I took one of the Leaves and some Distress Oxide Ink and colored the leaf. I simply smudged the ink onto my craft mat and added a bit of water. Next, I ran the leaf through the watered down ink. I heat set it with my heat tool. Then, I added a bit of Heidi Swapp Chartreuse Colorshine. I use the nozzle wand and add the color where I want it.  
  

Now, the card base is dry and it's time to build the card.

I start by running the Hexagon frames and the hellos through my Xyron 3" Sticker Maker. Then, place the frames - the large one first, then the smaller one just overlapping and towards the top. Next, I adhered the leaves. I add a bit of Xyron Mega Runner at the bottom of the leaves and a bit of foam adhesive in the center of the leaves (I simply trimmed a small sliver of foam adhesive).
  

Next, I adhered the small hexagon with foam adhesive onto the card. Making sure that the leaves are just tucked under the hexagon. Then, I stacked the 4 white hellos together. Next, the Copper hello on top of the 4 stacked hellos to created a nice firm chipboard piece. I then place it onto the small hexagon.
  

The card is almost done. For a finishing touch, I added a few drops of Nuvo Crystal Drops in Copper Penny. Next to the leaves and the sentiment and around the card.

Now, the card is complete!


Materials Used:

Elizabeth Craft Designs - Dies - Pair Of Leaves 2


Elizabeth Craft Designs - Dies - Stitched Hexagons

Lawn Fawn - Yay, Kites! Dies

Distress Oxide Ink Pad - Bundled Sage

Nuvo Crystal Drops - Metallic Copper Penny

Heidi Swapp Multi-Design Stencil
Heidi Swapp Bronzer Colorshine Spray
Heidi Swapp Chartreuse Colorshine Spray
Xyron Adhesive - Mega Runner 
Xyron 3" Sticker Maker
Artist Loft: Plastic Pallet Knife and tray
Recollections Brand Cardstock: White, Kraft & Metallic Copper
Glitter Paste: I made my own by mixing the following: Artist Loft Gloss Gel Medium,
Daler & Rowney Acrylic Gesso, Accent Jewel Crown Acrylic Paint: Barque Pearl, 
Artist Loft Glitter: White Shimmer

Thank you for stopping by today. I hope you found some inspiration!

Don't forget to come and join in the fun at the Dies R Us Challenge Blog. There's a new challenge theme offered on the 1st and 15th of each month and one lucky randomly drawn winner will receive a gift voucher prize to the Dies R Us Store. For your convenience, all the important Dies R Us links are provided below.