Showing posts with label Mama Elephant. Show all posts

Jun 2, 2021

You Donut Even Know

 Hi Dies R Us Fans!

Today I am sharing a cute birthday card made with darling Mama Elephant products that are available in the Dies R Us store.  Here is my card:

 What I Used to Make my Card:
White Card Base
Watercolor Paper
Zig 
Clean Color Brush Markers
Gina K Amalgam Ink Pad in Obsidian Ink
Hero Arts Ultra Fine White Embossing Powder
Light Purple Card
Sizzix/Tim Holtz Beaded Garland Embossing Folder, #660041
Mama Elephant Donut Treats Stamps
Mama Elephant Donut Treats Dies
Nuvo Deluxe Adhesive
Half Pearls {stash}
Dimensional Dots

I began this card by stamping, coloring and cutting out the mice and the donuts.  Setting them aside, I embossed a piece of light purple card {there are SO many embossing folders available in the Dies R Us store; I have some on order but haven't gotten them yet} using an embossing folder and then embossed the sentiment using ultra fine white embossing powder. 


I used some pastel colored half pearls I had in my stash to add some interest and to act as some sprinkles on the donuts, gluing them down with adhesive. Lastly, I used dimensional dots to attach the elements and then glued the the entire piece onto a white card base.  Between the embossing folder, the half pearls and the dimensional dots this card has a lot of character, but it was difficult to get a good picture of both the front and of the dimension so I have included a view that shows it all off.  Just click on the picture and it should open up in another screen big enough to see.

Thanks so much for stopping by! I hope the world is opening up a bit where you are but please, stay safe! See you soon and until next time, happy crafting! Christi


Mar 2, 2021

Spread Your Wings And Soar!

 Happy Tuesday everyone! It's Rosie here today showing you how to create a scene card using all Memory Box Dies! I have a lot of tips and tricks for you throughout this tutorial so I hope it helps you when you are creating with dies.


Let's Get Started!

Step 1: I cut two of the Open Branch Tree dies: one from brown cardstock and one from green.

Step 2: Cut the leaves only off the green tree and glue to the brown tree.

Step 3: Cut several trees from brown chipboard and brown foam. We are going to layer these on top of each other to create a thick tree for dimension. I usually use foam tape, but since these branches and leaves are so thin, it's easier to cut several trees and glue them together than trying to get a thin sliver of foam.

Step 4: Glue all the layers together. I will say the foam was difficult to glue in between the layers because it kept wanting to shift. The next time I will use only chipboard. Look at that thickness though!
 
Step 5: Next cut a spring/floral border from white cardstock. I used the Memory Box Spring Border, but it's not available in the DRU Store. I've linked other borders you can use below.

Step 6: I used Mowed Lawn Distress Oxide Ink to color in the grass and leaves. To avoid getting ink on the flowers, you can lay a scrap piece of paper over them or tape over them with painters tape.
 
Step 7: I used Copic Markers to color the flowers in rainbow colors.

 Step 8: I glued the spring border panel down to a piece of blue cardstock that is cut to 5" x 6".

Step 9: To complete my card layers, I cut a piece of black cardstock to 5.25" x 6.25" to go behind the card panel. The white card base is cut to 5.5" x 6.5".

Step 10: I decided I needed some butterflies. I cut the smaller butterfly from the Precious Butterflies set from rainbow colored paper. I realized the top intricate butterfly from the Kensington Border fit over the small precious butterfly almost perfectly. There is also a piece on the Kensington Border (in the middle, next to the flower) that looked like antennas so I cut three Kensington Borders from black cardstock. I also cut another tree from black cardstock so I could use some of the leaves for the butterflies bodies.

Step 11: I decided I needed a smaller butterfly so I cut out the 2nd butterfly from the bottom of the Kensington Border. Then I traced it on patterned paper to form the body. If you have intricate dies like this butterfly, but need a solid base you can always trace around the intricate die-cut to get the shape you need.

Step 12: Assemble the butterflies by gluing the intricate outline to the main body, then the antennas, and finally a leaf on top for the body. Here are the butterflies all put together.

I found a sentiment on the Mama Elephant She's So Lovely Set that fit perfectly with the butterflies on this card so I stamped that along the bottom.


These are the products I used:
Memory Box Spring Border 
(this is sold out, but you can pick from these flower borders HERE)

Mama Elephant She's So Lovely

Don't forget to come join in the fun at the 
Dies R Us Challenge Blog.  There's a new challenge theme offered on the 1st and 15th of each month, and one lucky randomly drawn winner will receive a gift voucher prize to the Dies R Us Store.  For your convenience, all the important Dies R Us links are provided below.

Thank you for stopping by! Have a great week!

Feb 2, 2021

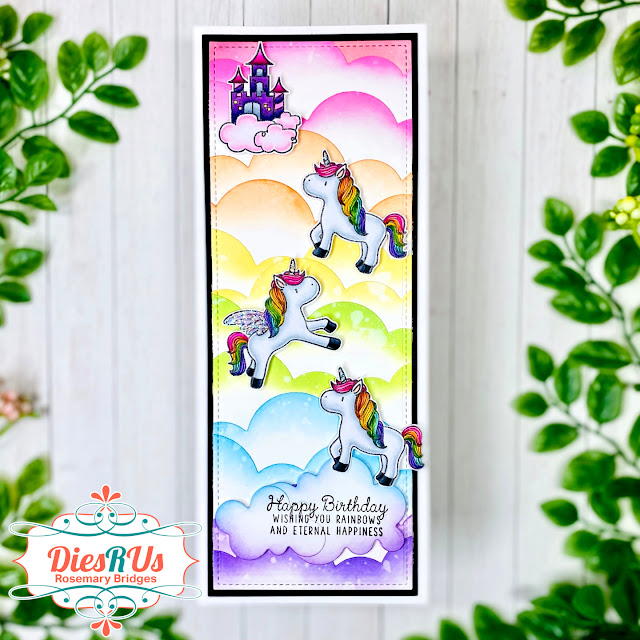
Unicorns and Rainbows!

 Happy Tuesday everyone! There are so many new products coming into the Dies R Us Store including one of my favorite brands...MAMA ELEPHANT! Today, I'm sharing a slimline card I created using the ME Slim Card Basics Dies with the ME Unicorns and Rainbows Stamps


 For my tutorial, I'll be showing you how I created the awesome cloud background. Let's get started!

 Step 1: I used the cloud border die from the ME Slim Card Basics to cut out multiple cloud edges. I also cut a piece of white cardstock to 3.5 x 8.5. I wanted the white cardstock rectangle to be a little bit larger than the stitched die in the set (you will see why later).

 
Step 2: I wanted to make a rainbow cloud background so I grabbed Picked Raspberry, Ripe Persimmon, Scattered Straw, Twisted Citron, Broken China, and Wilted Violet Distress Oxide Inks. I used makeup brushes to rub the ink along the cloud edge.


I also did several clouds using Broken China so I could create a 2nd background of only blue clouds. I'll use this background for another project later.

Step 3: I glued the cloud edges in a random pattern over the 3.5 x 8.5 rectangle base, and trimmed off the edges.

 
Step 4: Next, I used the stitched slimline die to cut out the panels. Because there are several layers of clouds I did have to run the die several times through my die cutting machine with an additional paper shim. Then I had to pull off the edges and trim up some hanging parts with scissors.
 
 
Step 5: I cut a black rectangle mat to go behind the cloud border panel, and adhered the entire thing to a white card base. Then I colored up the unicorns and castle from the ME Unicorns and Rainbows Stamp Set. The clouds at the bottom of the card with the sentiment are from Lawn Fawn Simple Puffy Clouds.
 
 
I adhered the sentiment clouds, unicorns, and castle to the card with foam tape for extra dimension.
 
 
These are the products I used:

Don't forget to come join in the fun at the 
Dies R Us Challenge Blog.  There's a new challenge theme offered on the 1st and 15th of each month, and one lucky randomly drawn winner will receive a gift voucher prize to the Dies R Us Store.  For your convenience, all the important Dies R Us links are provided below.

Thank you for stopping by! Have a great week!

Feb 1, 2021

Sincerely Yours

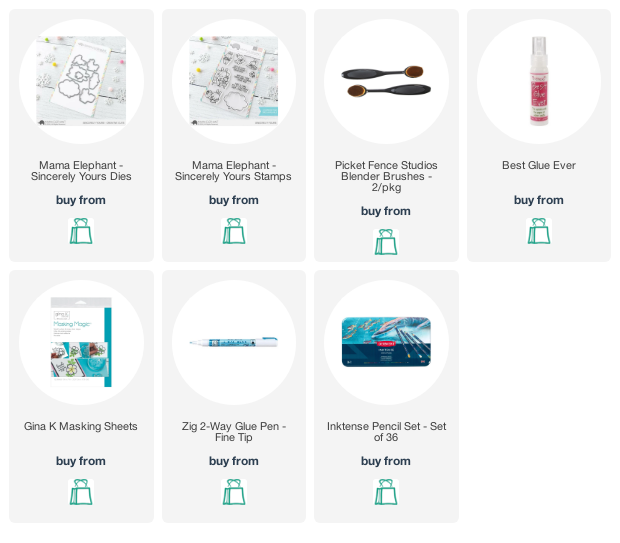
 Hi everyone and Happy Monday!  Today I am sharing a card I made using Mama Elephant Die/Stamp set called "Sincerely Yours" which is available at the Dies R Us store.  I created the background using a brick stencil with some molding paste just to do something a tad different from the norm of cutesy cards but I still wanted to use a cutesy image. 

 I stamped the images on cardstock and colored it with Derwent Inktense colored pencils.  I am trying to learn how to color with them and some other mediums I tend to shy away from.  

I am hoping everyone enjoyed my post and thanks for visiting me.  

Don't forget to come join in the fun at the Dies R Us Challenge Blog. There's a new challenge theme offered on the 1st and 15th of each month and one lucky randomly drawn winner will receive a gift voucher prize to the Dies R Us Store. For your convenience, all the important Dies R Us links are provided below.


    https://blogger.googleusercontent.com/img/b/R29vZ2xl/AVvXsEjCjT8pw_L9T-z6-KjvbFtjxltch0jDrbOVSRoR7-pMeQw8lEYfIDENxvu0UYve6R3ZP9GqtyyTDEJbdtSMk3bGQBx_Y3u5-ayMxatDG7IHMgflmEHGKjuk1fXzqacoc_aa78anm5BPmKz1/s320/*logo%2Bcollage.pages.jpg